
This whimsical cotton candy fudge layers soft pastel hues and a nostalgic flavor, making it a perfect no-bake confection. It’s surprisingly simple to prepare, resulting in a delightfully creamy and visually stunning dessert that everyone will adore.
Ingredients
- 12 oz (340g) high-quality white chocolate chips
- 14 oz (396g) sweetened condensed milk (full-fat for best results)
- 4 tbsp (57g) unsalted butter, cut into cubes
- 1 tsp pure vanilla extract
- 1.5 tsp cotton candy flavoring (food-grade)
- Gel food coloring (assorted pastel colors, e.g., pink, blue, purple)
- Pinch of fine salt (enhances flavor)
Instructions
- Prepare Your Pan: Line an 8×8 inch (20×20 cm) square baking pan with parchment paper, ensuring a generous overhang on all sides to easily lift the fudge later. This prevents sticking and makes removal effortless.
- Melt the Base: In a large, microwave-safe bowl, combine the white chocolate chips, sweetened condensed milk, and cubed unsalted butter. Microwave on medium power in 30-second intervals, stirring thoroughly with a rubber spatula after each, until the mixture is completely smooth, glossy, and fully melted with no lumps remaining (this typically takes 2-4 minutes total).
- Infuse Flavor: Once melted, gently fold in the pure vanilla extract and the cotton candy flavoring until they are fully incorporated and the aroma is evenly distributed throughout the rich base.
- Divide Evenly: Carefully divide the warm fudge mixture into 3 to 4 separate, heat-safe bowls, aiming for approximately equal portions in each, depending on how many distinct colors you intend to create.
- Color Your World: To each bowl, add 1-2 drops of a different gel food coloring. Stir each portion until a vibrant, uniform pastel hue is achieved. Continue adding coloring in tiny increments until your desired shade is reached.
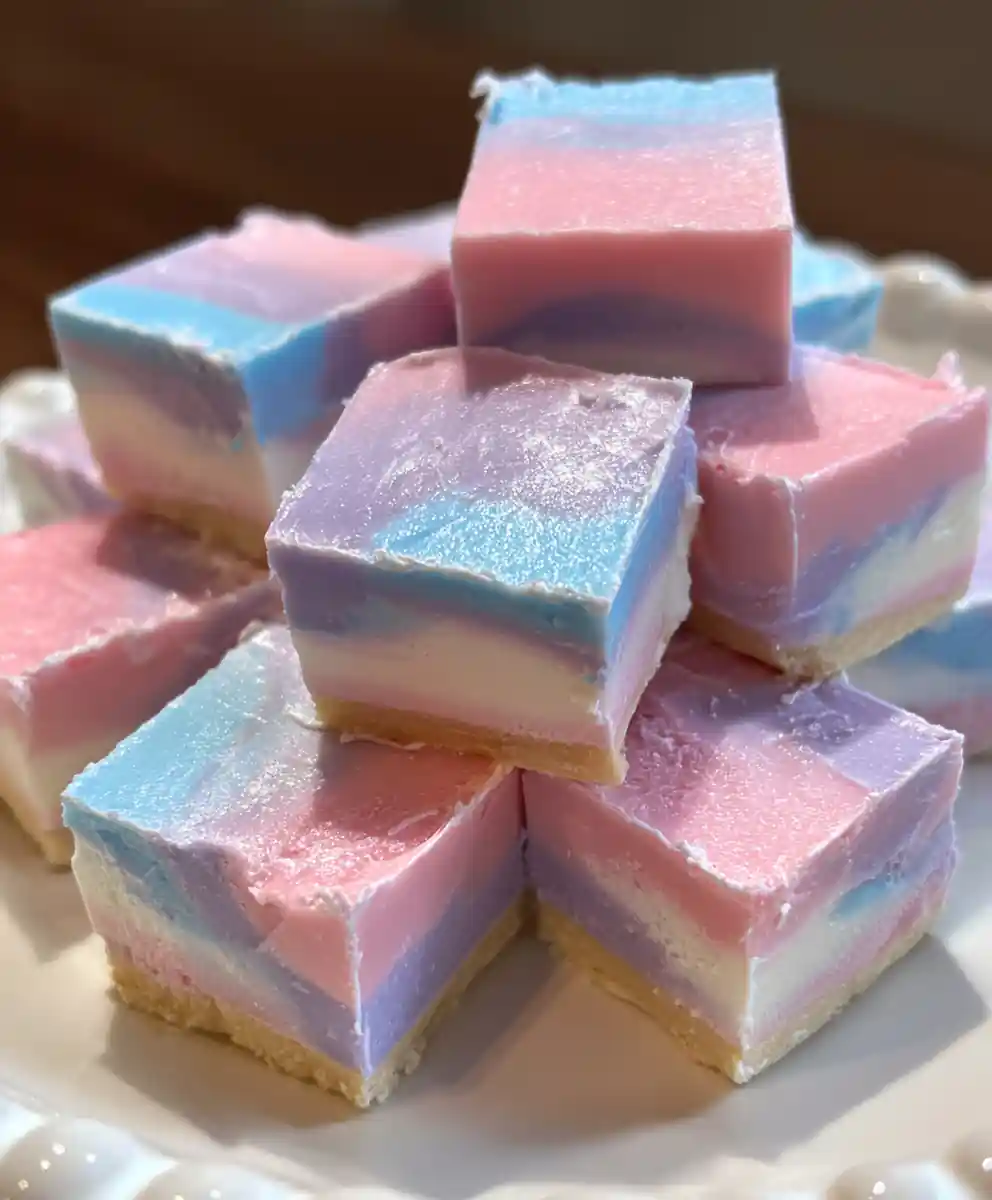
- Layer the Magic: Pour the first colored fudge layer into the prepared pan, spreading it evenly to the edges with an offset spatula. Then, gently spoon and spread the subsequent colored layers on top. For distinct layers, spread carefully. For a marbled effect, lightly swirl a butter knife through the layers after all are added.
- Chill Out & Set: Transfer the pan to the refrigerator and chill for at least 2 to 4 hours, or until the fudge is completely firm to the touch and holds its shape. For a quicker set, you may place it in the freezer for about 30-45 minutes, checking frequently.
- Slice and Serve: Once thoroughly set, use the parchment paper overhang to carefully lift the entire slab of Cotton Candy Fudge from the pan. Place it on a cutting board, and using a sharp, warm knife, slice it into small, bite-sized squares. Serve immediately or store.
Behind the Dish
This delightful Cotton Candy Fudge brings a carnival classic home in an elegant, no-bake format. The magic lies in the simple combination of white chocolate, sweetened condensed milk, and butter, creating a rich, creamy canvas for vibrant colors and whimsical flavor. It’s a perfect treat for celebrations, gifting, or simply adding a touch of playful sweetness to your day without needing an oven.
Keys To Success
- Use high-quality white chocolate chips, not white baking morsels, for the best melting and flavor.
- Do not overheat the mixture in the microwave; melt slowly and stir frequently to ensure a smooth, lump-free base without scorching.
- Gel food colorings provide much more vibrant and concentrated color with less liquid, preventing the fudge from becoming too thin.
- Allow ample time for chilling. Rushing this step will result in soft, difficult-to-cut fudge.
- For clean slices, warm your knife under hot water and wipe it clean between each cut.
Serving Suggestions
- Serve these colorful fudge squares as a delightful dessert centerpiece at birthday parties, baby showers, or holiday gatherings.
- Package them in decorative boxes or cellophane bags for charming homemade gifts.
- Pair with a glass of cold milk or a scoop of vanilla ice cream for an extra sweet indulgence.
- Garnish with a sprinkle of edible glitter or a few colorful sprinkles before the fudge fully sets for added sparkle.
Prep Time: 13 minutes, Cook Time: 4 minutes, Chill Time: 2-4 hours, Yields: 36 small squares.
FAQs
- Can I use different flavors instead of cotton candy?
- Yes, absolutely! Feel free to swap cotton candy flavoring for other extracts like strawberry, raspberry, peppermint, or even almond for a different flavor profile.
- How do I achieve distinct layers versus a marble effect?
- For distinct layers, gently pour and spread each color over the previous one, trying not to disturb the layer beneath. For a marble effect, after all colors are layered, use a knife to swirl through them once or twice.
- How should I store cotton candy fudge?
- Store the fudge in an airtight container at room temperature for up to one week, or in the refrigerator for up to two weeks. If refrigerated, allow it to come to room temperature for optimal texture.
- Can this fudge be frozen?
- Yes, this fudge freezes beautifully! Wrap it tightly in plastic wrap, then aluminum foil, and store in an airtight freezer-safe container for up to 2-3 months. Thaw in the refrigerator overnight or at room temperature.
- My fudge is too soft and won’t set. What went wrong?
- This usually happens if the white chocolate base wasn’t fully melted and combined, or if there wasn’t enough chilling time. Ensure the mixture is completely smooth and allow adequate refrigeration until firm.
- What type of white chocolate is best?
- Use high-quality white chocolate chips or finely chopped white chocolate bars. Avoid white baking morsels or white confectionery coating as they often contain less cocoa butter and can result in a greasier or less firm fudge.
- Can I double the recipe?
- Yes, you can easily double the recipe. Just use a larger pan, such as a 9×13 inch (23×33 cm) pan, and ensure you have enough bowls for dividing and coloring. The melting and chilling times may remain similar.
- Why is my fudge grainy?
- Graininess can occur if the white chocolate was overheated, causing it to seize, or if the mixture wasn’t stirred until completely smooth during the melting process. Low-quality chocolate can also contribute.
[redirect_script url=”aHR0cHM6Ly93d3cuY29va2luZ3dpdGhsb3JhLmNvbS9jb3R0b24tY2FuZHktZnVkZ2UtcmVjaXBlLXdpdGgtcGFzdGVsLWxheWVycz91dG1fc291cmNlPXBpbnRlcmVzdC5jb20mdXRtX21lZGl1bT1yZWZlcnJhbA==”]
Leave a Reply