Category: Side Dishes And Appetizers

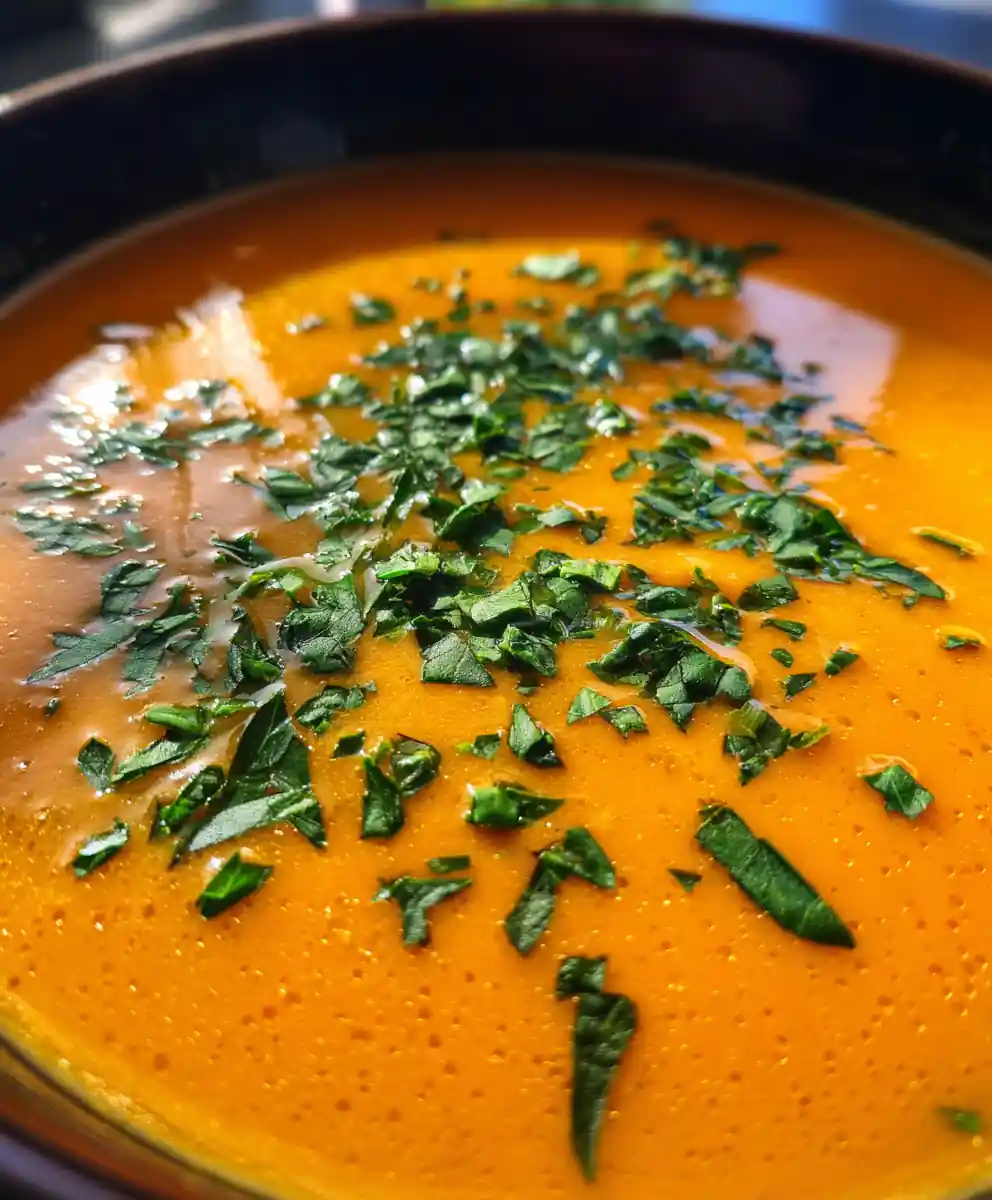
  • Velvety Creamy Palia-Inspired Carrot Soup with Fresh Herbs

    Velvety Creamy Palia-Inspired Carrot Soup with Fresh Herbs

    Indulge in the comforting warmth of this Palia-inspired carrot soup, a silky-smooth delight bursting with sweet carrot flavor and brightened by fresh herbs. This simple yet elegant recipe is perfect for a cozy weeknight meal or a sophisticated starter, promising a truly delightful culinary experience.

    Ingredients

    • 4 cups (approx. 450g) sweet carrots, peeled and thinly sliced
    • 4 cups (950ml) vegetable broth, low-sodium
    • ½ cup (120ml) heavy cream or preferred dairy-free alternative
    • 1 medium yellow onion, finely diced
    • 2 cloves garlic, freshly minced
    • 2 tablespoons fresh herbs, finely chopped (such as dill, parsley, or chives)
    • 1 tablespoon unsalted butter or olive oil
    • ½ teaspoon sea salt, to taste
    • ¼ teaspoon freshly ground black pepper, to taste

    Instructions

    1. Start by melting the 1 tablespoon of unsalted butter or olive oil in a large, heavy-bottomed pot or Dutch oven over medium heat. Add the 1 finely diced medium yellow onion and 2 cloves of freshly minced garlic. Sauté, stirring frequently, until the onion becomes translucent and very fragrant, typically for 4-6 minutes. Avoid browning the garlic for best flavor.
    2. Introduce the 4 cups of peeled and thinly sliced sweet carrots, 4 cups of low-sodium vegetable broth, ½ teaspoon of sea salt, and ¼ teaspoon of freshly ground black pepper to the pot. Increase the heat to bring the mixture to a gentle boil, then immediately reduce the heat to low. Cover the pot and simmer for 18-22 minutes, or until the carrots are exceptionally tender and can be easily pierced with a fork. This ensures a silky-smooth purée.
    3. Carefully transfer the hot soup mixture into a sturdy blender. Begin blending on a low speed and gradually increase to high, continuing until the soup is completely silky smooth with no visible chunks. (If using an immersion blender, blend directly in the pot until fully smooth and creamy.) Always be cautious when blending hot liquids, only filling the blender half full and venting the lid.
    4. Pour the puréed soup back into the clean pot over very low heat. Stir in the ½ cup of heavy cream (or your chosen dairy-free alternative) and the 2 tablespoons of finely chopped fresh herbs. Heat gently, stirring occasionally, just until the soup is warmed through, usually 2-3 minutes. Do not allow it to boil, as this can cause the cream to separate. Taste and adjust the seasoning with additional salt and pepper if desired before serving warm.

    What Makes This Work

    This recipe thrives on simplicity, allowing the natural sweetness of carrots to shine. By simmering them until incredibly tender, we ensure a luxuriously smooth texture when blended. The aromatics provide a foundational depth, while a touch of cream adds richness, and fresh herbs offer a vibrant, finishing flourish that elevates the entire dish.

    Success Tips

    • For the best flavor and texture, use fresh, sweet carrots. Older carrots can be woody and less flavorful.
    • Ensure carrots are very tender before blending; this is key to achieving a truly silky-smooth soup without stringiness.
    • When blending hot liquids, always start on low speed and gradually increase. Fill the blender no more than halfway to prevent pressure buildup and spills.
    • Avoid boiling the soup once the cream has been added, as this can cause it to curdle or separate. Gentle warming is sufficient.
    • Taste and adjust seasonings at the very end; the saltiness of your broth can vary, so it’s best to fine-tune just before serving.

    Make Ahead / Freeze

    • This carrot soup is an excellent make-ahead option. You can prepare the soup up to the blending step, then cool it completely and store it in an airtight container in the refrigerator for up to 3-4 days.
    • When ready to serve, gently reheat the puréed soup on the stovetop and then stir in the heavy cream and fresh herbs just before heating through.
    • For freezing, cool the puréed soup completely (before adding cream) and transfer to freezer-safe containers or bags. It can be frozen for up to 3 months. Thaw overnight in the refrigerator, reheat on the stovetop, and then incorporate the cream and fresh herbs.

    Yields: 4 servings | Prep time: 13 minutes | Cook time: 23 minutes | Total time: 36 minutes

    FAQs

    Can I make this soup dairy-free or vegan?
    Yes, easily! Simply swap the heavy cream for a dairy-free alternative like full-fat coconut milk or cashew cream, and ensure you use oil instead of butter for sautéing.
    What kind of fresh herbs work best?
    Dill, parsley, and chives are excellent choices for their bright, fresh flavors. You could also try a touch of fresh thyme or cilantro for a different aromatic profile.
    How can I adjust the soup’s thickness?
    If the soup is too thick, add a splash more vegetable broth until it reaches your desired consistency. If it’s too thin, you can simmer it uncovered for a few extra minutes to reduce it slightly, or blend in a cooked potato or a tablespoon of cornstarch slurry (mixed with cold water) at the end.
    Can I prepare this soup in advance?
    Absolutely! This carrot soup is fantastic for making ahead. Prepare it up to the blending step, then cool completely and store in an airtight container in the refrigerator for up to 3-4 days. Reheat gently on the stovetop, stirring in cream and herbs just before serving.
    Is this soup freezer-friendly?
    Yes, it freezes well before adding the heavy cream. Cool the puréed soup completely, then transfer to freezer-safe containers or bags for up to 3 months. Thaw overnight in the refrigerator, reheat, and then stir in the cream and fresh herbs.
    How do I get my soup truly silky smooth?
    For the smoothest texture, ensure your carrots are very tender before blending. Using a high-speed blender is ideal; if using an immersion blender, blend for several minutes, moving it around the pot, until completely smooth. You can also pass the blended soup through a fine-mesh sieve for an extra-luxurious finish.
    What can I substitute for carrots?
    While this is a carrot soup, you could adapt the recipe to use other root vegetables like sweet potatoes or butternut squash for a similar creamy texture, though the flavor profile would change significantly.

    [redirect_script url=”aHR0cHM6Ly93d3cuY29va2luZ3dpdGhsb3JhLmNvbS9wYWxpYS1jcmVhbXktY2Fycm90LXNvdXAtcmVjaXBlLXdpdGgtZnJlc2gtaGVyYnM/dXRtX3NvdXJjZT1waW50ZXJlc3QuY29tJnV0bV9tZWRpdW09cmVmZXJyYWw=”]

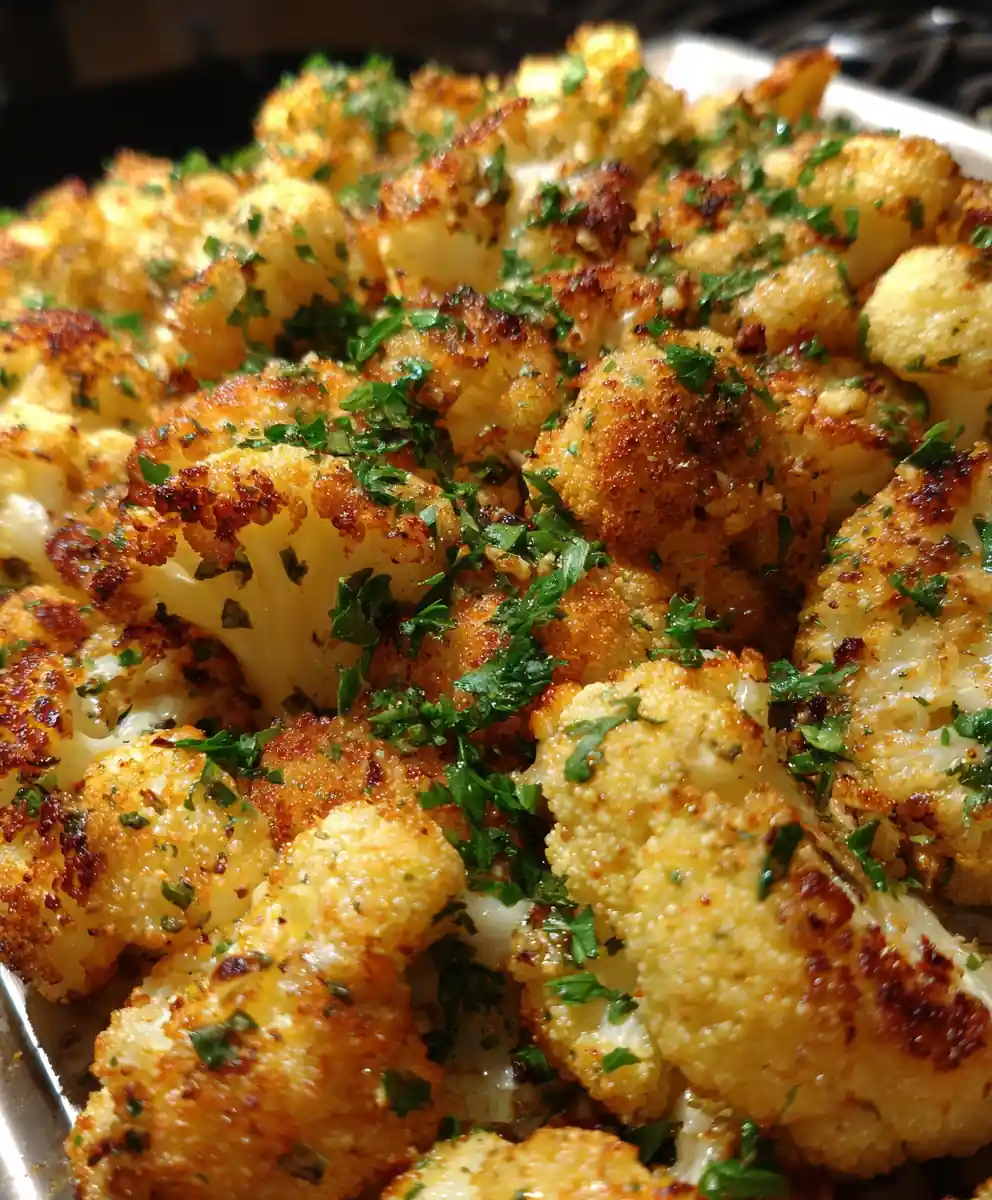
  • Perfectly Roasted Cauliflower with Garlic & Herbs: A Flavorful Side

    Perfectly Roasted Cauliflower with Garlic & Herbs: A Flavorful Side

    Transform a simple head of cauliflower into a caramelized, savory delight with this easy oven-roasted recipe. Infused with fresh garlic, rosemary, and thyme, this dish achieves a tender-crisp texture and a rich, browned exterior, making it an irresistible and healthy side dish for any meal.

    Ingredients

    • One medium head cauliflower (about 900g / 2 lbs), trimmed and cut into florets
    • 2 ½ tablespoons extra virgin olive oil
    • 1 ½ tablespoons fresh rosemary, finely chopped
    • 1 ½ tablespoons fresh thyme, finely chopped
    • 1 ¼ teaspoons garlic powder
    • ½ teaspoon sea salt
    • ¼ teaspoon freshly ground black pepper
    • 2 tablespoons fresh parsley, chopped, for garnish

    Instructions

    1. Begin by thoroughly washing one medium head of cauliflower and patting it completely dry with a kitchen towel. Carefully remove the tough outer leaves and the core, then cut the cauliflower into uniform, bite-sized florets, aiming for pieces roughly 1 to 1 ½ inches in size. Consistent sizing is key for even roasting.
    2. In a spacious mixing bowl, combine the prepared cauliflower florets with 2 ½ tablespoons of extra virgin olive oil, 1 ¼ teaspoons of garlic powder, 1 ½ tablespoons of finely chopped fresh rosemary, 1 ½ tablespoons of finely chopped fresh thyme, ½ teaspoon of sea salt, and a generous ¼ teaspoon of freshly ground black pepper. Use your hands or a large spoon to toss everything thoroughly until every floret is glistening and uniformly coated with the oil and seasonings. This ensures maximum flavor distribution.
    3. Arrange the seasoned cauliflower florets in a single layer on a large, rimmed baking sheet, ensuring they have ample space and are not overcrowded. Overlapping pieces will steam instead of roast, preventing that desirable crisp-tender texture and golden-brown caramelization. Transfer the sheet to a preheated 400°F (200°C) oven and roast for 20-25 minutes. After about 10-12 minutes, use a spatula to gently flip the florets to ensure even browning and char on all sides. Continue roasting until the cauliflower is fork-tender, with deliciously browned and slightly crispy edges.
    4. As soon as the cauliflower emerges from the oven, sprinkle generously with 2 tablespoons of fresh chopped parsley for a burst of color and vibrant fresh flavor. Serve this perfectly roasted vegetable hot as a versatile and healthy side dish, or as a flavorful base for a grain bowl.

    Recipe At-A-Glance

    This simple technique transforms humble cauliflower into a star side dish with minimal effort. Achieving perfectly tender yet crispy florets requires even seasoning and proper spacing on the baking sheet to encourage caramelization rather than steaming. The fresh herbs and garlic powder infuse deep, aromatic flavors, making it a versatile addition to any meal.

    Baker’s Notes

    • Don’t Overcrowd: This is the most crucial tip for crispy roasted vegetables. If your florets are too close, they’ll steam instead of roast, leading to a softer texture. Use two baking sheets if necessary.
    • Dry Cauliflower is Key: Excess moisture prevents caramelization. Ensure your cauliflower is thoroughly patted dry after washing for the best browning.
    • Uniform Florets: Aim for similarly sized pieces so they all cook at the same rate, preventing some from being undercooked while others burn.
    • Fresh Herbs vs. Dried: While fresh herbs offer a brighter flavor, dried herbs can be used in a pinch. Use about ⅓ the amount of dried herbs compared to fresh (e.g., ½ tablespoon dried rosemary/thyme for this recipe).

    Try These Variations

    • Spicy Kick: Add a pinch of red pepper flakes or a dash of cayenne pepper along with the other seasonings.
    • Cheesy Goodness: Sprinkle with grated Parmesan cheese during the last 5-7 minutes of roasting for a golden, cheesy crust.
    • Lemon Brightness: A squeeze of fresh lemon juice or a sprinkle of lemon zest after roasting can really brighten the flavors.
    • Smoky Flavor: A ¼ teaspoon of smoked paprika can add a wonderful depth to the roasted cauliflower.
    • Curry Inspired: Swap out the herbs and garlic powder for 1 ½ teaspoons of curry powder and a pinch of turmeric.

    Prep Time: 12 minutes | Cook Time: 20-25 minutes | Yield: 4 servings

    FAQs

    Can I use frozen cauliflower for this recipe?
    While fresh is best for optimal texture and browning, you can use frozen cauliflower. Thaw it completely and pat it very dry before seasoning and roasting to prevent sogginess.
    How do I prevent my roasted cauliflower from being soggy?
    The keys are to ensure the cauliflower is completely dry before seasoning and to spread the florets in a single layer on the baking sheet without overcrowding. Overcrowding causes steaming instead of roasting.
    Can I make this roasted cauliflower ahead of time?
    Roasted cauliflower is best enjoyed fresh out of the oven for peak crispness. However, you can prep the florets and mix them with the oil and seasonings up to 4 hours in advance and store them covered in the refrigerator.
    What are some good serving suggestions for this dish?
    This versatile side pairs wonderfully with grilled chicken or fish, roasted pork loin, or as a healthy accompaniment to a hearty vegetarian main like lentil soup or quinoa bowls. It’s also delicious as a snack on its own.
    How should I store leftovers?
    Store any leftover roasted cauliflower in an airtight container in the refrigerator for upgto 3-4 days. Reheat gently in a 350°F (175°C) oven or in an air fryer for a few minutes to regain some crispness.
    Can I add other vegetables to the pan?
    Absolutely! Broccoli florets, sliced carrots, or bell peppers can be roasted alongside the cauliflower. Ensure they are cut to similar sizes for even cooking and avoid overcrowding the pan.
    What if my cauliflower isn’t browning or caramelizing?
    Ensure your oven is fully preheated to 400°F (200°C) and you’re not overcrowding the baking sheet. Patting the cauliflower very dry also aids in browning. If it’s still not browning, try increasing the oven temperature by 25°F for the last 5-10 minutes, keeping a close eye on it.

    [redirect_script url=”aHR0cHM6Ly93d3cuY29va2luZ3dpdGhsb3JhLmNvbS9vdmVuLXJvYXN0ZWQtYmVzdC1jYXVsaWZsb3dlci1yZWNpcGUtd2l0aC1oZXJicy8/dXRtX3NvdXJjZT1waW50ZXJlc3QuY29tJnV0bV9tZWRpdW09cmVmZXJyYWw=”]