Category: Desserts & Baking

  • Decadent Chocolate Oat Fudge Bars: A Rich Layered Treat

    Decadent Chocolate Oat Fudge Bars: A Rich Layered Treat

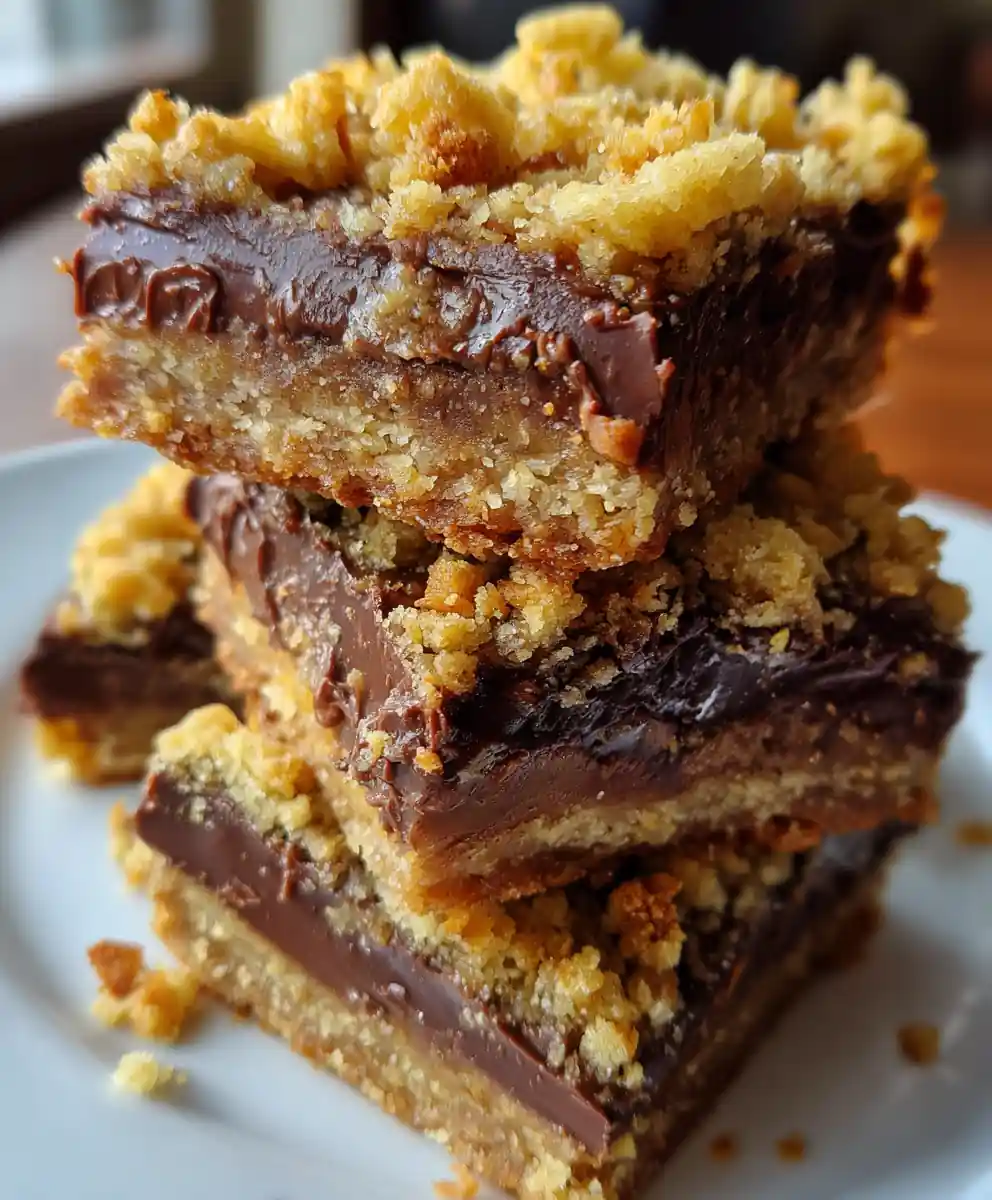
    Indulge in the ultimate dessert experience with these delightful Chocolate Oat Fudge Bars. Featuring a perfectly crumbly, buttery oat base, a rich and velvety chocolate fudge filling, and a golden, textured oat crumble topping, these bars offer a symphony of flavors and textures in every bite. They are surprisingly simple to prepare and make an impressive addition to any dessert spread or a cherished homemade treat.

    Ingredients

    • 1 cup (2 sticks) unsalted butter, softened
    • 1 ½ cups packed light brown sugar
    • 2 cups old-fashioned rolled oats
    • 1 ½ cups all-purpose flour
    • ½ cup unsweetened cocoa powder, Dutch-processed for richness
    • 1 (14-ounce) can sweetened condensed milk
    • 1 teaspoon pure vanilla extract

    Instructions

    1. Preheat oven and prepare pan. Preheat your oven to 350°F (175°C). Lightly grease a 9×13 inch baking pan. In a large mixing bowl, using an electric mixer, cream together the ½ cup unsalted butter, softened, and 1 cup packed light brown sugar on medium speed for about 2-3 minutes until the mixture is light, pale, and fluffy. Gradually add the 2 cups old-fashioned rolled oats and 1 ½ cups all-purpose flour, mixing on low speed until just combined and a crumbly, sandy texture forms. Press approximately two-thirds of this oat crumb mixture firmly and evenly into the bottom of the prepared pan, ensuring it forms a compact base.
    2. Pre-bake the crust. Place the pan with the pressed oat base into the preheated 350°F (175°C) oven and bake for 10 to 12 minutes. The edges should appear lightly golden brown and the crust should be slightly set. Remove from the oven and set aside while you prepare the fudge layer.
    3. Prepare the luscious chocolate fudge layer. In a medium, heavy-bottomed saucepan, melt the remaining ½ cup unsalted butter over medium heat until fully liquid. Add the 1 (14-ounce) can sweetened condensed milk, remaining ½ cup packed light brown sugar, ½ cup unsweetened cocoa powder, and 1 teaspoon pure vanilla extract. Whisk constantly to combine thoroughly. Bring the mixture to a gentle boil, then immediately reduce the heat to low. Simmer, stirring continuously with a rubber spatula or wooden spoon, for exactly 5 minutes. The fudge mixture will thicken noticeably and darken in color, clinging to the spoon.
    4. Layer and crumble. Carefully and evenly pour the warm, thick fudge mixture directly over the partially baked oat base in the pan. Distribute it gently to cover the entire surface. Take the remaining one-third of the reserved oat crumb mixture and evenly crumble it over the top of the fudge layer, creating a rustic, delightful topping.
    5. Complete the bake. Return the pan to the 350°F (175°C) oven and bake for an additional 20 to 25 minutes. The top oat crumble should achieve a beautiful golden-brown color, the edges of the fudge layer should be visibly bubbly, and the center, when gently pressed, should feel set and firm, not liquid.
    6. Cool for perfection. This step is crucial for perfect bars: remove the pan from the oven and transfer it to a wire rack. Allow the bars to cool completely at room temperature for at least 2 to 3 hours, or until fully firm, before attempting to cut them into neat squares. Chilling in the refrigerator for 30 minutes once cooled can make cutting even easier.

    Chef’s Insight

    These Chocolate Oat Fudge Bars are a delightful fusion of crumbly, buttery oat goodness and a rich, decadent chocolate fudge layer. The combination of textures—crisp crumble and smooth, chewy fudge—makes them utterly irresistible. They’re straightforward to prepare, yet offer a satisfyingly gourmet result that’s perfect for potlucks, dessert tables, or a cozy evening treat.

    Cook’s Notes

    • Softened Butter is Key: Ensure your butter for the oat base is truly softened (room temperature) for a light, fluffy creamed mixture. Cold butter will result in a denser, less uniform crumble.
    • Don’t Rush the Simmer: When making the fudge layer, simmer for the full 5 minutes. This allows the mixture to thicken properly, preventing a runny fudge layer in your finished bars.
    • Cool Completely: This cannot be stressed enough! Warm fudge bars will fall apart. Allow them to cool entirely, ideally for several hours, before slicing for clean, perfect squares. Chilling them in the fridge for 30 minutes after cooling can further aid in neat cutting.

    How To Serve

    • These bars are wonderful on their own, perhaps with a glass of milk or a cup of coffee.
    • For a more indulgent dessert, serve a square warmed slightly, topped with a scoop of vanilla bean ice cream and a drizzle of caramel sauce.
    • They also make fantastic additions to a dessert platter for parties or holiday gatherings.

    Prep Time: 14 mins | Cook Time: 32 mins | Cool Time: 2-3 hours | Yield: 24 bars

    FAQs

    Can I use quick oats instead of rolled oats?
    While old-fashioned rolled oats provide the best texture, quick oats can be used in a pinch. However, they may result in a slightly softer, less chewy oat crumble.
    My fudge layer didn’t set, what went wrong?
    The most common reason for a runny fudge layer is not simmering it long enough. Ensure you simmer the mixture over low heat, stirring constantly, for the full 5 minutes until it visibly thickens. High humidity can also affect setting.
    How should I store these bars?
    Store the cooled, cut bars in an airtight container at room temperature for up to 3-4 days, or in the refrigerator for up to a week. If stacking, place parchment paper between layers to prevent sticking.
    Can I freeze Chocolate Oat Fudge Bars?
    Yes! Once completely cooled and cut, arrange the bars in a single layer on a baking sheet and freeze until firm. Then, transfer them to a freezer-safe airtight container or bag, separating layers with parchment paper. They can be frozen for up to 2-3 months.
    Can I add nuts or chocolate chips to this recipe?
    Absolutely! You can fold ½ cup of chopped pecans, walnuts, or chocolate chips into the oat crumble mixture before pressing the base or sprinkling the topping. This adds extra flavor and crunch.
    How do I get clean cuts?
    Allow the bars to cool completely at room temperature, then chill them in the refrigerator for at least 30 minutes before slicing. Use a large, sharp knife, wiping the blade clean with a hot, damp cloth between each cut for the cleanest edges.
    Can I make this recipe dairy-free?
    Making this recipe dairy-free is challenging due to the sweetened condensed milk and butter. While some dairy-free condensed milks exist, results can vary. Dairy-free butter substitutes for the oat layers are more readily available, but the fudge layer requires careful substitution.

    [redirect_script url=”aHR0cHM6Ly9lYXN5ZGFzaHJlY2lwZXMuY29tL29hdC1mdWRnZS1iYXItcmVjaXBlLXdpdGgtY2hvY29sYXRlLWxheWVyLz91dG1fc291cmNlPXBpbnRlcmVzdC5jb20mdXRtX21lZGl1bT1yZWZlcnJhbA==”]

  • Irresistible Ugly Duckling Cake with Tangy Pineapple Topping

    Irresistible Ugly Duckling Cake with Tangy Pineapple Topping

    Discover the delightful simplicity of this Ugly Duckling Cake, a surprisingly moist and tender sheet cake that gets its charm from a warm, sweet-tart crushed pineapple topping. Baked in a single pan and finished with a flavorful glaze poured directly over the hot cake, this recipe ensures every bite is infused with tropical goodness. It’s an easy-to-make dessert perfect for sharing at any gathering or enjoying as a comforting treat at home.

    Ingredients

    • 2 cups (240g) all-purpose flour, spooned and leveled
    • 1 ½ cups (300g) granulated sugar (for cake batter)
    • 2 large eggs, at room temperature
    • ½ cup (120ml) vegetable oil, or other neutral oil like canola
    • 1 cup (240ml) whole milk, at room temperature
    • 2 teaspoons baking powder, fresh and active
    • 1 teaspoon pure vanilla extract
    • 1 (20 oz) can (567g) crushed pineapple, undrained
    • ½ cup (100g) granulated sugar (for topping)
    • ¼ cup (57g) unsalted butter, cut into small pieces

    Instructions

    1. Preheat Oven and Prepare Pan: Begin by preheating your oven to a steady 350°F (175°C). Select a 9×13 inch baking pan and lightly grease the interior, then dust it evenly with flour, tapping out any excess. This creates a non-stick surface, ensuring your cake releases easily.
    2. Combine Dry Cake Ingredients: In a spacious mixing bowl, meticulously whisk together the 2 cups of all-purpose flour, 1 ½ cups of granulated sugar, and 2 teaspoons of baking powder. Whisk thoroughly for 1-2 minutes until all dry ingredients are uniformly blended, preventing lumps and ensuring even leavening.
    3. Mix Wet Cake Ingredients: In a separate, medium-sized bowl, whisk together the 2 large room-temperature eggs, ½ cup of vegetable oil, 1 cup of room-temperature milk, and 1 teaspoon of pure vanilla extract. Continue whisking until the mixture is smoothly emulsified and well combined, about 1 minute.
    4. Gently Combine Wet and Dry: Create a well in the center of your dry ingredients, then pour the wet mixture into it. Using a whisk or spatula, mix gently until the ingredients are just combined and no streaks of dry flour remain. Be careful not to overmix, as this can develop the gluten too much, resulting in a tough cake.
    5. Bake the Cake Base: Carefully pour the prepared batter evenly into your greased and floured 9×13 inch pan, spreading it to the edges. Transfer to the preheated oven and bake for 32-37 minutes. The cake is done when its top springs back lightly when touched, and a toothpick or cake tester inserted into the very center comes out completely clean.
    6. Simmer the Pineapple Topping: While the cake bakes, prepare your luscious topping. In a medium saucepan, combine the entire 20 oz can of undrained crushed pineapple, ½ cup of granulated sugar, and ¼ cup of unsalted butter. Place over medium heat and bring to a gentle simmer, stirring frequently for 6-8 minutes. The mixture should thicken slightly and become glossy; avoid a rolling boil.
    7. Saturate the Hot Cake: As soon as the baked cake emerges from the oven, while it is still piping hot, immediately and evenly pour the warm, thickened pineapple topping over its entire surface. The heat from the cake will help absorb the topping, infusing it with flavor and moisture.
    8. Cool Completely Before Serving: Resist the urge to cut into the cake immediately! Allow the cake to cool completely on a wire rack for at least 2-3 hours before slicing and serving. This resting period allows the topping to set and the cake’s structure to stabilize for clean slices and optimal flavor.

    Chef’s Insight

    This Ugly Duckling Cake truly lives up to its name – it’s unpretentious but delivers incredible flavor and moistness. The genius lies in pouring the hot pineapple topping over the hot cake, creating a self-glazing effect that locks in moisture and infuses every crumb with sweet, tangy pineapple. Don’t be tempted to skip the cooling step; it’s essential for the topping to set properly and for clean slices.

    Cook’s Notes

    • Room Temperature Ingredients: Ensure eggs and milk are at room temperature. This allows them to emulsify better with the oil, creating a smoother, more uniform batter and a finer-crumbed cake.
    • Do Not Overmix: Once the wet and dry ingredients are combined, mix only until no dry streaks remain. Overmixing develops gluten, which can make the cake dense and chewy instead of light and tender.
    • Even Topping Distribution: When pouring the pineapple topping, try to spread it as evenly as possible. A spatula or the back of a spoon can help ensure every slice gets a generous portion of that delicious glaze.
    • Clean Toothpick Test: A truly clean toothpick means no wet batter. If you see moist crumbs, bake for a few more minutes. Undercooking can lead to a sunken center.

    How To Serve

    • Serve this cake slightly chilled or at room temperature for the best flavor and texture.
    • A dollop of freshly whipped cream or a scoop of vanilla bean ice cream makes an excellent accompaniment.
    • For a touch of elegance, garnish each slice with a fresh mint sprig or a few toasted coconut flakes.
    • This cake is substantial enough on its own for a dessert, or it can be a delightful addition to a brunch spread.

    Keep & Reheat

    • Storage: Store leftover Ugly Duckling Cake, covered tightly with plastic wrap or in an airtight container, at room temperature for up to 2 days, or in the refrigerator for up to 4-5 days. Refrigeration will firm up the topping slightly.
    • Freezing: For longer storage, slice the cooled cake into individual portions. Wrap each slice tightly in plastic wrap, then aluminum foil, and place in a freezer-safe bag or container. Freeze for up to 2-3 months.
    • Thawing/Reheating: Thaw frozen slices in the refrigerator overnight or at room temperature for a few hours. This cake is best served at room temperature after thawing; reheating is not typically necessary or recommended as it can alter the texture.

    Prep time: 18 minutes | Cook time: 45 minutes | Total time: 3 hours 3 minutes | Yield: 12-16 servings

    FAQs

    Can I use fresh pineapple instead of canned?
    While canned crushed pineapple (undrained) is specified for its consistent moisture and convenience, you could try fresh, finely minced pineapple. However, you’d need to add a bit of liquid (like pineapple juice) to the topping to achieve the right consistency, as fresh pineapple has less natural juice.
    What if I don’t have a 9×13 inch pan?
    A 9×13 inch pan is ideal for the recommended baking time and thickness. If using a different size, adjust baking time and monitor closely. A slightly smaller pan might require a longer bake time, while a larger one could bake faster. Ensure the total volume matches roughly.
    How do I know when the cake is perfectly baked?
    The cake is ready when the top springs back when gently pressed, and a wooden skewer or toothpick inserted into the very center comes out clean, without any wet batter attached.
    Can I make this cake gluten-free?
    You may be able to substitute the all-purpose flour with a 1:1 gluten-free baking blend that contains xanthan gum. Results can vary, but many blends work well in simple sheet cakes like this one.
    Why is my pineapple topping too thin or too thick?
    If your topping is too thin after simmering, continue to cook and stir for a few more minutes to reduce it further. If it’s too thick, you can stir in a tablespoon or two of pineapple juice or water to reach your desired consistency.
    Can I add other flavors or mix-ins to the cake?
    Absolutely! Consider folding in ½ cup of shredded coconut or chopped pecans/walnuts into the cake batter for added texture. A pinch of cinnamon or nutmeg could also complement the pineapple flavor nicely.
    Is this cake suitable for freezing?
    Yes, this cake freezes beautifully. Once completely cooled, slice it into individual portions, wrap them tightly, and store in the freezer for up to 2-3 months. Thaw in the refrigerator before serving.
    My cake sank in the middle, what happened?
    A sunken cake often indicates it was either underbaked, the oven door was opened too soon, or it was overmixed. Ensure your oven temperature is accurate and resist opening the oven frequently during baking.

    [redirect_script url=”aHR0cHM6Ly9lYXN5ZGFzaHJlY2lwZXMuY29tL3VnbHktZHVja2xpbmctY2FrZS1yZWNpcGUtd2l0aC1waW5lYXBwbGUtdG9wcGluZy8/dXRtX3NvdXJjZT1waW50ZXJlc3QuY29tJnV0bV9tZWRpdW09cmVmZXJyYWw=”]

  • Zesty Sundrop Pound Cake: A Bright Citrus-Infused Treat

    Zesty Sundrop Pound Cake: A Bright Citrus-Infused Treat

    Brighten your day with a slice of this irresistible Zesty Sundrop Pound Cake! This recipe transforms a classic Southern comfort dessert into a vibrant citrus sensation, boasting a tender crumb and a delightful tang from fresh lemon or orange, all infused with the unique bubbly sweetness of Sundrop soda. Perfect for any gathering or a simple afternoon treat.

    Ingredients

    • 3 cups / 360g all-purpose flour
    • 2 cups / 400g granulated sugar
    • 1 cup / 226g unsalted butter, softened to room temperature
    • 4 large eggs, at room temperature
    • 1 cup / 240ml Sundrop soda, chilled
    • 2 tbsp fresh lemon or orange zest, finely grated
    • 1 tbsp fresh lemon or orange juice, freshly squeezed
    • 1 tsp pure vanilla extract
    • 1 tsp baking powder
    • ½ tsp fine sea salt

    Instructions

    1. Prepare Your Pan and Oven: Begin by preheating your oven to 325°F (160°C). Crucially, grease your 10-12 cup Bundt or tube pan thoroughly with shortening or butter, then dust it generously with flour, ensuring every crevice is coated. This meticulous preparation is key to preventing sticking and ensuring your beautiful pound cake releases effortlessly.
    2. Cream Butter and Sugar: In a spacious mixing bowl, or the bowl of a stand mixer fitted with the paddle attachment, combine the softened unsalted butter and granulated sugar. Beat on medium speed for 5-7 minutes until the mixture becomes remarkably light, fluffy, and visibly pale, indicating that plenty of air has been incorporated for a tender texture.
    3. Incorporate Eggs and Flavorings: Add the large eggs one at a time, beating well after each addition until fully incorporated into the butter mixture, scraping down the sides of the bowl as needed. Next, stir in the pure vanilla extract and the vibrant fresh citrus zest, mixing just until fragrant.
    4. Alternate Dry and Wet Ingredients: In a separate medium bowl, whisk together the all-purpose flour, baking powder, and fine sea salt until thoroughly combined. With the mixer on low speed, gradually add about a third of the dry ingredients to the wet mixture, followed by half of the Sundrop soda. Repeat this process, ending with the remaining dry ingredients. Mix only until just combined and no streaks of flour remain; overmixing will develop the gluten and result in a tough cake.
    5. Bake to Golden Perfection: Carefully pour the smoothly blended batter into your meticulously prepared Bundt or tube pan, spreading it evenly. Transfer the pan to the preheated oven and bake for 65-75 minutes. The cake is done when a golden-brown crust has formed, it feels firm yet springy to the touch, and a wooden skewer or toothpick inserted into the thickest part comes out completely clean. Allow the cake to cool in the pan on a wire rack for 15 minutes before gently inverting it onto the rack to cool completely for at least 1-2 hours before slicing.

    What To Serve With It

    • Simple Glaze: A quick powdered sugar glaze (powdered sugar, a splash of Sundrop or citrus juice) adds a lovely finish and extra moisture.
    • Fresh Berries: A medley of fresh seasonal berries like strawberries, blueberries, or raspberries complements the citrus notes beautifully.
    • Whipped Cream: A dollop of freshly whipped cream or a scoop of vanilla bean ice cream offers a cool contrast to the rich cake.
    • Citrus Segments: Garnish with thin slices of fresh lemon or orange for an elegant presentation and burst of fresh flavor.

    Flavor Twists

    • Lemon-Lime Lift: Use lemon-lime soda instead of Sundrop for a slightly different, equally zesty profile.
    • Orange Blossom: Incorporate ½ teaspoon of orange blossom water into the batter for a delicate floral aroma alongside the citrus.
    • Spiced Citrus: Add a pinch of ground cardamom or nutmeg to the dry ingredients for a warm, subtle spice note that pairs well with citrus.
    • Coconut Kiss: Stir in ½ cup of shredded unsweetened coconut to the batter for a tropical twist.

    Leftovers & Reheating

    • Storage: Store any leftover pound cake tightly wrapped in plastic wrap or in an airtight container at room temperature for up to 3-4 days to maintain freshness.
    • Freezing: For longer storage, slice the cooled cake and wrap individual slices tightly in plastic wrap, then place them in a freezer-safe bag or container. Freeze for up to 2-3 months.
    • Thawing & Reheating: Thaw frozen slices at room temperature for an hour or two. You can enjoy it as is, or gently warm individual slices in the microwave for 15-30 seconds for a just-baked feel.

    Prep time: 18 minutes | Cook time: 68 minutes | Total time: 1 hour 26 minutes | Yield: 12-14 servings

    FAQs

    Can I substitute Sundrop soda with another beverage?
    Yes, for a similar flavor profile, you can use other citrus-flavored sodas like Mountain Dew or a lemon-lime soda. If you prefer a less sweet or different flavor, club soda or even milk can be used, but the cake’s unique tang and moistness will be altered.
    What type of citrus zest and juice should I use?
    You can use either fresh lemon or fresh orange, or even a combination of both. The recipe works well with whatever citrus you prefer or have on hand. Ensure the zest is finely grated for maximum flavor distribution.
    How do I know if my pound cake is fully baked?
    The cake is done when a wooden skewer or toothpick inserted into the center comes out clean, and the top is golden brown and springs back lightly when touched. An instant-read thermometer should register around 200-210°F (93-99°C) in the center.
    My cake stuck to the pan, what went wrong?
    Thorough greasing and flouring of the pan are crucial. Ensure you use shortening or butter, not cooking spray, and flour every crevice. Allowing the cake to cool in the pan for 10-15 minutes before inverting is also key; too soon or too long can cause sticking.
    Can I make this pound cake ahead of time?
    Yes, pound cake is an excellent make-ahead dessert. It often tastes even better the next day as the flavors meld. Store it tightly wrapped at room temperature for up to 3-4 days, or freeze slices for longer storage.
    What causes a dense or dry pound cake?
    Overmixing the batter is a common culprit for dense cakes, as it develops gluten. Baking for too long or at too high a temperature can lead to a dry cake. Ensure you mix only until just combined and follow baking times/temperatures closely.
    Can I add a glaze to this Sundrop Pound Cake?
    Absolutely! A simple glaze made from powdered sugar and a few tablespoons of fresh citrus juice or even a little more Sundrop soda would be a delicious addition. Drizzle it over the completely cooled cake.

    [redirect_script url=”aHR0cHM6Ly9lYXN5ZGFzaHJlY2lwZXMuY29tL3N1bmRyb3AtcG91bmQtY2FrZS1yZWNpcGUtY2l0cnVzLWZsYXZvcmVkLz91dG1fc291cmNlPXBpbnRlcmVzdC5jb20mdXRtX21lZGl1bT1yZWZlcnJhbA==”]

  • Classic Mexican Wedding Cookies: A Snow-Dusted Delight

    Classic Mexican Wedding Cookies: A Snow-Dusted Delight

    Discover the magic of Mexican Wedding Cookies, often known as Russian Teacakes or Snowball Cookies, with this beloved recipe. These delicate, buttery shortbread bites are generously coated in powdered sugar, creating a melt-in-your-mouth experience that’s perfect for holidays, gatherings, or a simple sweet craving.

    Ingredients

    • 1 cup (226g) unsalted butter, softened to room temperature
    • ½ cup (60g) powdered sugar, sifted, for the dough
    • 2–3 cups (240-360g) powdered sugar, sifted, for rolling
    • 2 cups (240g) all-purpose flour, spooned and leveled
    • 1 cup (113g) finely chopped pecans, or walnuts, toasted for enhanced flavor (optional)
    • 1 teaspoon (5ml) pure vanilla extract
    • ¼ teaspoon fine sea salt

    Instructions

    1. Cream Butter and Sugar: In a spacious mixing bowl, utilizing an electric mixer on medium-high speed, thoroughly beat the softened unsalted butter with the ½ cup of sifted powdered sugar. Continue mixing for 3-5 minutes until the mixture appears light, notably fluffy, and pale in color. Ensure you pause to scrape down the sides and bottom of the bowl periodically to incorporate all ingredients evenly.
    2. Incorporate Dry Ingredients and Nuts: Gradually add the all-purpose flour, a half cup at a time, along with the vanilla extract, to the creamed butter mixture. Mix on low speed just until combined and no streaks of flour remain; overmixing can develop gluten and lead to tough cookies. Gently fold in the finely chopped pecans until they are uniformly distributed throughout the dough.
    3. Chill the Dough: Carefully gather the dough into a cohesive ball, flatten it slightly, and wrap it tightly in plastic wrap. Refrigerate the dough for a minimum of 45 minutes (up to 2 hours). This crucial chilling step helps solidify the butter, preventing the cookies from spreading excessively during baking and ensuring they maintain their distinctive rounded shape.
    4. Shape and Bake: Preheat your oven to 350°F (175°C). Line two baking sheets with parchment paper. Scoop small portions of the chilled dough and roll them between your palms into uniform balls, roughly 1 inch (2.5 cm) in diameter. Arrange these dough balls about 1 inch apart on the prepared baking sheets. Bake for 12-14 minutes, or until the edges appear lightly golden and the bottoms are faintly browned, while the centers remain pale. Avoid overbaking to keep them tender.
    5. First Powdered Sugar Coating: Immediately upon removing the cookies from the oven, while they are still warm and slightly tacky, gently roll them in a shallow bowl filled with powdered sugar. Ensure they are thoroughly coated on all sides. The warmth helps the sugar adhere beautifully.
    6. Cool and Final Coating: Transfer the sugar-coated cookies to a wire rack and allow them to cool completely. Once they are at room temperature, roll them a second time in fresh powdered sugar. This double coating creates that iconic ‘snow-dusted’ appearance and adds an extra indulgent layer of sweetness and texture.

    Chef’s Insight

    These classic cookies are surprisingly simple to make, yet their delicate texture and rich, nutty flavor, enrobed in a generous layer of powdered sugar, make them feel incredibly special. The secret to their melt-in-your-mouth quality lies in the high butter content and the chilling process, which prevents spreading and ensures a tender crumb.

    Cook’s Notes

    • Butter Temperature: Ensure your butter is truly softened, not melted. It should give slightly when pressed, but still hold its shape.
    • Sifted Sugar: Sifting powdered sugar for both the dough and rolling helps prevent lumps and ensures a smooth, even coating.
    • Pecan Toasting: For a deeper, more pronounced nutty flavor, lightly toast your chopped pecans in a dry skillet over medium-low heat for 5-7 minutes, stirring frequently, until fragrant. Let them cool completely before adding to the dough.
    • Do Not Overbake: These cookies should remain pale, with only the very edges showing light color. Overbaking will result in a drier, less tender cookie.

    How To Serve

    • Mexican Wedding Cookies are a beloved treat for festive occasions like Christmas, weddings, or any gathering where a delicate, sweet bite is appreciated.
    • Serve them alongside a warm cup of coffee, hot chocolate, or a delicate tea.
    • They also make an elegant addition to any dessert platter or cookie exchange.

    Keep & Reheat

    • Store these cookies in an airtight container at room temperature for up to one week.
    • If you prefer to make them ahead, the unbaked dough balls can be frozen for up to 3 months. Arrange them on a baking sheet until solid, then transfer to a freezer-safe bag. Bake from frozen, adding a couple of extra minutes to the bake time.
    • Coated cookies can also be frozen, then re-rolled in sugar after thawing.

    Prep time: 45 minutes, Cook time: 14 minutes, Yield: Approximately 36 cookies

    FAQs

    Can I use other nuts?
    Absolutely! While pecans are traditional, walnuts are a classic substitute. You can also experiment with finely chopped almonds or pistachios for a different flavor profile.
    Why do my cookies spread too much?
    The most common culprits are insufficient chilling of the dough or using butter that’s too warm. Ensure your butter is softened, not melted, and always chill the dough for at least 45 minutes.
    Can I make these cookies dairy-free or gluten-free?
    For dairy-free, substitute a good quality plant-based butter alternative. For gluten-free, use a 1:1 gluten-free all-purpose flour blend, preferably one containing xanthan gum, though the texture might vary slightly.
    How do I get a perfect powdered sugar coating?
    The key is a double coating. Roll them warm from the oven for the first pass, as the slight moisture helps the sugar stick. Then, roll them again once completely cool for that beautiful, opaque snow-dusted finish.
    Can I freeze Mexican Wedding Cookies?
    Yes, both the dough and the baked cookies freeze well. Freeze unbaked dough balls, then bake from frozen. Baked cookies can be frozen for up to 2 months; re-roll in powdered sugar after thawing if needed.
    What if my powdered sugar gets clumpy?
    Always sift your powdered sugar before mixing into the dough and before rolling the cookies. This prevents lumps and ensures a smooth, even consistency.
    Can I add flavorings other than vanilla?
    Certainly! A few drops of almond extract or a hint of orange zest can add a delightful twist. Just be mindful not to overpower the delicate buttery flavor.

    [redirect_script url=”aHR0cHM6Ly9lYXN5ZGFzaHJlY2lwZXMuY29tL21leGljYW4td2VkZGluZy1jb29raWVzLXJlY2lwZS13aXRoLXBvd2RlcmVkLXN1Z2FyLz91dG1fc291cmNlPXBpbnRlcmVzdC5jb20mdXRtX21lZGl1bT1yZWZlcnJhbA==”]

  • Classic Pecan Pie: A Rich & Sweet Holiday Dessert Tradition

    Classic Pecan Pie: A Rich & Sweet Holiday Dessert Tradition

    This Classic Pecan Pie delivers irresistible sweetness with a gooey, rich filling packed with toasted pecans, all nestled in a flaky crust. It’s the perfect show-stopping dessert for holidays or any special occasion, simple to prepare yet utterly decadent.

    Ingredients

    • 1 ½ cups (150g) toasted pecan halves or pieces, roughly chopped
    • 1 cup (200g) light brown sugar, firmly packed
    • 1 cup (240ml) light corn syrup
    • ½ cup (113g) unsalted butter, melted and slightly cooled
    • 3 large eggs, lightly beaten and at room temperature
    • 1 teaspoon (5ml) pure vanilla extract
    • 1 (9-inch/23cm) unbaked pie crust, chilled

    Instructions

    1. Preheat and Prep Crust: Position an oven rack in the center and preheat your oven to 350°F (175°C). For a perfectly crisp crust and to avoid a soggy bottom, gently prick the bottom of your unbaked pie crust with a fork, then lightly blind bake it for about 8-10 minutes, just until it begins to set and dry slightly. This preliminary bake creates a barrier for the filling.
    2. Whisk Together the Filling: In a spacious mixing bowl, combine the firmly packed light brown sugar, rich light corn syrup, slightly cooled melted unsalted butter, room temperature lightly beaten eggs, and aromatic pure vanilla extract. Whisk vigorously for 1-2 minutes until all ingredients are thoroughly blended, the mixture is smooth, and there are no sugar clumps.
    3. Assemble the Pie: Evenly distribute the toasted pecan halves or pieces across the bottom of your pre-baked pie crust. Carefully and slowly pour the prepared liquid filling over the pecans, ensuring they are mostly, but not entirely, submerged. A few pecans peeking out are fine.
    4. Bake Until Golden: Gently transfer the assembled pie onto a sturdy baking sheet – this is a crucial step to catch any potential drips and make moving the pie safer. Bake for 45-55 minutes, checking around the 40-minute mark. The pie is perfectly baked when its edges are beautifully golden brown, and the center is mostly firm yet retains a slight, gentle wobble (like firm gelatin) when lightly shaken. If you notice the crust edges browning too rapidly, fashion a loose foil tent around them.
    5. Cool for Optimal Setting: Remove the pie from the oven and immediately place it on a wire cooling rack. Allow it to cool undisturbed at room temperature for a minimum of 3-4 hours, or ideally until completely cool. This extended cooling period is essential for the filling to fully set into a luscious, sliceable texture, preventing a runny center when served.

    What Makes This Work

    The magic of this pecan pie lies in the perfect balance of sweetness from brown sugar and corn syrup, which combine to create that signature gooey, caramelized filling. Using toasted pecans enhances their nutty flavor significantly, and a brief blind bake of the crust ensures a delightfully crisp base, preventing any unwelcome sogginess. The relatively low baking temperature allows the filling to slowly set without curdling the eggs, leading to a smooth, rich texture.

    What To Serve With It

    • A generous scoop of premium vanilla bean ice cream.
    • A dollop of freshly whipped cream, perhaps infused with a hint of bourbon or maple.
    • A side of strong black coffee or a delicate herbal tea to balance the sweetness.
    • For a festive touch, a glass of spiced cider or a sweet dessert wine.

    Leftovers & Reheating

    • Storage: Cover leftover pecan pie tightly with plastic wrap or aluminum foil and store at room temperature for up to 2 days, or in the refrigerator for up to 4-5 days.
    • Freezing: For longer storage, slice the cooled pie, wrap individual slices tightly in plastic wrap, then again in foil, and place in an airtight freezer bag for up to 3 months.
    • Reheating: Thaw frozen slices in the refrigerator overnight. To serve warm, reheat individual slices in an oven preheated to 300°F (150°C) for 10-15 minutes, or microwave briefly until just warmed through.

    Prep time: 12 minutes | Cook time: 50 minutes | Yield: One 9-inch pie (8-10 servings)

    FAQs

    Can I use dark corn syrup for this recipe?
    Yes, you can substitute dark corn syrup for light corn syrup, but be aware it will yield a slightly darker pie with a more robust, less sweet, molasses-like flavor. The texture will remain similar.
    Why is my pecan pie filling runny after cooling?
    A runny pecan pie is almost always a sign of underbaking. Ensure the pie is baked until the edges are set and golden, and the center has only a slight, uniform wobble, then allow it to cool completely for at least 3-4 hours.
    Can this pecan pie be made ahead of time?
    Absolutely! Pecan pie is an excellent make-ahead dessert. You can bake it up to 2 days in advance and store it, covered, at room temperature, or refrigerate it for up to 4-5 days.
    What can I do if my pie crust edges are browning too quickly?
    If you notice the crust getting too dark before the filling is set, gently tent the edges with strips of aluminum foil. This protects them from direct heat while allowing the filling to continue baking.
    Is it really necessary to blind bake the pie crust?
    While not strictly mandatory, blind baking the crust is highly recommended for pecan pie. It helps create a barrier against the moist filling, preventing a soggy bottom and ensuring a perfectly crisp base.
    Can I add a splash of bourbon or rum to the filling?
    For an extra layer of flavor, you can certainly add 1 to 2 tablespoons of bourbon, dark rum, or even spiced rum to the filling mixture along with the vanilla extract. It adds a sophisticated, boozy note.
    How do I know the pie is fully cooked?
    The pie is fully cooked when the edges are set and puffed, and the center jiggles slightly like firm gelatin when gently shaken. An internal temperature of 200°F (93°C) also indicates doneness, if you use a thermometer.

    [redirect_script url=”aHR0cHM6Ly9lYXN5ZGFzaHJlY2lwZXMuY29tL3NpbXBsZS1wZWNhbi1waWUtcmVjaXBlLWVhc3ktaG9saWRheS1kZXNzZXJ0Lz91dG1fc291cmNlPXBpbnRlcmVzdC5jb20mdXRtX21lZGl1bT1yZWZlcnJhbA==”]

  • Authentic Taiwanese Pineapple Cakes: A Sweet & Tangy Delight

    Authentic Taiwanese Pineapple Cakes: A Sweet & Tangy Delight

    Indulge in the exquisite taste of homemade Taiwanese Pineapple Cakes (Feng Li Su), a beloved pastry known for its buttery, crumbly shortbread crust and a rich, sweet-tart pineapple filling. This recipe meticulously guides you through crafting these delightful treats from scratch, perfect for gifting or savoring with a warm cup of tea.

    Ingredients

    • 1 cup (226g) unsalted butter, softened
    • 2 ½ cups (300g) all-purpose flour, spooned and leveled
    • ½ cup (60g) powdered sugar, sifted
    • 1 large egg yolk, room temperature
    • 2 medium fresh ripe pineapples (about 4 cups grated), peeled and cored
    • ½ cup (100g) granulated sugar
    • 2 tablespoons maltose or corn syrup
    • ¼ teaspoon fine sea salt

    Instructions

    1. First, prepare the vibrant pineapple filling. Carefully peel, core, then grate or finely chop the pineapples to create a fine pulp. Transfer this to a heavy-bottomed pot and combine with the granulated sugar and maltose or corn syrup. Cook over medium heat, stirring very frequently, for 35-45 minutes. The mixture should thicken significantly, developing a jam-like consistency and turning a deep golden color. It should be firm enough to hold its shape when a spoon is dragged through it. Once thickened, remove from heat and allow it to cool completely to room temperature. This cooling step is crucial to prevent the dough from melting during assembly.
    2. Next, create the tender shortbread dough. In a spacious mixing bowl, cream together the softened unsalted butter and sifted powdered sugar until the mixture becomes light, fluffy, and pale, about 3-4 minutes. Beat in the single egg yolk until fully incorporated, ensuring no streaks remain. Gradually add the all-purpose flour, mixing on low speed until a soft, cohesive dough just comes together. Avoid overmixing, which can lead to tough shortbread. Wrap the dough tightly in plastic film and chill in the refrigerator for at least 30 minutes, or up to an hour, to make it easier to handle.
    3. Now, it’s time to assemble your pineapple cakes. Once the pineapple filling is completely cool and the dough is thoroughly chilled, divide them into uniform portions: approximately 15g for the filling and 25g for the dough. This precision helps with even baking. Take a piece of dough and flatten it into a small disc (about 2 inches). Place a ball of pineapple filling in the center. Carefully cup the dough around the filling, bringing the edges up and sealing it completely, ensuring no filling peeks through. Gently press this filled ball into your pineapple cake molds, creating a neat, compact shape. Repeat for all portions.
    4. Finally, bake these golden treats to perfection. Preheat your oven to 350°F (175°C). Arrange the filled molds on a baking sheet, leaving a small space between each. Bake for an initial 8-10 minutes. Then, carefully remove the tray, and if using molds with two sides, flip them over to ensure even browning on all surfaces. Return to the oven and continue baking for another 8-10 minutes, or until the cakes are beautifully golden brown and firm to the touch. The total baking time will be 16-20 minutes. Allow the pineapple cakes to cool slightly in the molds on a wire rack before carefully unmolding them. They firm up further as they cool.

    Pro Tips

    • Choosing Pineapples: Opt for fresh, very ripe pineapples. Their natural sweetness and acidity are crucial for the filling’s authentic flavor. Avoid under-ripe or overly sour fruits.
    • Filling Consistency is Key: The success of the filling relies on cooking it down until it’s very thick and jam-like. A wet filling will make the dough soggy or cause blowouts during baking.
    • Accurate Weighing: Using a kitchen scale for both the dough and filling portions ensures consistent cake sizes and even baking.
    • Don’t Overmix the Dough: Overworking the shortbread dough can develop the gluten, resulting in a tougher, less tender crust. Mix just until combined.
    • Chilling the Dough: This step is non-negotiable. Cold dough is significantly easier to handle and prevents the butter from melting too quickly in the oven, maintaining the cake’s shape.

    Serving Suggestions

    • Tea Time Delight: Serve these exquisite pineapple cakes alongside a warm cup of oolong tea, jasmine green tea, or a fragrant black tea. The slight bitterness of the tea perfectly complements the sweet-tangy pastry.
    • After-Dinner Treat: Offer them as a light dessert after a meal, perhaps with a small scoop of vanilla bean ice cream for contrast.
    • Festive Gifting: Package them beautifully in small boxes for Lunar New Year celebrations, birthdays, or as a thoughtful homemade gift for friends and family.
    • Coffee Companion: Enjoy with your morning coffee or as an afternoon pick-me-up. The rich buttery flavor pairs wonderfully with a freshly brewed cup.

    Storage & Make-Ahead

    • Room Temperature: Baked pineapple cakes can be stored in an airtight container at room temperature for up to 5-7 days. Ensure they are completely cool before storing to prevent condensation.
    • Refrigeration: For slightly longer storage, you can refrigerate them for up to 10 days, though the texture of the shortbread may become a bit firmer. Allow them to come to room temperature before serving for best enjoyment.
    • Freezing Baked Cakes: Baked and cooled pineapple cakes can be frozen for up to 2 months. Wrap each cake individually in plastic wrap, then place them in an airtight freezer-safe container or bag. Thaw at room temperature or gently warm in a low oven (250°F/120°C) until warmed through.
    • Make-Ahead Filling: The pineapple filling can be prepared up to 3 days in advance and stored in an airtight container in the refrigerator.
    • Make-Ahead Dough: The shortbread dough can be made 1-2 days ahead, wrapped tightly in plastic, and stored in the refrigerator. Allow it to soften slightly at room temperature before working with it.

    Prep time: 28 minutes | Cook time: 60 minutes | Total time: 2 hours | Yield: About 22 delightful cakes

    FAQs

    Can I use canned pineapple for the filling?
    Fresh ripe pineapple is highly recommended for authentic flavor and texture, but in a pinch, well-drained canned crushed pineapple (packed in juice) can be used, though you may need to cook it longer to achieve the desired thick consistency.
    What can I substitute for maltose?
    Corn syrup is an excellent direct substitute for maltose, offering similar texture and sweetness. Light agave nectar or honey can also work, but may slightly alter the flavor profile.
    How do I know the pineapple filling is thick enough?
    The filling is ready when it pulls away from the bottom of the pot, holds its shape firmly when a spoon is dragged through it, and looks jammy and translucent. It should not be watery.
    Why is chilling the dough important?
    Chilling the dough solidifies the butter, making it less sticky and much easier to handle, roll, and mold around the filling without tearing. It also helps prevent the cakes from spreading too much during baking.
    Can I make these pineapple cakes ahead of time?
    Yes, both the pineapple filling and the shortbread dough can be prepared a day or two in advance. Store the cooled filling in an airtight container in the fridge, and the wrapped dough in the fridge.
    How should I store baked pineapple cakes?
    Store baked pineapple cakes in an airtight container at room temperature for up to 5-7 days. For longer storage, they can be frozen for up to 2 months.
    What if I don’t have pineapple cake molds?
    While traditional molds create the iconic shape, you can hand-shape the cakes into small squares or rounds. They might not look exactly the same but will taste just as delicious.
    My dough is crumbly, what went wrong?
    If your dough is too crumbly, it might be slightly dry. Try adding half a teaspoon of cold water or milk, one drop at a time, until it just comes together. Avoid adding too much liquid.

    [redirect_script url=”aHR0cHM6Ly9lYXN5ZGFzaHJlY2lwZXMuY29tL3RhaXdhbmVzZS1waW5lYXBwbGUtY2FrZS1yZWNpcGUtd2l0aC1nb2xkZW4tZmlsbGluZy8/dXRtX3NvdXJjZT1waW50ZXJlc3QuY29tJnV0bV9tZWRpdW09cmVmZXJyYWw=”]

  • Copycat Starbucks Lemon Loaf with Zesty Lemon Glaze

    Copycat Starbucks Lemon Loaf with Zesty Lemon Glaze

    Indulge in the bright, tangy flavor of a beloved cafe classic with this homemade Copycat Starbucks Lemon Loaf recipe. Featuring a tender, moist crumb infused with fresh lemon zest and crowned with a sweet, zesty lemon glaze, this loaf is surprisingly simple to bake and perfect for breakfast, brunch, or an afternoon treat.

    Ingredients

    • 2 cups / 240g all-purpose flour
    • 1 ½ cups / 300g granulated sugar
    • 3 large eggs, at room temperature
    • ½ cup / 120ml whole milk
    • Zest of 2-3 fresh lemons (for the loaf)
    • Juice of 2-3 fresh lemons (for the glaze)
    • 1 ½ tsp / 7.5g baking powder
    • ½ tsp / 2.5g baking soda
    • ½ tsp / 2.5g fine sea salt
    • ½ cup / 113g unsalted butter, softened
    • 1 tsp / 5ml pure vanilla extract
    • 2 cups / 240g powdered sugar, sifted

    Instructions

    1. Prepare Baking Pan and Preheat Oven: Start by thoroughly greasing a 9×5 inch (23×13 cm) loaf pan with butter or baking spray, then dust it lightly with flour, tapping out any excess. This ensures a clean release. Preheat your oven to a steady 350°F (175°C) so it’s ready when the batter is mixed.
    2. Combine Dry Ingredients: In a medium-sized bowl, use a whisk to thoroughly combine the 2 cups of all-purpose flour, 1 ½ teaspoons of baking powder, ½ teaspoon of baking soda, and ½ teaspoon of fine sea salt. Whisk for about 30 seconds to ensure the leavening agents and salt are evenly distributed throughout the flour. Set this dry mixture aside.
    3. Cream Wet Ingredients: In a large mixing bowl (or the bowl of a stand mixer fitted with the paddle attachment), beat the ½ cup of softened unsalted butter and 1 ½ cups of granulated sugar together on medium-high speed. Continue beating for 2-3 minutes until the mixture appears light, pale yellow, and noticeably fluffy, indicating proper aeration. Beat in the 3 large eggs one at a time, incorporating each egg fully before adding the next. Finally, stir in the 1 teaspoon of pure vanilla extract and the bright zest from 2-3 fresh lemons until just combined, creating a wonderfully aromatic base.
    4. Incorporate Dry and Wet Mixtures: With the mixer on low speed, begin by adding about one-third of the dry ingredient mixture to the wet ingredients, mixing just until streaks of flour disappear. Next, pour in half of the ½ cup whole milk, mixing until barely combined. Repeat this pattern: add another third of the dry mixture, then the remaining milk, and finish with the last third of the dry ingredients. Mix only until the batter is just combined and smooth, taking care not to overmix, which can lead to a tough loaf.
    5. Bake the Loaf to Golden Perfection: Gently scrape the completed batter evenly into your prepared 9×5 inch loaf pan. Place the pan in the preheated oven and bake for approximately 55-60 minutes. To check for doneness, insert a wooden skewer or toothpick into the center of the loaf – it should come out clean with no wet batter clinging to it. If the top browns too quickly, you can loosely tent it with foil. Once baked, remove the loaf from the oven and let it cool in the pan on a wire rack for 10-15 minutes to allow it to firm up before attempting to remove it. Carefully invert the pan to release the loaf, then place it right-side up on the wire rack to cool completely.
    6. Whip Up the Zesty Lemon Glaze: While your lemon loaf is cooling, prepare the signature glaze. In a small bowl, measure out the 2 cups of sifted powdered sugar. Gradually whisk in 2-3 tablespoons of fresh lemon juice (from the lemons you zested earlier). Start with 2 tablespoons and add more a teaspoon at a time until the glaze is smooth, slightly thick, yet easily pourable. If it’s too thick, add a tiny bit of milk or water; if too thin, whisk in a little more powdered sugar.
    7. Glaze and Serve: Once the baked lemon loaf has cooled for at least an hour (or is mostly cool to the touch), place the wire rack with the loaf over a sheet of parchment paper or a baking tray to catch any drips. Evenly pour the prepared lemon glaze over the entire top of the loaf, allowing it to naturally cascade down the sides. Let the glaze set and firm up for about 15-20 minutes at room temperature before carefully slicing with a serrated knife and savoring each delightful bite.

    Chef’s Insight

    The key to achieving that signature moist and tender crumb in this lemon loaf is not to overmix the batter. Once the dry ingredients are just combined with the wet, stop mixing. Overworking the gluten in the flour can lead to a dense, tough texture, detracting from the loaf’s delicate nature.

    Cook’s Notes

    • Room Temperature Ingredients: Ensure eggs and butter are at room temperature. This helps them emulsify better, creating a smoother, more uniform batter and a lighter texture.
    • Don’t Rush Cooling: Allowing the loaf to cool properly before glazing is crucial. If the loaf is too warm, the glaze will melt and run off, rather than forming a beautiful, set coating.
    • Zest Wisely: When zesting lemons, be sure to only get the yellow part of the peel, avoiding the bitter white pith underneath. This will give you the brightest, purest lemon flavor.

    How To Serve

    • Serve slices of lemon loaf alongside a cup of hot coffee or tea for a delightful breakfast or afternoon treat.
    • It pairs wonderfully with fresh berries or a dollop of whipped cream for a simple dessert.
    • For a special occasion, consider serving it with a scoop of vanilla bean ice cream.

    Prep time: 18 minutes | Cook time: 58 minutes | Total time: 1 hour 50 minutes | Yield: 10-12 slices

    FAQs

    Can I use bottled lemon juice for the glaze?
    While fresh lemon juice provides the best, brightest flavor, bottled lemon juice can be used for the glaze if fresh is unavailable. However, adjust the quantity as bottled juice can sometimes be more concentrated.
    How do I know when the loaf is fully baked?
    The loaf is done when a wooden skewer or toothpick inserted into the center comes out clean. The top should be golden brown and the edges just beginning to pull away from the pan.
    Can I make this lemon loaf ahead of time?
    Yes, this lemon loaf tastes even better the next day! You can bake it, cool it completely, glaze it, and then store it at room temperature for up to 3-4 days.
    How should I store leftover lemon loaf?
    Store the cooled and glazed lemon loaf in an airtight container at room temperature for up to 3-4 days. For longer storage, you can refrigerate it for up to a week.
    What if my glaze is too thin or too thick?
    If your glaze is too thin, whisk in a tablespoon of extra sifted powdered sugar until it reaches the desired consistency. If it’s too thick, add a tiny bit (½ teaspoon at a time) of fresh lemon juice or milk until it’s easily pourable.
    Can I add poppy seeds to this recipe?
    Absolutely! For a lemon poppy seed loaf, add 2 tablespoons of poppy seeds to your dry ingredients in Step 2. This will introduce a lovely texture and visual appeal.
    Can I substitute the whole milk?
    You can substitute whole milk with other dairy or non-dairy milks like 2% milk, almond milk, or oat milk. The texture might vary slightly, but it will still be delicious.
    Why is my lemon loaf dry?
    A dry lemon loaf is usually a sign of overbaking or overmixing. Ensure you only bake until a skewer comes out clean, and mix the batter just until combined, avoiding excessive stirring.

    [redirect_script url=”aHR0cHM6Ly9lYXN5ZGFzaHJlY2lwZXMuY29tL3N0YXJidWNrcy1sZW1vbi1sb2FmLXJlY2lwZS13aXRoLWdsYXplLz91dG1fc291cmNlPXBpbnRlcmVzdC5jb20mdXRtX21lZGl1bT1yZWZlcnJhbA==”]

  • Warm Spiced Carrot Cake Baked Oats: A Wholesome Breakfast Treat

    Warm Spiced Carrot Cake Baked Oats: A Wholesome Breakfast Treat

    Embrace a cozy and nutritious start to your day with these delightful Carrot Cake Baked Oats. This recipe transforms classic carrot cake flavors into a comforting, wholesome breakfast, perfect for meal prepping or a leisurely morning. Packed with fiber-rich oats, fresh carrots, and aromatic spices, it’s a guilt-free indulgence that feels like dessert but nourishes like a power-packed meal.

    Ingredients

    • 1 ½ cups (135g) Rolled Oats (old-fashioned, not instant)
    • 1 ½ cups (360ml) Milk (dairy or non-dairy, such as unsweetened almond or soy)
    • 2 large Eggs (room temperature, or flax eggs for a vegan option)
    • 1 cup (120g) Shredded Carrots (finely shredded for best texture)
    • ¼ cup (60ml) Maple Syrup (pure) or Honey (liquid sweetener)
    • 1 teaspoon Baking Powder (fresh and active)
    • 1 teaspoon Ground cinnamon (fragrant)
    • ½ teaspoon Ground nutmeg (freshly grated if possible)
    • ¼ teaspoon Ground ginger (pungent)
    • 1 teaspoon Vanilla Extract (pure)

    Instructions

    1. Prepare Oven and Dish: Begin by preheating your oven to a steady 375°F (190°C). As it heats, lightly grease an 8×8 inch baking dish or individual ramekins using butter, cooking spray, or coconut oil. This crucial step ensures easy release and helps create beautifully golden edges for your baked oats.
    2. Combine Wet Ingredients: In a generously sized mixing bowl, thoroughly whisk together the milk, eggs (or flax egg mixture), pure maple syrup or honey, vanilla extract, and all the warm spices (cinnamon, nutmeg, and ginger) until uniformly blended and smooth. This creates the flavorful liquid base for your oats.
    3. Combine Dry Ingredients: In a separate, medium-sized bowl, combine the rolled oats and baking powder. Stir them together briefly with a spoon or whisk to ensure they are evenly distributed, which will help the oats rise properly during baking.
    4. Mix Wet and Dry, Add Carrots: Gently pour the dry oat mixture into the wet ingredients. Using a spatula or wooden spoon, stir just until the ingredients are mostly combined. Immediately fold in the finely shredded carrots. It’s important not to overmix at this stage; a few lumps are fine. The mixture will appear quite loose and pourable, which is perfect.
    5. Pour into Dish: Carefully transfer the carrot cake oat batter into your prepared baking dish or ramekins, aiming for an even layer. If you are using individual ramekins, fill each approximately two-thirds full to allow for a slight rise.
    6. Bake Until Golden: Place the dish into the preheated oven and bake for 25 to 30 minutes, or until the top is beautifully golden brown, the edges are visibly set, and a wooden skewer or toothpick inserted into the center comes out clean with no wet batter. The delightful aroma of warm spices will fill your kitchen, signaling deliciousness!

    Baker’s Notes

    • For the best texture, use old-fashioned rolled oats rather than quick or instant oats, which can become too mushy.
    • Ensure your baking powder is fresh for optimal lift; old baking powder can result in dense oats.
    • Using room temperature eggs helps them incorporate more smoothly into the wet ingredients, creating a more uniform batter.
    • Don’t be afraid to experiment with different non-dairy milks to find your favorite flavor profile.

    Try These Variations

    • Nutty Crunch: Fold in ½ cup of chopped walnuts or pecans along with the shredded carrots for added texture and healthy fats.
    • Fruity Boost: Add ½ cup of raisins or dried cranberries for extra bursts of sweetness and chewiness.
    • Coconut Twist: Stir in ¼ cup of shredded unsweetened coconut for a tropical hint that complements the carrot cake flavors.
    • Protein Power: Mix a scoop of your favorite vanilla or unflavored protein powder into the dry ingredients before combining with the wet for an extra protein kick.

    Make Ahead / Freeze

    • Make Ahead (Refrigerate): Prepare the entire mixture as directed, pour it into your baking dish, cover tightly with plastic wrap, and refrigerate overnight (up to 24 hours). Bake in the morning as usual, adding an extra 5-10 minutes to the baking time if baking from cold.
    • Storage (Leftovers): Store any leftover baked oats in an airtight container in the refrigerator for up to 3-4 days.
    • Reheating: Reheat individual portions in the microwave for 1-2 minutes, or in a preheated oven at 300°F (150°C) for 10-15 minutes until warmed through.
    • Freezing: Once fully cooled, individual baked oat portions can be wrapped tightly in plastic wrap and then foil, or placed in freezer-safe containers, and frozen for up to 2-3 months. Thaw overnight in the refrigerator before reheating.

    Prep time: 12 minutes | Cook time: 28 minutes | Total time: 40 minutes | Yield: 4 servings

    FAQs

    Can I use quick oats instead of rolled oats?
    While rolled oats are recommended for their chewiness and texture, quick oats can be used in a pinch. However, they may result in a softer, more uniform consistency that some people find mushy.
    What is a flax egg and how do I make it?
    A flax egg is a vegan substitute made by combining 1 tablespoon of ground flaxseed meal with 3 tablespoons of water for each egg. Let it sit for 5-10 minutes until it thickens into a gel-like consistency before using.
    Can I make this recipe ahead of time for breakfast?
    Absolutely! You can prepare the mixture the night before, pour it into your baking dish, cover, and refrigerate. Bake it in the morning, adding an extra 5-10 minutes to the cook time if baking from cold.
    How do I store and reheat leftover baked oats?
    Store any leftovers in an airtight container in the refrigerator for 3-4 days. Reheat individual servings in the microwave for 1-2 minutes or in a 300°F (150°C) oven for 10-15 minutes until warm.
    What kind of milk is best for these baked oats?
    You can use any milk you prefer, whether it’s dairy milk (like whole or 2%) or a non-dairy alternative such as unsweetened almond, soy, or oat milk. The choice will slightly impact the flavor and creaminess.
    How do I know when my baked oats are fully cooked?
    The oats are done when the top is golden brown, the edges are set, and a wooden skewer or toothpick inserted into the center comes out clean, indicating no wet batter remains.
    My baked oats seem too dry/crumbly or too wet. What went wrong?
    If too dry, your oven might run hot, or you over-baked; try reducing cook time slightly next time. If too wet, it might be under-baked; bake for a few more minutes until a toothpick comes out clean. Ensure precise measurements of wet and dry ingredients.

    [redirect_script url=”aHR0cHM6Ly9lYXN5ZGFzaHJlY2lwZXMuY29tL2NhcnJvdC1jYWtlLWJha2VkLW9hdHMtcmVjaXBlLWJyZWFrZmFzdC1zdHlsZS8/dXRtX3NvdXJjZT1waW50ZXJlc3QuY29tJnV0bV9tZWRpdW09cmVmZXJyYWw=”]

  • Irresistible Pecan Pie Bread Pudding with Decadent Bourbon Sauce

    Irresistible Pecan Pie Bread Pudding with Decadent Bourbon Sauce

    Indulge in a comforting classic with this luscious Pecan Pie Bread Pudding, a delightful dessert that transforms simple ingredients into an extraordinary treat. Featuring tender, vanilla-infused bread studded with crunchy pecans and drizzled with a decadent optional bourbon sauce, this pudding offers all the nostalgic flavors of pecan pie in an easy-to-serve format perfect for any occasion.

    Ingredients

    • 8-10 cups stale bread (challah, brioche, or French), cut into 1-inch cubes
    • 4 large eggs, room temperature
    • 2 cups (480ml) whole milk or heavy cream
    • ¾ cup (150g) granulated sugar
    • 1 tablespoon pure vanilla extract
    • 1 cup (115g) chopped pecans
    • ½ cup (113g) unsalted butter, divided
    • ½ cup (100g) packed light brown sugar
    • ¼ cup (60ml) heavy cream
    • 2 tablespoons (30ml) bourbon, optional
    • 1 pinch fine sea salt

    Instructions

    1. Prepare Your Bread Base: Begin by preparing 8-10 cups of day-old challah, brioche, or French bread, ensuring it’s cut into uniform 1-inch cubes. If your bread isn’t sufficiently stale, spread the cubes in a single layer on a baking sheet and allow them to air dry for 1-2 hours, or toast them briefly in a low oven at 200°F (95°C) for about 15 minutes until slightly crisp but not browned. This step is crucial for optimal custard absorption.
    2. Whisk the Rich Custard: In a generously sized mixing bowl, whisk together the 4 large, room temperature eggs, 2 cups of whole milk (or for an extra rich pudding, use heavy cream), ¾ cup of granulated sugar, 1 tablespoon of pure vanilla extract, and a pinch of fine sea salt. Whisk vigorously until all ingredients are thoroughly combined and the sugar has dissolved, creating a smooth and uniform custard base.
    3. Combine, Soak & Integrate Flavors: Add the prepared bread cubes and the 1 cup of chopped pecans to the custard mixture. Gently fold the bread and pecans into the custard, making sure every piece of bread is fully coated. Allow this mixture to soak at room temperature for 20-30 minutes, periodically pressing the bread down with a spoon to encourage maximum absorption of the liquid, which will result in a supremely moist pudding.
    4. Achieve Golden Perfection in the Oven: While the mixture soaks, preheat your oven to 350°F (175°C). Liberally butter a 9×13 inch baking dish to prevent sticking. Once the soaking time is complete, pour the custard-soaked bread and pecan mixture evenly into the prepared baking dish. Bake for 45-60 minutes, or until the top is beautifully golden brown and the center feels set. A knife inserted near the center should emerge clean, indicating the pudding is cooked through.
    5. Craft the Decadent Bourbon Sauce: As the pudding bakes, melt ½ cup of unsalted butter in a medium saucepan over medium heat. Once melted, whisk in ½ cup of packed light brown sugar, ¼ cup of heavy cream, and the 2 tablespoons of bourbon, if you are using it. Bring the mixture to a gentle simmer, whisking constantly for 5-7 minutes. The sauce will thicken slightly and become glossy; be careful not to scorch it. Remove from heat once thickened to your desired consistency.
    6. Cool, Serve & Garnish with Sauce: Remove the Pecan Pie Bread Pudding from the oven and allow it to cool slightly for about 10-15 minutes before serving. This brief cooling period helps the pudding set further and makes for cleaner slices. Drizzle generously with the warm Bourbon Sauce, allowing it to seep into the tender pudding. Serve warm and savor each delightful bite.

    Why You’ll Love It

    This Pecan Pie Bread Pudding is more than just a dessert; it’s a celebration of comfort food. You’ll adore the way humble ingredients transform into a sophisticated treat with a tender, custardy interior and a delightful crunch from the pecans. The optional bourbon sauce adds a layer of richness that truly elevates the experience, making it perfect for both casual family dinners and elegant holiday gatherings. It’s a fantastic way to use up day-old bread, minimizing waste while maximizing flavor.

    Pro Tips

    • Bread Choice is Key: While challah, brioche, or French bread are excellent, ensure it’s truly stale. Fresh bread absorbs too much liquid and can result in a soggy pudding.
    • Don’t Rush the Soak: The 20-30 minute soaking time is essential for the bread to fully absorb the custard, leading to a perfectly moist and flavorful pudding. Pressing the bread down occasionally helps.
    • Temperature Matters: Room temperature eggs and milk will blend more smoothly into the custard and absorb more evenly into the bread, contributing to a better texture.
    • Perfect Pudding Doneness: The knife test is your best friend. If it comes out clean, the pudding is set. Overbaking can lead to a dry texture, so keep an eye on it after 45 minutes.
    • Bourbon Sauce Control: If you prefer a thicker sauce, simmer it for a minute or two longer, but keep whisking to prevent burning. For a thinner sauce, you can add a touch more cream or milk.

    Serving Suggestions

    • Warm and Saucy: The classic way to enjoy this bread pudding is warm, generously drizzled with the homemade Bourbon Sauce.
    • A La Mode: For an extra decadent treat, serve warm slices with a scoop of vanilla bean ice cream or a dollop of freshly whipped cream. The contrast of hot and cold is delightful.
    • Coffee or Tea Pairing: This rich dessert pairs wonderfully with a strong cup of coffee, espresso, or a robust black tea, balancing its sweetness.
    • Holiday Feast Staple: It makes an excellent addition to any holiday spread, offering a comforting alternative or complement to traditional pecan pie.
    • Brunch Star: Though rich, a smaller portion can even be a luxurious addition to a special brunch menu.

    Yields: 8-10 servings. Prep time: 25 minutes. Cook time: 50 minutes.

    FAQs

    Can I use fresh bread for this recipe?
    While stale bread is preferred for optimal custard absorption and texture, you can use fresh bread if necessary. Simply cut it into cubes and toast it lightly in a 200°F (95°C) oven for 15-20 minutes, or spread it on a baking sheet to air dry for a few hours, to help dry it out.
    What kind of pecans should I use?
    You can use either pecan halves or chopped pecans. If using halves, rough chop them yourself for better distribution and texture within the pudding. Toasting them lightly before adding can also enhance their flavor.
    Can I make Pecan Pie Bread Pudding ahead of time?
    Yes, this bread pudding is an excellent make-ahead dessert. You can assemble it, cover it, and refrigerate it overnight before baking. For the sauce, you can prepare it a day or two in advance and gently reheat it before serving.
    How do I know when the bread pudding is fully cooked?
    The pudding is done when the top is golden brown and a knife inserted into the center comes out clean. The center should be set, not jiggly, indicating the custard has fully cooked through.
    Is the bourbon in the sauce essential, or can I omit it?
    The bourbon is optional but highly recommended as it adds a wonderful depth of flavor. If you prefer to omit it, you can substitute it with an equal amount of milk, cream, or even a splash of pecan liqueur or non-alcoholic vanilla extract for a similar flavor profile.
    How should I store leftovers?
    Store any leftover bread pudding covered tightly in the refrigerator for up to 3-4 days. The sauce can also be stored separately in an airtight container in the fridge.
    Can I freeze this bread pudding?
    Yes, you can freeze baked and cooled bread pudding. Wrap individual portions or the entire dish tightly in plastic wrap, then in foil. It can be frozen for up to 2-3 months. Thaw overnight in the refrigerator and reheat gently.
    What if I don’t have challah or brioche bread?
    French bread or even a good quality sandwich bread (slightly dried out) can be used as alternatives. The key is to use a sturdy, slightly dense bread that can hold up to soaking without becoming mushy.

    [redirect_script url=”aHR0cHM6Ly9lYXN5ZGFzaHJlY2lwZXMuY29tL3BlY2FuLXBpZS1icmVhZC1wdWRkaW5nLXJlY2lwZS13aXRoLWJvdXJib24tc2F1Y2UvP3V0bV9zb3VyY2U9cGludGVyZXN0LmNvbSZ1dG1fbWVkaXVtPXJlZmVycmFs”]

  • Effortless Golden Butter Swim Biscuits: A One-Dish Wonder

    Effortless Golden Butter Swim Biscuits: A One-Dish Wonder

    Dive into the simplest biscuit experience with these incredibly easy Butter Swim Biscuits. Baked in a pool of melted butter, they emerge golden, tender, and perfectly moist, offering a delightful texture that’s both soft and slightly crisp.

    Ingredients

    • 2 cups (240g) all-purpose flour, unbleached
    • 2 tablespoons (25g) granulated sugar
    • 1 tablespoon baking powder, aluminum-free
    • 1 teaspoon fine sea salt
    • 1 cup (240ml) whole milk, cold
    • 1 stick (½ cup/113g) unsalted butter, melted

    Instructions

    1. Preheat your oven to a hot 450°F (230°C). While the oven heats, melt the 1 stick (½ cup) unsalted butter in a microwave-safe bowl or small saucepan until fully liquid. Carefully pour the shimmering melted butter into a 9×13 inch baking dish, tilting the dish gently to ensure the entire bottom is evenly coated.
    2. In a large mixing bowl, thoroughly whisk together the 2 cups all-purpose flour, 2 tablespoons granulated sugar, 1 tablespoon baking powder, and 1 teaspoon salt. Ensure there are no lumps and the leavening agent is well distributed for an even rise.
    3. Add the 1 cup cold whole milk directly into the bowl with the dry ingredients. Using a sturdy spoon or rubber spatula, mix just until the ingredients are moistened and a shaggy, sticky dough forms. Be careful not to overmix, as this develops gluten and can lead to tough biscuits; a few dry streaks are perfectly fine.
    4. With a large spoon, carefully dollop spoonfuls of the sticky biscuit dough evenly over the melted butter in the prepared baking dish. Once all the dough is in the dish, gently spread it towards the edges with the back of your spoon or a spatula, ensuring it forms a relatively even layer. Do not press down too firmly.
    5. Transfer the dish to the preheated oven and bake for 20 minutes, or until the tops of the biscuits are beautifully golden brown, puffed up, and cooked through. The edges should appear slightly crispy where they meet the butter. A toothpick inserted into the center should come out clean. Allow them to cool slightly in the dish before serving warm.

    Recipe At-A-Glance

    These butter swim biscuits are a revelation in simplicity and flavor. With just six basic ingredients, you can whip up a batch of incredibly tender, buttery biscuits in under 30 minutes. The genius lies in baking the dough directly in a pool of melted butter, ensuring every bite is rich and moist with a perfectly crisp bottom. Ideal for breakfast, brunch, or alongside savory dishes.

    Baker’s Notes

    • Do not overmix the dough. Overworking the flour develops gluten, which results in tough, dense biscuits instead of light, fluffy ones. Mix only until just combined.
    • For extra flaky layers, ensure your milk is very cold. The contrast with the hot oven helps create steam and lift.
    • Resist the urge to check the oven frequently. Let the biscuits bake undisturbed for at least 15 minutes to allow them to rise properly and set.
    • Adjust baking time slightly based on your oven; ovens can vary. Look for deep golden tops and puffed centers.

    Try These Variations

    • For a cheesy twist, fold in ½ cup shredded cheddar cheese with the dry ingredients.
    • Sweeten them further by adding 1 teaspoon vanilla extract to the milk or by sprinkling coarse sugar on top before baking.
    • For a savory herb biscuit, mix in 1 tablespoon chopped fresh chives or dried dill with the dry ingredients.
    • Add a touch of warmth with ¼ teaspoon ground cinnamon or nutmeg to the dry mix.

    Prep time: 8 minutes Cook time: 20 minutes Yield: 12 medium biscuits

    FAQs

    Can I use cold butter instead of melted?
    No, the melted butter is crucial for this recipe. It creates the ‘butter swim’ effect, ensuring incredibly moist biscuits and preventing them from sticking while baking.
    What kind of flour is best for biscuits?
    All-purpose flour works perfectly for these biscuits. While self-rising flour could work, you’d need to adjust the baking powder and salt, so stick with all-purpose for the specified ratios.
    My biscuits didn’t rise, what went wrong?
    The most common culprits are old or expired baking powder, or overmixing the dough. Ensure your baking powder is fresh and mix the dough minimally, just until moistened.
    How should I store leftover butter swim biscuits?
    Store cooled biscuits in an airtight container at room temperature for up to 2-3 days. Reheat gently in the microwave for 15-20 seconds or in a warm oven for a few minutes.
    Can I make these biscuits ahead of time?
    The dough is best baked immediately. However, you can melt the butter and whisk the dry ingredients the night before. Combine the wet and dry ingredients just before baking.
    Can I use a different size baking dish?
    A 9×13 inch dish is ideal for the specified quantity, ensuring the biscuits are snugly nestled and benefit from the butter pool. If you use a smaller dish, the biscuits will be taller and may need a minute or two longer to cook. A larger dish might result in thinner, crispier biscuits.
    Can I freeze butter swim biscuits?
    Yes, baked and cooled biscuits can be frozen in an airtight freezer bag for up to 1 month. Thaw at room temperature and reheat in a low oven (300°F/150°C) until warm through.

    [redirect_script url=”aHR0cHM6Ly9lYXN5ZGFzaHJlY2lwZXMuY29tL2J1dHRlci1zd2ltLWJpc2N1aXQtcmVjaXBlLWJ1dHRlcnktcGFuLWJha2VkLz91dG1fc291cmNlPXBpbnRlcmVzdC5jb20mdXRtX21lZGl1bT1yZWZlcnJhbA==”]