Category: Desserts And Baking

  • Easy Homemade Rocky Road Fudge with Gooey Marshmallow Chunks

    Easy Homemade Rocky Road Fudge with Gooey Marshmallow Chunks

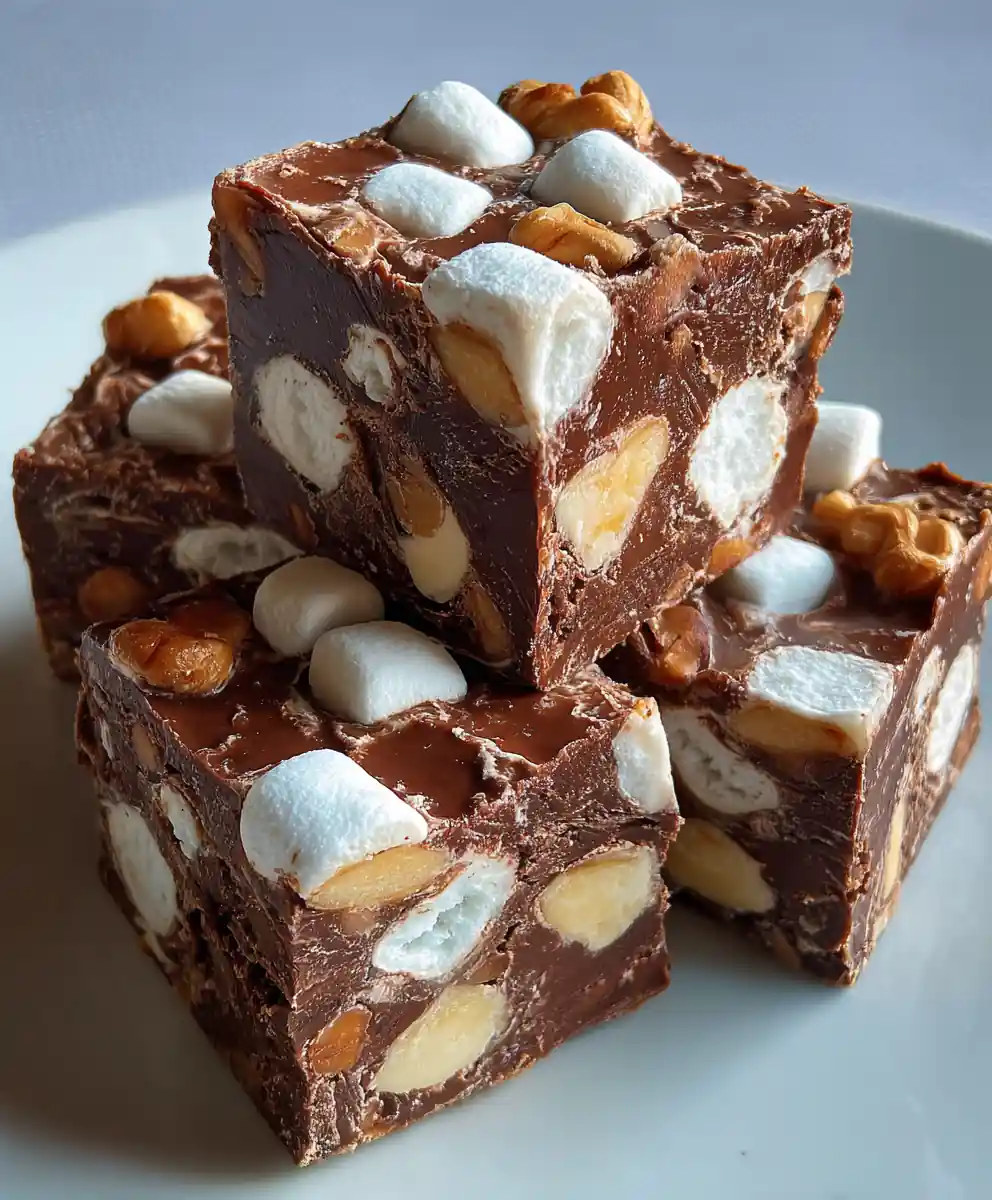
    Indulge in the nostalgic delight of homemade rocky road fudge. This no-bake treat effortlessly combines rich chocolate, soft marshmallows, and crunchy nuts into a perfectly set confection that’s surprisingly simple to make.

    Ingredients

    • 14 ounces (397g) sweetened condensed milk, full-fat
    • 2 cups (340g) good quality chocolate chips (semi-sweet or milk)
    • ½ cup (113g) unsalted butter, cut into pieces
    • 1 teaspoon pure vanilla extract
    • 3 cups (150g) mini marshmallows
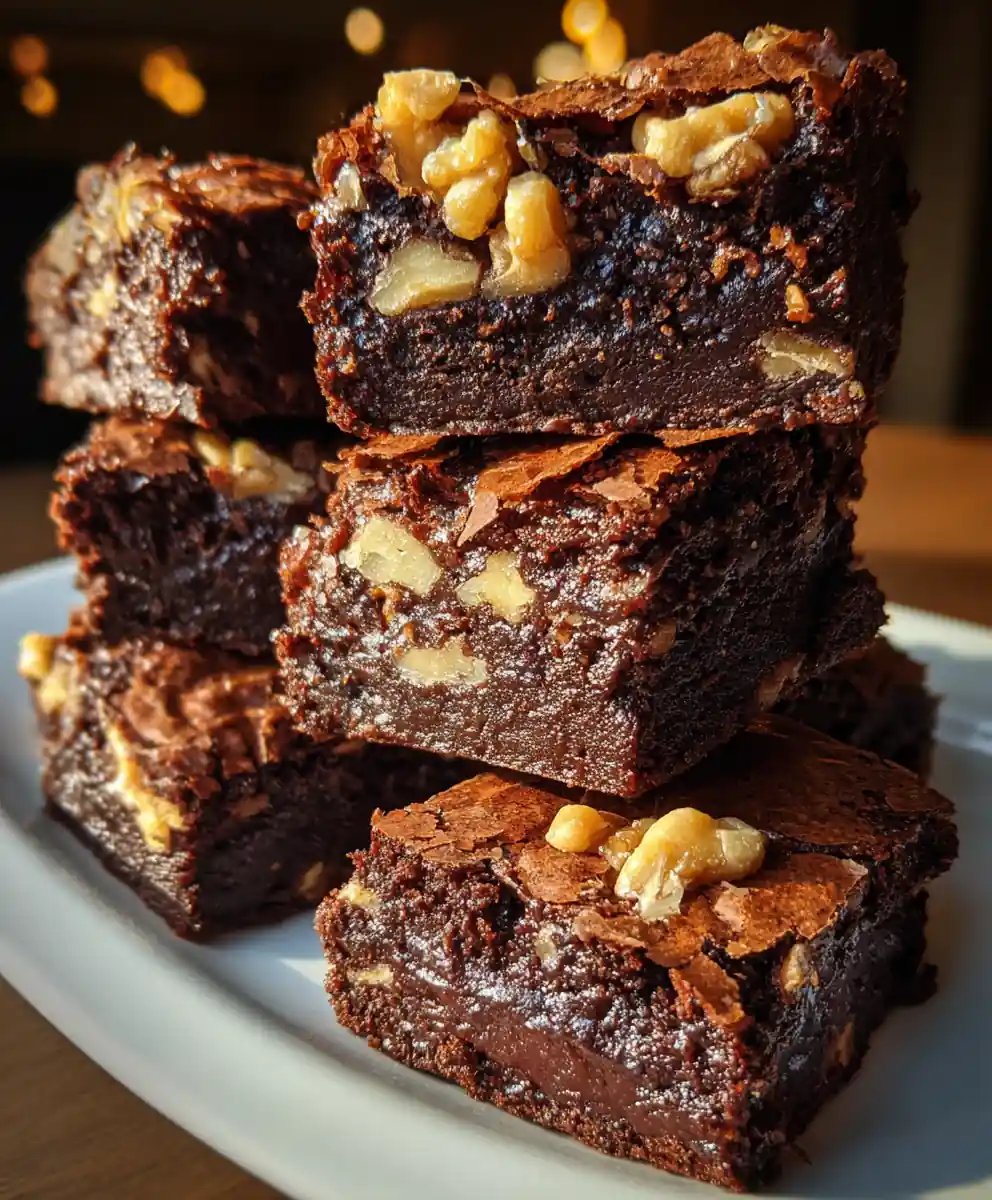
    • 1 cup (115g) chopped nuts (such as walnuts or pecans)

    Instructions

    1. Melt the Base Ingredients: In a medium-sized heavy-bottomed saucepan, combine the cut unsalted butter, chocolate chips, and sweetened condensed milk. Place the saucepan over low heat. Stir continuously with a rubber spatula or wooden spoon, ensuring the mixture melts slowly and evenly without scorching. Continue stirring for about 7-9 minutes until the chocolate is fully melted and the mixture is smooth, glossy, and well combined. Crucially, do not allow it to boil, as this can cause the fudge to seize or become grainy.
    2. Infuse Flavor and Texture: Immediately remove the saucepan from the heat. Stir in the pure vanilla extract until fully incorporated. Working quickly, gently fold in the mini marshmallows and chopped nuts. Continue folding until these ingredients are evenly distributed throughout the warm chocolate mixture. Speed is important here, as the fudge will begin to set as it cools.
    3. Prepare and Press into Pan: Promptly pour the warm fudge mixture into an 8×8 inch (20×20 cm) baking pan that has been fully lined with parchment paper, leaving a generous overhang on all sides. This parchment sling will make for effortless removal later. Use an offset spatula or the back of a spoon to firmly and evenly press the fudge into the pan, ensuring a compact and smooth surface.
    4. Chill Until Firm: Transfer the pan to the refrigerator and allow the fudge to chill for a minimum of 2½ to 3 hours, or until it is completely firm to the touch. Adequate chilling is essential for clean cuts and the proper fudge consistency.
    5. Slice and Serve: Once thoroughly chilled, use the parchment paper overhang to carefully lift the solid block of fudge out of the pan and onto a cutting board. For perfect squares, warm a sharp knife under hot water, dry it, and then slice the fudge into 1-inch (2.5 cm) pieces. Repeat warming and drying the knife between cuts for the cleanest results.

    Why You’ll Love It

    This Rocky Road Fudge recipe is an absolute dream for anyone craving a quick, satisfying dessert with minimal fuss. It’s a no-bake wonder that comes together with just a few ingredients, delivering a rich chocolatey base studded with chewy marshmallows and crunchy nuts. Perfect for gifting, holiday platters, or simply a sweet treat for yourself.

    Pro Tips

    • Quality Ingredients Matter: Use good quality chocolate chips for the best flavor and texture. High-fat condensed milk also contributes to a creamier fudge.
    • Low and Slow Melting: Never rush the melting process. Low heat prevents the chocolate from burning and ensures a smooth, lump-free base. Stirring constantly is key.
    • Working Quickly: Once the chocolate base is melted and removed from heat, work swiftly to incorporate the vanilla, marshmallows, and nuts before the mixture starts to cool and thicken too much.
    • Parchment Paper is Your Friend: Lining the pan with parchment paper is crucial for easy removal. Leave an overhang to create handles.
    • Warm Knife for Clean Cuts: For perfectly neat squares, dip your knife in hot water and wipe it dry between each cut. This helps glide through the fudge and prevent sticking.

    Leftovers & Reheating

    • Storage: Store rocky road fudge in an airtight container at room temperature for up to 1 week, or in the refrigerator for up to 2 weeks. If refrigerating, let it come to room temperature for 15-20 minutes before serving for the best texture.
    • Freezing: This fudge freezes beautifully! Wrap individual pieces tightly in plastic wrap, then place them in a freezer-safe bag or container. It can be frozen for up to 2-3 months. Thaw at room temperature for several hours before enjoying.
    • Make Ahead: Rocky Road Fudge is an excellent make-ahead dessert. Prepare it days in advance and keep it chilled until you’re ready to serve.

    Prep Time: 17 minutes | Cook Time: 8 minutes | Chill Time: 2½ hours | Total Time: 2 hours 35 minutes | Yield: Approximately 36 squares

    FAQs

    Can I use different types of chocolate chips?
    Yes, you can use a mix of semi-sweet, milk, or even dark chocolate chips, or just one type, depending on your preference for sweetness and chocolate intensity.
    What if my fudge doesn’t set properly?
    If your fudge is too soft, it likely didn’t chill long enough, or the mixture might have been cooked too high or not long enough. Ensure you’re using full-fat sweetened condensed milk and chill for the recommended time.
    Can I substitute the nuts?
    Absolutely! Walnuts and pecans are classic, but you can also use almonds, peanuts, or even omit them if you prefer a nut-free version. Lightly toasting nuts beforehand can enhance their flavor.
    How do I get clean cuts when slicing?
    The best trick is to use a sharp knife that has been warmed under hot water and then wiped dry. Repeat this process for each cut to achieve perfectly clean, non-sticky slices.
    Is there a way to make this fudge dairy-free?
    For a dairy-free version, use dairy-free chocolate chips, a plant-based butter alternative, and dairy-free sweetened condensed milk (often made with coconut milk).
    Can I add other mix-ins?
    Yes, feel free to get creative! Sprinkles, crushed cookies, pretzels, or dried fruit can be folded in with the marshmallows and nuts for extra flavor and texture.
    What’s the best way to store leftover fudge?
    Store leftover fudge in an airtight container at room temperature for up to a week, or in the refrigerator for up to two weeks. It also freezes well for longer storage.

    [redirect_script url=”aHR0cHM6Ly93d3cuY29va2luZ3dpdGhsb3JhLmNvbS9yZWNpcGUtZm9yLXJvY2t5LXJvYWQtZnVkZ2Utd2l0aC1tYXJzaG1hbGxvdy1jaHVua3M/dXRtX3NvdXJjZT1waW50ZXJlc3QuY29tJnV0bV9tZWRpdW09cmVmZXJyYWw=”]

  • Classic Palmer House Brownies with Toasted Walnut Topping

    Classic Palmer House Brownies with Toasted Walnut Topping

    Experience the timeless delight of these fudgy Palmer House Brownies, crowned with a crunchy layer of toasted walnuts. This classic recipe delivers a perfect balance of rich chocolate flavor and satisfying texture, making it an ideal treat for any occasion.

    Ingredients

    • Unsalted butter, softened: 1 cup (226g)
    • Granulated sugar: 2 cups (400g)
    • Large eggs, room temperature: 4
    • Pure vanilla extract: 2 teaspoons
    • All-purpose flour, sifted: 1 cup (120g)
    • Unsweetened cocoa powder: ¾ cup (75g)
    • Baking powder: ½ teaspoon
    • Fine sea salt: ½ teaspoon
    • Walnuts, roughly chopped: 1 cup (120g)

    Instructions

    1. Prepare your baking pan: Preheat your oven to a steady 350°F (175°C). Take a 9×13 inch baking pan and line it thoroughly with parchment paper, allowing a generous overhang on the longer sides. This parchment “sling” will be your secret weapon for effortlessly lifting the cooled brownies from the pan later.
    2. Melt butter and combine with sugar: In a spacious, heavy-bottomed saucepan, gently melt the unsalted butter over very low heat until it’s completely liquid. Remove the pan from the heat immediately. Add the granulated sugar, stirring vigorously with a wooden spoon or spatula until the sugar is fully incorporated and the mixture looks uniform, about 1-2 minutes. This initial step helps dissolve some of the sugar.
    3. Incorporate wet ingredients: Into the warm butter-sugar mixture, crack in the large eggs one by one. After each egg, beat it in thoroughly until no streaks of yolk remain and the mixture is smooth and glossy. Once all eggs are incorporated, stir in the pure vanilla extract, appreciating its aromatic fragrance as it blends in.
    4. Whisk dry ingredients: In a separate, medium-sized bowl, combine the sifted all-purpose flour, unsweetened cocoa powder, baking powder, and fine sea salt. Whisk these dry ingredients together diligently for about 30 seconds to ensure they are fully aerated and evenly distributed, which prevents pockets of leavener.
    5. Gently combine mixtures: Gradually add the dry ingredient mixture into the wet ingredients in two or three additions. Use a spatula to mix very gently, folding just until no streaks of flour are visible. Crucially, avoid overmixing, as excessive gluten development will lead to dense, tough brownies instead of a tender, fudgy texture.
    6. Fold in internal walnuts: Measure out half of your roughly chopped walnuts. Gently fold these nuts into the prepared brownie batter. Distribute them evenly throughout for an enjoyable textural contrast in every bite.
    7. Pour and top the batter: Carefully transfer the rich brownie batter into your parchment-lined 9×13 inch baking pan. Use an offset spatula or the back of a spoon to spread the batter evenly into all corners. Generously sprinkle the remaining half of the chopped walnuts over the entire surface of the batter, pressing them lightly to adhere.
    8. Bake to perfection: Place the pan into your preheated 350°F (175°C) oven and bake for 26-28 minutes. Begin checking around the 25-minute mark. The brownies are ready when a wooden toothpick or cake tester inserted into the center comes out with moist crumbs attached – not wet batter – and the edges appear set and slightly pulled away from the sides of the pan.
    9. Cool completely: Remove the baked brownies from the oven and set the pan on a wire rack. Allow them to cool completely in the pan for at least 2-3 hours, or even longer. This extended cooling time is absolutely essential for the brownies to set properly, ensuring clean, perfect slices and that signature fudgy consistency.

    Pro Tips

    • Room Temperature Ingredients: Ensure eggs and butter are at room temperature for a smoother, more emulsified batter, leading to a superior texture.
    • Do Not Overmix: The most common pitfall! Mix dry ingredients into wet until just combined to prevent tough, cakey brownies.
    • Cooling is Crucial: Resist the urge to cut warm brownies. They need to cool completely to achieve that dense, fudgy center and clean edges.
    • Parchment Overhang: Don’t skip this! It makes lifting the entire slab of brownies out of the pan effortless for neat slicing.

    Serving Suggestions

    • Classic Plain: Enjoy them as is, letting their rich flavor shine.
    • A La Mode: Warm slightly and serve with a scoop of vanilla bean ice cream.
    • Drizzled Delights: A drizzle of homemade caramel sauce or a sprinkle of flaky sea salt elevates the experience.
    • Coffee Companion: Pair with a hot cup of coffee, a latte, or a cold glass of milk for a comforting treat.

    Storage & Make-Ahead

    • At Room Temperature: Store cooled brownies in an airtight container at room temperature for up to 3-4 days.
    • Refrigerated: For a firmer, chewier brownie, store in an airtight container in the refrigerator for up to a week. Bring to room temperature or warm slightly before serving.
    • Freezing: Tightly wrap individual brownies or the entire slab in plastic wrap, then aluminum foil. Freeze for up to 2-3 months. Thaw at room temperature.
    • Make-Ahead: The batter can be made up to 24 hours in advance and stored in the fridge, but bring to room temp before baking.

    Prep Time: 18 minutes. Cook Time: 28 minutes. Yield: 16 decadent brownies.

    FAQs

    Can I use salted butter instead of unsalted?
    While unsalted butter allows for precise salt control, you can use salted butter. Just reduce the added salt in the recipe from ½ teaspoon to ¼ teaspoon to prevent them from being too salty.
    Why are my brownies cakey instead of fudgy?
    Cakey brownies often result from overmixing the batter after adding the flour. Overmixing develops gluten, leading to a lighter, more cake-like texture. Mix only until the dry ingredients are just incorporated.
    What’s the best way to cut brownies cleanly?
    Ensure the brownies are completely cooled. For extra neat cuts, refrigerate the pan for 30 minutes before cutting, and use a sharp knife wiped clean between each slice. A plastic knife can also yield surprisingly clean edges.
    Can I substitute different nuts for walnuts?
    Absolutely! Pecans, almonds, or even a mix of nuts would be delicious. For best flavor, toast any nuts lightly before adding them to the batter.
    How do I know when the brownies are done baking?
    The edges should look set and slightly pulled away from the pan. A toothpick inserted into the center should come out with moist crumbs attached, but no wet batter. Undercooking slightly yields a fudgier result, while overbaking makes them dry.
    Can I make these brownies gluten-free?
    You can experiment with a 1:1 gluten-free all-purpose flour blend. Ensure the blend contains xanthan gum, or add ½ teaspoon per cup of flour, to maintain texture. Results may vary slightly.
    What size pan is best if I don’t have a 9×13?
    A 9×9 inch pan will work for a thicker brownie, but you’ll need to increase the baking time significantly, possibly up to 40-50 minutes, and watch carefully for doneness. A thinner brownie will result in a larger pan like 10×15, requiring less bake time.

    [redirect_script url=”aHR0cHM6Ly93d3cuY29va2luZ3dpdGhsb3JhLmNvbS9wYWxtZXItaG91c2UtYnJvd25pZS1yZWNpcGUtd2l0aC13YWxudXQtdG9wcGluZz91dG1fc291cmNlPXBpbnRlcmVzdC5jb20mdXRtX21lZGl1bT1yZWZlcnJhbA==”]

  • Irresistible Spiced Pumpkin Scones with Sweet Maple Glaze

    Irresistible Spiced Pumpkin Scones with Sweet Maple Glaze

    Embrace the cozy flavors of autumn with these delightful Spiced Pumpkin Scones, perfectly balanced with a luxurious maple glaze. This recipe promises tender, fragrant scones bursting with warm spices and the subtle sweetness of pumpkin, making them an ideal treat for breakfast, brunch, or an afternoon pick-me-up.

    Ingredients

    • 2 cups all-purpose flour, unbleached
    • 1 cup pumpkin puree, pure (not pie filling)
    • ½ cup light brown sugar, packed
    • ½ cup unsalted butter, very cold and cubed
    • 1 tbsp baking powder, aluminum-free
    • ½ tsp baking soda
    • 1 tsp ground cinnamon, Ceylon
    • ½ tsp ground nutmeg, freshly grated
    • ½ tsp ground ginger
    • ¼ tsp ground cloves (or 1 ½ tsp quality pumpkin pie spice blend)
    • ½ cup heavy cream, cold (or full-fat buttermilk)
    • ¼ cup pure maple syrup, Grade A
    • 1 ½ cups powdered sugar, sifted
    • 2-3 tbsp whole milk or additional heavy cream (for glaze)
    • ½ tsp fine sea salt
    • 1 tsp pure vanilla extract
    • 1 tsp blackstrap molasses (optional, for deeper flavor and color)

    Instructions

    1. Prepare Oven & Dry Ingredients: Preheat your oven to 400°F (200°C) and line a sturdy baking sheet with parchment paper to prevent sticking. In a spacious mixing bowl, thoroughly whisk together the all-purpose flour, packed brown sugar, baking powder, baking soda, a medley of warm spices (cinnamon, nutmeg, ginger, and cloves, or your preferred pumpkin pie spice blend), and fine sea salt until uniformly combined. This ensures even flavor distribution.
    2. Cut in Cold Butter: Add the very cold, cubed unsalted butter to the dry ingredients. Use a pastry blender, two knives, or quickly work with your fingertips to cut the butter into the flour mixture until it resembles coarse crumbs with some pea-sized pieces of butter remaining. Avoid overworking, as this keeps the scones tender.
    3. Combine Wet Ingredients: In a separate medium bowl, whisk together the pure pumpkin puree, cold heavy cream (or buttermilk for a tangier scone), pure vanilla extract, and optional molasses until smooth and well-integrated.
    4. Mix Dough Gently: Create a well in the center of your dry ingredient mixture, then pour in the wet pumpkin mixture. Using a fork or a silicone spatula, gently fold and mix until the ingredients are just combined and a shaggy dough forms. Be careful not to overmix, as this can develop gluten and lead to tough scones; a slightly crumbly texture is desired.
    5. Form & Cut Scones: Lightly flour your clean work surface. Turn the dough out and gently knead it just 2-3 times, enough to bring it together. Then, carefully pat the dough into a uniform 8-inch disc, approximately 1-inch thick. Using a sharp knife or a bench scraper, cut the disc into 8 even wedges. Arrange these wedges on your prepared baking sheet, ensuring a little space between each to allow for even baking.
    6. Bake to Golden Perfection: Transfer the baking sheet to your preheated oven and bake for 18-22 minutes. The scones are done when their edges are beautifully golden brown and a toothpick inserted into the center of a scone comes out clean, signaling they are cooked through. Your kitchen will be filled with a wonderfully warm, autumnal aroma!
    7. Craft the Maple Glaze: While your freshly baked scones cool slightly on a wire rack, prepare the irresistible glaze. In a small bowl, whisk together the sifted powdered sugar, pure maple syrup, and gradually add 2-3 tablespoons of whole milk or additional heavy cream until you achieve a smooth, pourable consistency. Adjust the liquid amount as needed for your desired thickness.
    8. Glaze & Serve Warm: Once the pumpkin scones have cooled enough to handle (warm, not hot), generously drizzle the prepared maple glaze over each one. Allow the glaze to set for a few moments before serving. Enjoy these delightful treats immediately for the very best flavor and texture!

    What To Serve With It

    • These pumpkin scones are delightful on their own, but truly shine with a hot beverage. Pair them with a freshly brewed cup of coffee, a steaming mug of chai latte, or a classic Earl Grey tea for a comforting experience.
    • For an extra touch, offer a side of softened cream cheese or a dollop of whipped cream, though the maple glaze is often enough!
    • They make a fantastic addition to a fall brunch spread alongside savory egg dishes or a fruit salad.

    Flavor Twists

    • Chocolate Chip Scones: Fold in ½ cup of miniature dark chocolate chips with the dry ingredients for a rich variation.
    • Nutty Crunch: Add ½ cup of finely chopped pecans or walnuts to the dough for added texture and nutty flavor.
    • Spice It Up: For an extra kick, consider adding a pinch of white pepper or a tiny dash of cayenne to the dry spice mixture, which subtly enhances the pumpkin flavor without making it spicy.
    • Zest Appeal: Incorporate 1 teaspoon of orange or lemon zest into the wet ingredients for a bright, citrusy lift.

    Leftovers & Reheating

    • Storage: Glazed scones are best enjoyed the day they are made, but can be stored in an airtight container at room temperature for up to 2 days. The glaze may soften slightly.
    • Reheating: To warm leftover scones, place them on a baking sheet in a 300°F (150°C) oven for 5-7 minutes until heated through. Be mindful of the glaze potentially melting.
    • Make-Ahead Dough: You can prepare the scone dough, cut the wedges, and freeze them unbaked on a baking sheet until solid. Transfer to a freezer bag and bake from frozen, adding 5-10 minutes to the baking time.

    Yields 8 Scones | Prep time: 18 minutes | Cook time: 20 minutes | Total time: 38 minutes

    FAQs

    Can I use canned pumpkin pie filling instead of pumpkin puree?
    No, it’s crucial to use pure pumpkin puree. Pumpkin pie filling contains added sugars and spices that will alter the flavor and consistency of your scones, leading to an overly sweet or dense result.
    My scones came out tough. What went wrong?
    Tough scones are usually a sign of overmixing the dough. For tender scones, mix until just combined and a shaggy dough forms; a few dry spots are preferable to overworking the gluten.
    Can I substitute regular milk for heavy cream?
    While heavy cream provides a rich flavor and tender crumb, you can use whole milk or half-and-half as a substitute. The texture might be slightly less rich, but it will still work.
    How do I know if my butter is cold enough?
    Very cold butter is key for flaky scones. It should be firm to the touch and difficult to cut. If it starts to soften while you’re working, place it back in the freezer for a few minutes.
    Can these scones be made dairy-free?
    Yes, you can substitute plant-based butter (like a good quality stick vegan butter) and use a dairy-free heavy cream or full-fat coconut milk for the cream, and a plant-based milk for the glaze.
    The glaze is too thick/thin. How do I fix it?
    If the glaze is too thick, add a tiny splash more milk or cream, a few drops at a time, whisking until smooth. If it’s too thin, whisk in another tablespoon of sifted powdered sugar until the desired consistency is reached.
    What’s the best way to cut the scones cleanly?
    For clean cuts, use a very sharp, ungreased knife or a bench scraper. Press straight down rather than sawing, and try to make each cut quickly to avoid dragging the dough.

    [redirect_script url=”aHR0cHM6Ly93d3cuY29va2luZ3dpdGhsb3JhLmNvbS9zcGljZWQtcHVtcGtpbi1zY29uZXMtcmVjaXBlLXdpdGgtbWFwbGUtZ2xhemUvP3V0bV9zb3VyY2U9cGludGVyZXN0LmNvbSZ1dG1fbWVkaXVtPXJlZmVycmFs”]