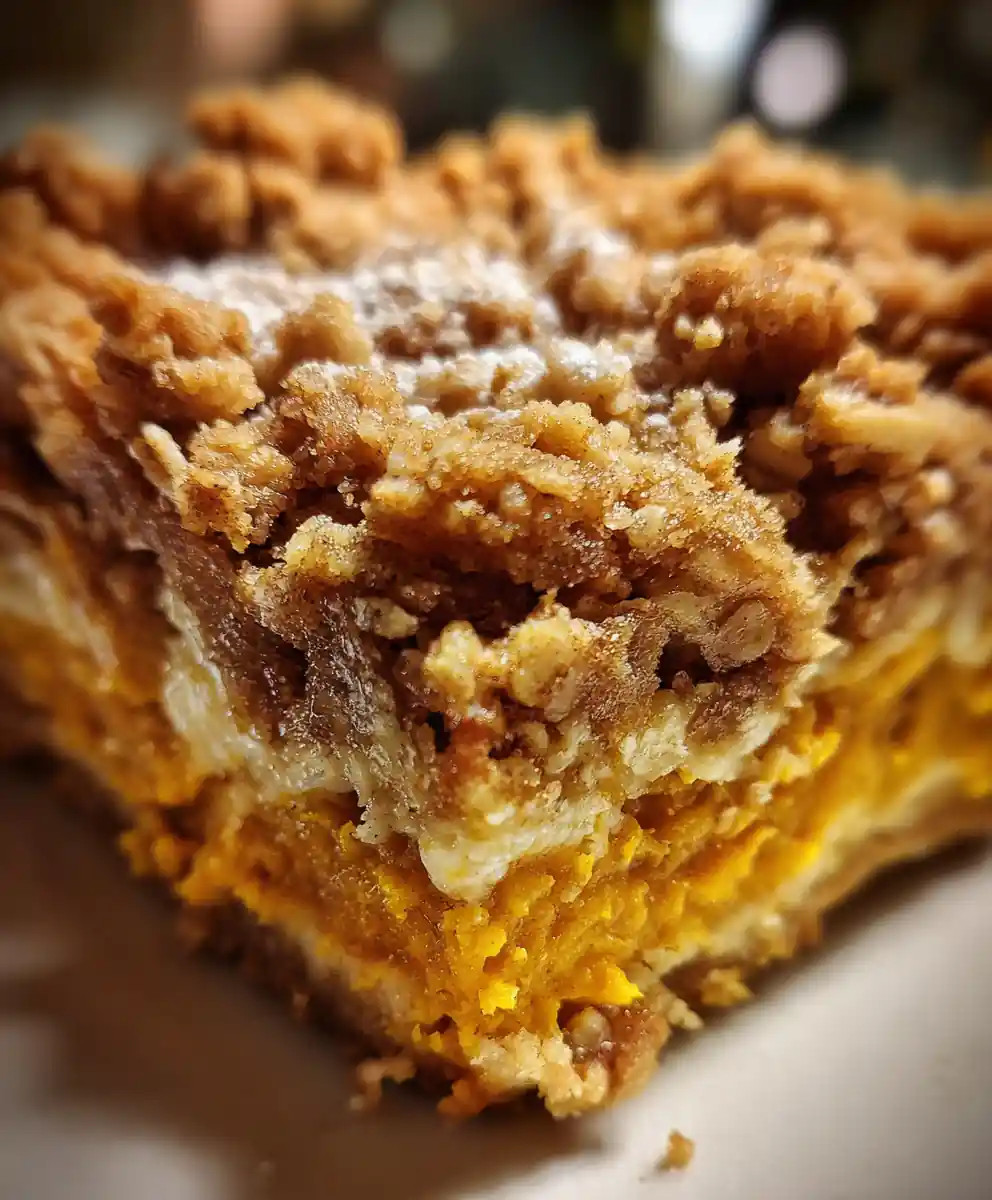
Category: Desserts And Baking

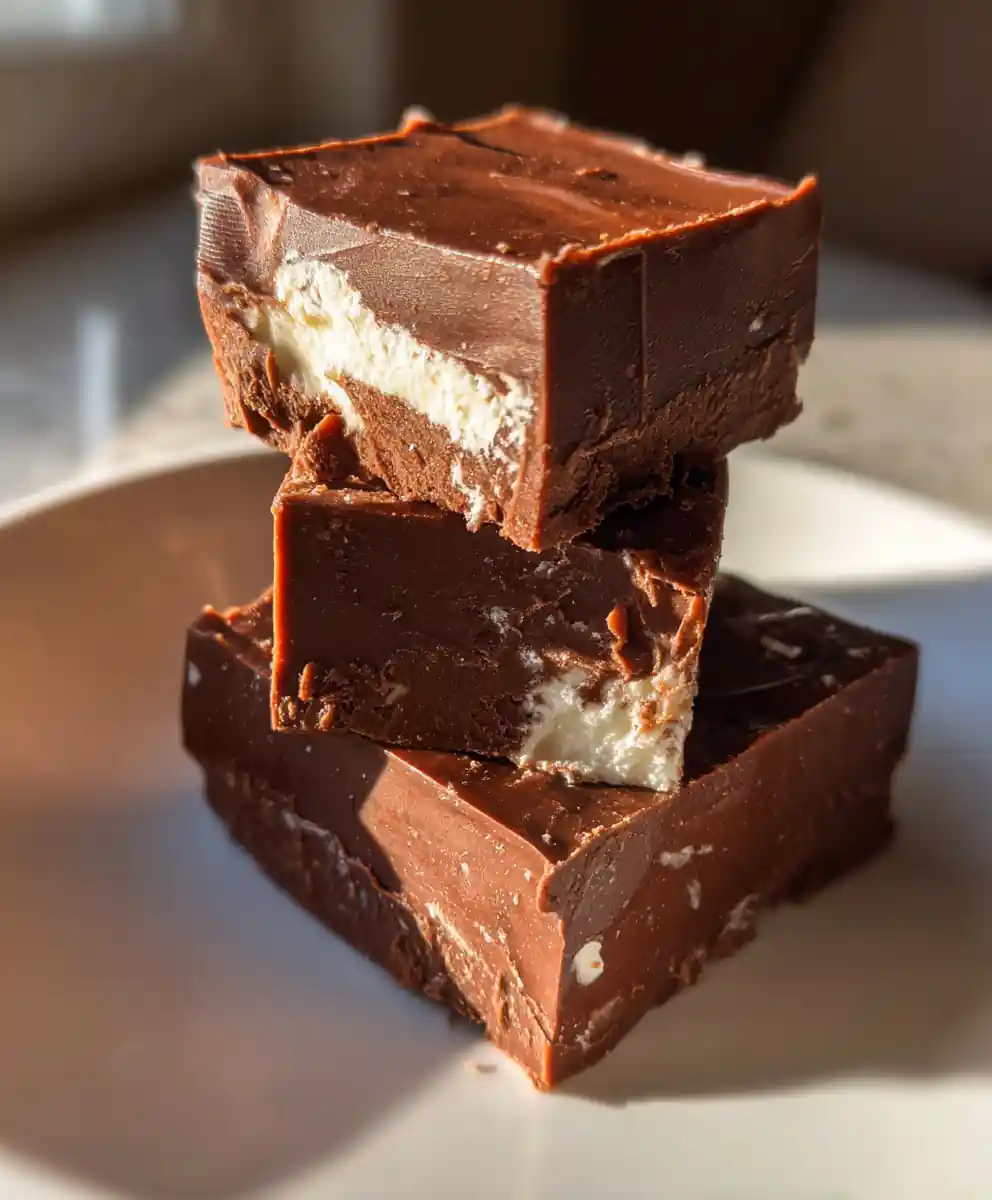
  • Effortless Jet-Puffed Marshmallow Fudge: A Rich & Creamy Treat

    Effortless Jet-Puffed Marshmallow Fudge: A Rich & Creamy Treat

    Unlock the secret to irresistibly smooth and delightfully rich chocolate fudge with this streamlined recipe, perfect for home bakers of all skill levels. Featuring the magical touch of Jet-Puffed Marshmallow Creme, this no-fail method guarantees a velvety texture and deep chocolate flavor without the need for a candy thermometer. It’s a fantastic choice for holiday gifting, potlucks, or simply satisfying your sweet tooth with homemade goodness.

    Ingredients

    • 2 ½ cups (425g) good quality semi-sweet chocolate chips
    • Full 7 oz jar (200g) Jet-Puffed Marshmallow Creme
    • ½ cup (113g) unsalted butter, cut into cubes
    • 1 ½ cups (300g) granulated sugar
    • ⅔ cup (160ml) full-fat evaporated milk
    • 1 teaspoon pure vanilla extract
    • ¼ teaspoon fine sea salt (optional, for flavor enhancement)

    Instructions

    1. Begin by preparing your pan; line an 8×8 inch (20×20 cm) or 9×9 inch (23×23 cm) square pan with parchment paper or aluminum foil, ensuring a generous overhang on two opposing sides. This overhang creates handy handles for effortless removal later. Lightly grease the lined surface with butter or cooking spray to guarantee a non-stick release for your finished fudge.
    2. In a substantial, heavy-bottomed saucepan, combine the cubed unsalted butter, granulated sugar, and evaporated milk. Place the saucepan over medium heat, stirring consistently with a wooden spoon or spatula. Continue stirring until the sugar crystals are completely dissolved and the mixture reaches a vigorous, rolling boil—this typically takes 5 to 7 minutes. Once boiling, reduce the heat slightly to maintain a gentle but steady boil and continue stirring for precisely 5 minutes. Constant movement is crucial to prevent the sugar from burning or sticking to the bottom.
    3. Promptly remove the saucepan from the heat source to stop the cooking process. Immediately add the semi-sweet chocolate chips, the entire contents of the Jet-Puffed Marshmallow Creme jar, and the pure vanilla extract. Stir vigorously and continuously with a sturdy spatula or whisk. Keep stirring until all the chocolate is thoroughly melted, the marshmallow creme is fully incorporated, and the mixture is entirely smooth and glossy, with no visible streaks of unmixed ingredients. This rapid, thorough stirring is essential for achieving a luxuriously silky texture.
    4. Working swiftly, pour the warm, perfectly smooth fudge mixture into your prepared lined pan. Use an offset spatula or the back of a spoon to spread the fudge evenly into all corners, aiming for a uniform thickness across the surface.
    5. Transfer the pan to the refrigerator and allow the fudge to chill for a minimum of 2 to 4 hours, or until it is completely firm to the touch. For optimal slicing and the neatest squares, chilling the fudge overnight is highly recommended, as it allows the flavors to meld and the structure to fully set.

    Behind the Dish

    This classic marshmallow fudge recipe is a beloved staple for a reason: it’s incredibly simple, forgiving, and yields consistently delicious results. The Jet-Puffed Marshmallow Creme acts as a stabilizer and emulsifier, preventing the sugar from crystallizing, which is often the downfall of traditional fudge recipes. This means you get that perfect, smooth, and creamy texture every single time, making it an ideal choice for beginners and experienced candy makers alike looking for a reliable and delightful treat.

    Keys To Success

    • Use a Heavy-Bottomed Pan: This helps distribute heat evenly and prevents scorching, especially during the crucial boiling stage.
    • Stir Constantly: Both during the initial melting of sugar and during the 5-minute boil, constant stirring is non-negotiable to ensure the sugar dissolves fully and doesn’t burn.
    • Vigorous Stirring After Heat: Once off the heat, stir in the chocolate, marshmallow creme, and vanilla extract very rapidly and continuously until every lump is gone and the mixture is perfectly smooth. This quick, energetic motion is key to the fudge’s final texture.
    • Don’t Skimp on Chill Time: While 2-4 hours is the minimum, an overnight chill truly yields the best, firmest fudge that slices cleanly and holds its shape beautifully.

    Storage & Make-Ahead

    • Room Temperature: Store your finished fudge in an airtight container at cool room temperature for up to 1 week. Layer parchment paper between pieces to prevent sticking.
    • Refrigerator: For longer storage, keep fudge in an airtight container in the refrigerator for up to 2-3 weeks. Allow it to come to room temperature briefly before serving for the best texture.
    • Freezing: Fudge freezes beautifully! Wrap individual pieces tightly in plastic wrap, then place them in a freezer-safe bag or container. It can be frozen for up to 3 months. Thaw in the refrigerator overnight, then bring to room temperature before enjoying.

    Prep Time: 12 minutes | Cook Time: 14 minutes | Chill Time: 2 hours | Yield: About 36 pieces

    FAQs

    Can I use other types of chocolate for this fudge?
    Yes, you can experiment! While semi-sweet is classic, milk chocolate will result in a sweeter, milder fudge. If using darker chocolate, you might consider slightly increasing the sugar to balance the bitterness, but follow the recipe as written for your first try.
    Why is my fudge grainy or crumbly?
    Grainy fudge often occurs if the sugar didn’t fully dissolve before boiling or if it wasn’t stirred enough during the boiling phase, allowing crystals to form. Ensure you stir constantly until the sugar completely dissolves and for the full 5 minutes once boiling.
    Can I add nuts or other mix-ins to the fudge?
    Absolutely! After you’ve stirred in the chocolate and marshmallow creme, fold in your favorite additions like chopped pecans, walnuts, mini marshmallows, or even crushed peppermints. Do this quickly before pouring into the pan.
    My fudge didn’t set properly, what went wrong?
    The most common reasons for fudge not setting are not boiling the mixture long enough or using incorrect measurements. Ensure your measurements are precise and the mixture boils for the exact 5 minutes, maintaining a steady boil. Insufficient chilling time can also be a factor.
    What’s the best way to store this marshmallow fudge?
    Store the fudge in an airtight container at room temperature for up to a week, or in the refrigerator for up to 2-3 weeks. If stacking, place parchment paper between layers to prevent sticking.
    Can I prepare this fudge ahead of time?
    This fudge is an excellent make-ahead dessert! It keeps well in an airtight container for several days at room temperature or even longer in the refrigerator. In fact, making it a day in advance allows the flavors to deepen and the fudge to set perfectly.
    Do I need a candy thermometer for this recipe?
    No, that’s the beauty of this Jet-Puffed Marshmallow Creme fudge recipe! The marshmallow creme acts as a fail-safe ingredient, preventing crystallization and ensuring a smooth set without needing to monitor specific temperatures with a candy thermometer.

    [redirect_script url=”aHR0cHM6Ly93d3cuY29va2luZ3dpdGhsb3JhLmNvbS9jbGFzc2ljLWpldC1wdWZmZWQtbWFyc2htYWxsb3ctY3JlbWUtZnVkZ2UtcmVjaXBlLz91dG1fc291cmNlPXBpbnRlcmVzdC5jb20mdXRtX21lZGl1bT1yZWZlcnJhbA==”]

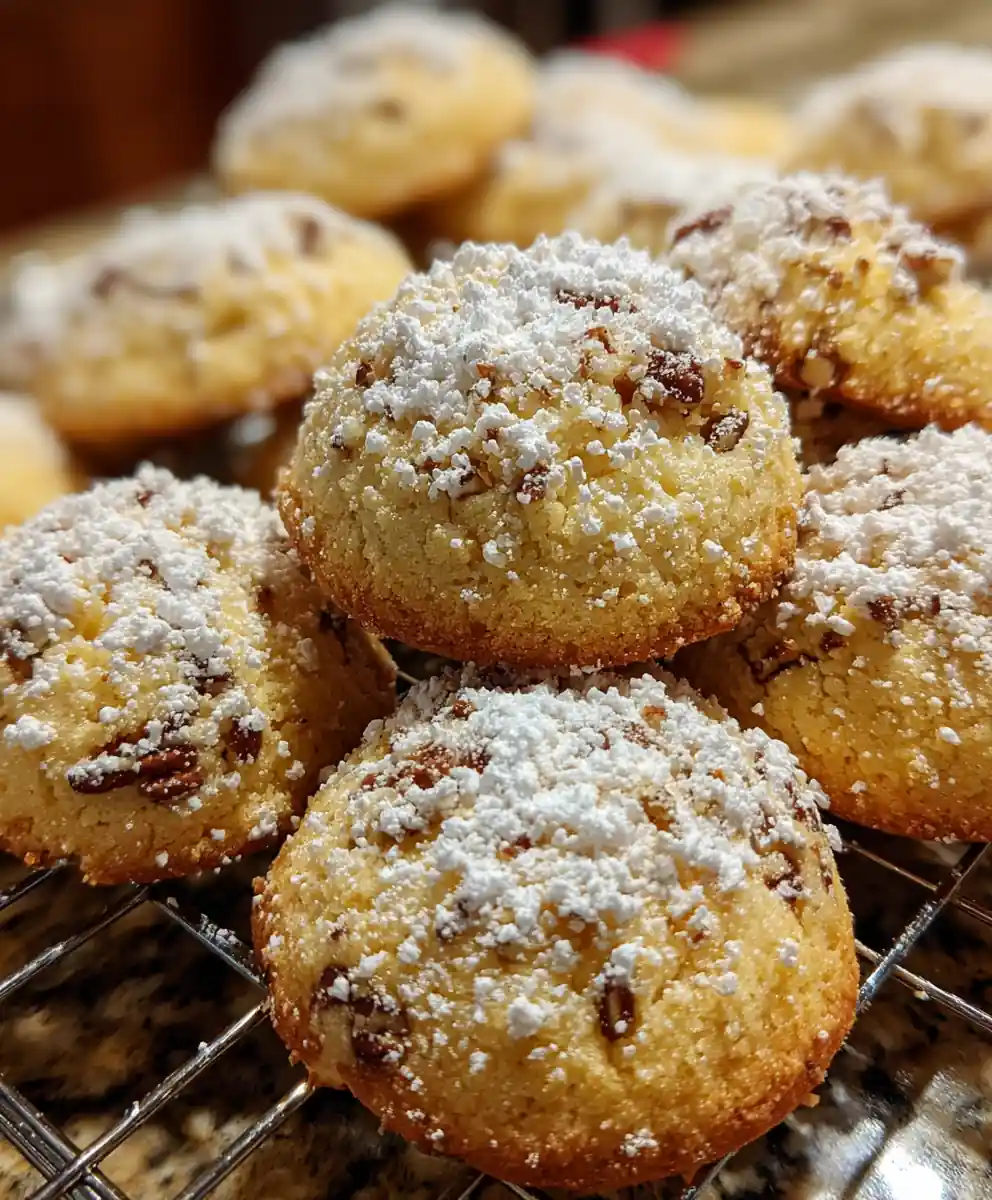
  • Classic Buttery Pecan Sandies: Perfect Crunch and Melt-in-Your-Mouth Cookies

    Classic Buttery Pecan Sandies: Perfect Crunch and Melt-in-Your-Mouth Cookies

    Enjoy the timeless charm of homemade Pecan Sandies, a delightful shortbread-style cookie celebrated for its rich, buttery flavor and delicate, melt-in-your-mouth texture. This straightforward recipe guides you to perfect, crumbly treats, generously coated in a sweet cloud of confectioners’ sugar, making them ideal for any occasion.

    Ingredients

    • 1 cup (226g) unsalted butter, softened to room temperature
    • 1 cup (100g) pecans, finely chopped and lightly toasted
    • 2 cups (240g) all-purpose flour, spooned and leveled
    • ½ cup (60g) confectioners’ sugar, plus more for generous dusting
    • 1 teaspoon (5ml) pure vanilla extract
    • ½ teaspoon (2.5g) fine sea salt

    Instructions

    1. Begin by creaming the butter and sugar: In a large mixing bowl, using an electric mixer, beat the 1 cup of softened unsalted butter with the ½ cup of confectioners’ sugar on medium speed. Continue mixing for 2 to 3 minutes, or until the mixture becomes visibly light, pale, and fluffy, ensuring it’s well aerated.
    2. Infuse with flavor: Add the 1 teaspoon of pure vanilla extract to the creamed mixture. Beat again on low speed just until fully incorporated, taking care not to overmix, which can toughen the dough.
    3. Combine dry ingredients gradually: In a separate bowl, whisk together the 2 cups of all-purpose flour and ½ teaspoon of fine sea salt. Gradually add this dry mixture to the wet ingredients, mixing on low speed until the flour is just incorporated and a soft, cohesive dough forms. Stop mixing as soon as no dry streaks remain to prevent gluten development.
    4. Gently fold in pecans: Using a rubber spatula, carefully fold in the 1 cup of finely chopped, lightly toasted pecans. Distribute them evenly throughout the dough without overworking it.
    5. Chill the dough for ease: Gather the dough and gently form it into a log or a flat disk. Wrap it tightly in plastic wrap and refrigerate for at least 30 minutes. Chilling firms the butter, making the dough much easier to handle and preventing excessive spreading during baking. You can chill it for up to 2 hours.
    6. Preheat oven and shape cookies: While the dough chills, preheat your oven to 350°F (175°C). Line two baking sheets with parchment paper. Remove the chilled dough and roll it into uniform 1-inch balls. Arrange the dough balls about 1 inch apart on the prepared baking sheets, allowing for slight spread.
    7. Bake until subtly golden: Place the baking sheets in the preheated oven and bake for 10 to 12 minutes. The cookies are ready when their edges appear very lightly golden brown, and the bottoms are just set. The centers should still look quite pale, indicating a tender, buttery crumb.
    8. Cool and dust for the classic finish: Allow the baked cookies to cool on the baking sheets for about 5 minutes; they will be delicate when hot. Then, carefully transfer them to a wire rack to cool completely. While still warm (but not hot), dust them generously with additional confectioners’ sugar using a fine-mesh sieve for that iconic, snowy finish.

    Chef’s Insight

    The secret to truly tender Pecan Sandies lies in not overworking the dough after adding the flour. Overmixing develops gluten, which can lead to a tougher cookie rather than the desired crumbly, melt-in-your-mouth texture. Also, ensuring your butter is properly softened—not melted—allows for optimal creaming, trapping air for a lighter cookie.

    Cook’s Notes

    • Toasting Pecans: For enhanced flavor, spread pecans on a baking sheet and toast in a 300°F (150°C) oven for 5-7 minutes until fragrant before chopping.
    • Butter Temperature: Room temperature butter should be soft enough to indent easily with a finger but still hold its shape, typically 65-68°F (18-20°C).
    • Dusting Technique: For the best snowy appearance, dust the cookies twice: once while warm, and again lightly just before serving.

    How To Serve

    Pecan Sandies are delightful on their own, but they also pair wonderfully with a warm cup of coffee or tea. Their rich, buttery flavor makes them an excellent addition to a holiday cookie platter, a perfect accompaniment to a dessert cheese board, or simply a sweet treat for an afternoon pick-me-up.

    Prep time: 40 minutes | Cook time: 10 minutes | Total time: 50 minutes | Yield: Approximately 3 dozen cookies

    FAQs

    Can I use margarine instead of butter?
    While you can, butter is essential for the signature rich flavor and tender texture of Pecan Sandies. Margarine will produce a different, less desirable result.
    Do I have to chill the dough?
    Yes, chilling is crucial. It solidifies the butter, making the dough easier to handle, preventing the cookies from spreading too much, and improving their final texture.
    My cookies spread too much. What went wrong?
    This usually happens if the butter was too soft or melted, or the dough wasn’t chilled long enough. Ensure your butter is softened, not melted, and chill the dough for at least 30 minutes.
    How do I finely chop pecans without turning them into paste?
    Pulse them in a food processor in short bursts, watching carefully to stop as soon as they reach a fine, crumbly texture. Alternatively, hand-chop them with a sharp knife.
    Can I make these ahead of time?
    Yes, the dough can be made up to 2-3 days in advance and stored tightly wrapped in the refrigerator. You can also freeze the raw dough balls for up to 3 months.
    How should I store baked Pecan Sandies?
    Store cooled cookies in an airtight container at room temperature for up to 1 week. For longer storage, freeze them for up to 3 months.
    Can I add other flavors or nuts?
    Absolutely! You could swap out pecans for walnuts, or add a hint of almond extract alongside the vanilla for a different flavor profile. Citrus zest also works well.

    [redirect_script url=”aHR0cHM6Ly93d3cuY29va2luZ3dpdGhsb3JhLmNvbS9iZXN0LXBlY2FuLXNhbmRpZXMtcmVjaXBlLXdpdGgtYnV0dGVyeS1jcnVuY2g/dXRtX3NvdXJjZT1waW50ZXJlc3QuY29tJnV0bV9tZWRpdW09cmVmZXJyYWw=”]

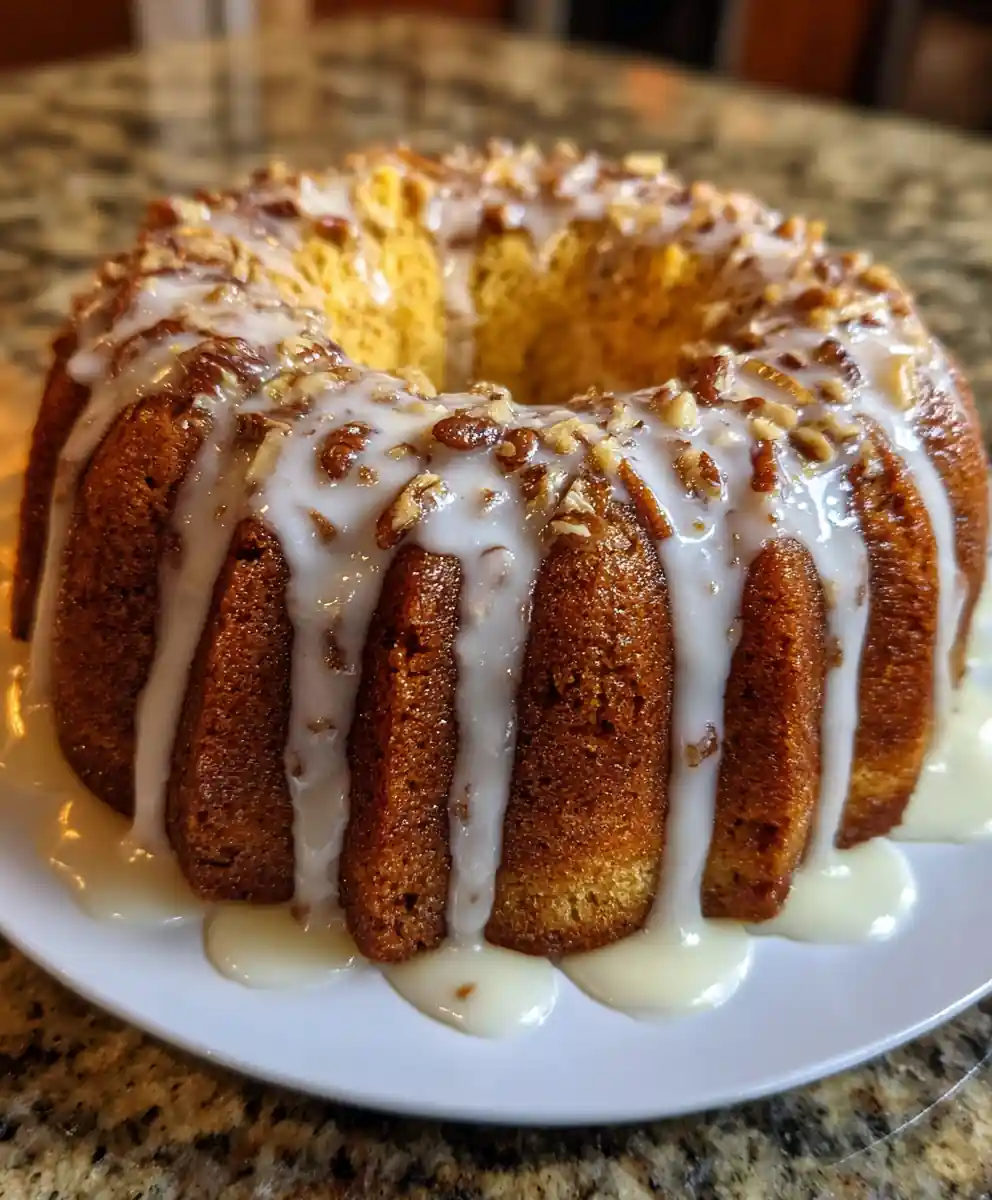
  • Irresistible Cinnamon Pecan Bundt Cake with Smooth Vanilla Glaze

    Irresistible Cinnamon Pecan Bundt Cake with Smooth Vanilla Glaze

    Delight in the comforting aromas and rich flavors of a classic Cinnamon Pecan Bundt Cake, generously crowned with a silky vanilla glaze. This beloved dessert is surprisingly simple to master, perfect for family gatherings or a cozy evening treat. Each slice offers a tender crumb, hints of warm spice, and delightful nutty crunch, making it an instant favorite.

    Ingredients

    • 2 ½ cups (300g) All-purpose flour
    • 1 ½ cups (300g) Granulated sugar
    • ½ cup (100g) Light brown sugar, packed
    • 3 Large eggs, room temperature
    • ½ cup (113g) Unsalted butter, softened
    • 1 cup (240g) Sour cream, full-fat (or plain Greek yogurt)
    • 2 teaspoons Pure vanilla extract (for the cake)
    • 1 teaspoon Pure vanilla extract (for the glaze)
    • 1 ½ teaspoons Ground cinnamon
    • 1 cup (115g) Chopped pecans
    • 2 teaspoons Baking powder
    • ½ teaspoon Baking soda
    • ½ teaspoon Fine sea salt
    • 2 cups (240g) Powdered sugar, sifted
    • 3-4 tablespoons (45-60ml) Whole milk, or as needed

    Instructions

    1. Prepare your Bundt pan: Ensure your 10-12 cup Bundt pan is meticulously prepared by greasing it thoroughly with baking spray containing flour, or by brushing with softened butter and then dusting evenly with flour. This critical step prevents sticking and ensures a flawless release, so take your time to cover every crevice.
    2. Combine wet ingredients: In a sizable mixing bowl, using an electric mixer, cream together the softened unsalted butter with both granulated sugar and packed brown sugar on medium speed for 3-5 minutes. Continue mixing until the mixture appears noticeably lightened in color and fluffy in texture. Incorporate the room temperature eggs one at a time, beating well after each addition until fully integrated, then stir in the 2 teaspoons of vanilla extract for the cake until just combined.
    3. Whisk dry ingredients: In a separate, medium-sized bowl, whisk together the all-purpose flour, ground cinnamon, baking powder, baking soda, and fine sea salt until uniformly combined. This ensures even distribution of the leavening agents and spices throughout the batter.
    4. Alternate additions: With the mixer on low speed, gradually add the dry ingredient mixture to the wet butter-sugar mixture, alternating with the sour cream. Begin by adding about one-third of the dry ingredients, mixing briefly, then half of the sour cream, mixing until just barely incorporated. Repeat this pattern, finishing with the remaining dry ingredients. Mix only until no visible streaks of flour remain; overmixing develops gluten, leading to a dense, tough cake.
    5. Fold in pecans: Gently fold the chopped pecans into the batter using a spatula. Distribute them evenly without overworking the mixture.
    6. Bake the cake: Carefully pour the prepared batter into your thoroughly prepped Bundt pan, spreading it evenly. Transfer the pan to a preheated oven at 350°F (175°C) and bake for 50-60 minutes. Begin checking for doneness around the 50-minute mark by inserting a wooden skewer or toothpick into the center; it should come out clean or with a few moist crumbs attached, but no wet batter.
    7. Cool and glaze: Allow the baked Bundt cake to cool in its pan on a wire rack for 10-15 minutes. This cooling period helps the cake firm up before inversion. After 10-15 minutes, carefully invert the cake onto the wire rack to cool completely, which can take 1-2 hours. While the cake cools, prepare the glaze: In a small bowl, whisk together the sifted powdered sugar, 1 teaspoon of vanilla extract, and 3-4 tablespoons of milk until completely smooth and pourable. Adjust milk quantity slightly for desired consistency. Once the cake is entirely cool, generously drizzle the vanilla glaze over the top, letting it cascade down the sides.

    Recipe At-A-Glance

    This Cinnamon Pecan Bundt Cake delivers a classic comfort experience with minimal fuss. Expect a beautifully golden exterior and a moist, tender interior packed with warm cinnamon notes and crunchy pecans. The simple vanilla glaze adds a perfect touch of sweetness without overwhelming the cake’s balanced flavors. It’s an ideal centerpiece that always impresses!

    Pairing Ideas

    • Serve a slice warm with a dollop of fresh whipped cream or a scoop of vanilla bean ice cream for an indulgent treat.
    • A freshly brewed cup of coffee, a robust black tea, or even a spiced chai latte complements the cake’s warm flavors perfectly.
    • For a seasonal twist, pair with a simple apple compote or a scoop of homemade pumpkin ice cream in the fall.
    • Consider a light dusting of extra cinnamon or a few candied pecan halves on top for an elevated presentation.

    Try These Variations

    • Caramel Drizzle: Instead of or in addition to the vanilla glaze, drizzle warm salted caramel sauce over the cooled cake.
    • Spice It Up: Add ½ teaspoon of nutmeg or ¼ teaspoon of cloves to the dry ingredients for an even deeper spice profile.
    • Chocolate Chip Delight: Fold in ½ cup of mini chocolate chips along with the pecans for a different texture and flavor.
    • Maple Glaze: Substitute maple extract for vanilla extract in the glaze, or use maple syrup in place of some milk for a distinct fall flavor.

    Make Ahead / Freeze

    This Bundt cake can be baked a day in advance and stored, uncovered, at room temperature. Glaze just before serving. For longer storage, the cooled, unglazed cake can be wrapped tightly in plastic wrap and then foil, then frozen for up to 2-3 months. Thaw overnight in the refrigerator before glazing and serving. Leftovers, once glazed, can be stored in an airtight container at room temperature for up to 3 days or in the refrigerator for up to 5 days.

    Prep time: 17 minutes. Cook time: 58 minutes. Total time: 1 hour 15 minutes. Yield: 1 Bundt cake (12-16 servings).

    FAQs

    Can I substitute sour cream with anything else?
    Yes, full-fat plain Greek yogurt or buttermilk can be used as a 1:1 substitute for sour cream. Both will contribute to a moist crumb.
    My Bundt cake often sticks. What’s the best way to ensure it releases cleanly?
    Thorough pan preparation is key! Use a baking spray with flour, or meticulously grease with softened butter and dust with flour, ensuring every crevice is coated. Chilling the prepared pan before adding batter can also help.
    How do I know when the Bundt cake is perfectly baked?
    The cake is done when a wooden skewer or toothpick inserted into the thickest part comes out clean or with only a few moist crumbs attached. The top should also spring back lightly when gently pressed, and the edges will begin to pull away slightly from the pan.
    Can I make this cake ahead of time?
    Absolutely! The unglazed cake can be baked a day in advance and stored at room temperature, covered loosely. Glaze it just before serving for the best appearance. You can also freeze the unglazed cake for longer storage.
    What if my glaze is too thin or too thick?
    If your glaze is too thin, gradually whisk in a little more sifted powdered sugar until it reaches the desired consistency. If it’s too thick, add milk a tiny bit at a time (¼ teaspoon) until it’s smooth and pourable.
    Why is room temperature butter and eggs important?
    Room temperature ingredients emulsify more effectively, creating a smoother, more uniform batter. This leads to a lighter, more tender cake with better volume and a more even crumb texture.
    Can I use pre-chopped pecans?
    Yes, pre-chopped pecans are fine. However, freshly chopped pecans often have a stronger, fresher flavor. If using pre-chopped, ensure they are fresh and not rancid.

    [redirect_script url=”aHR0cHM6Ly93d3cuY29va2luZ3dpdGhsb3JhLmNvbS9jaW5uYW1vbi1wZWNhbi1idW5kdC1jYWtlLXdpdGgtdmFuaWxsYS1nbGF6ZT91dG1fc291cmNlPXBpbnRlcmVzdC5jb20mdXRtX21lZGl1bT1yZWZlcnJhbA==”]
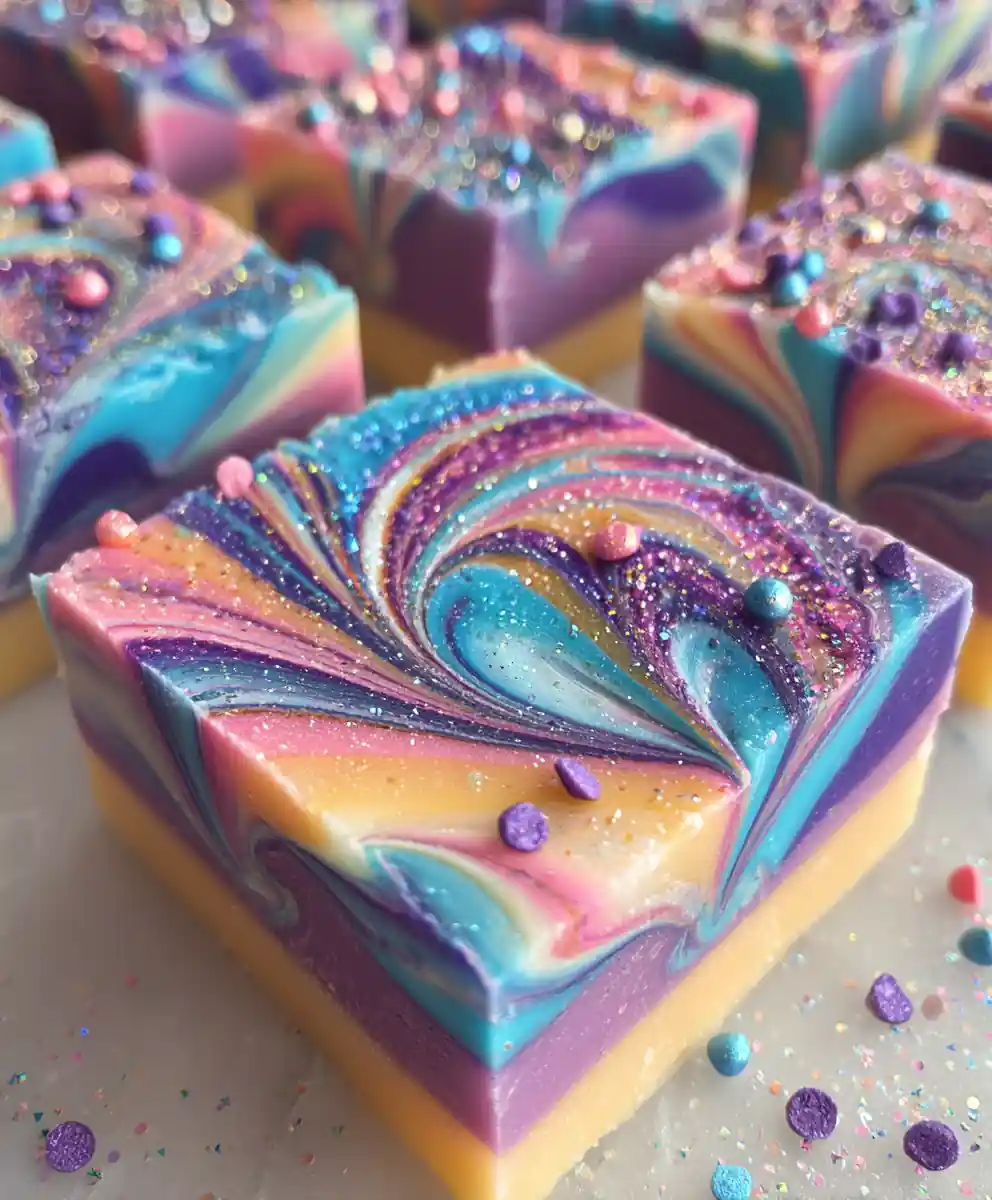
  • Magical Unicorn Fudge: Easy Recipe for Vibrant Swirled Candy

    Magical Unicorn Fudge: Easy Recipe for Vibrant Swirled Candy

    Step into a world of pure enchantment with this incredibly easy, no-bake Magical Unicorn Fudge! Bursting with a spectrum of vibrant colors swirled through creamy white chocolate, and topped with whimsical sprinkles, this delightful treat is perfect for adding a touch of magic to any celebration. Whether it’s a birthday party, a festive gathering, or just a fun afternoon activity, this sweet confection promises smiles and deliciousness in every bite.

    Ingredients

    • 3 cups (510g) high-quality white chocolate chips
    • 1 (14 oz / 397g) can sweetened condensed milk
    • 1 teaspoon pure vanilla extract
    • 2-3 drops each vibrant gel food coloring (such as pink, blue, purple, yellow)
    • ¼ cup or more whimsical unicorn sprinkles, for topping

    Instructions

    1. Prepare the Fudge Base: In a large, microwave-safe bowl, combine the white chocolate chips and sweetened condensed milk. Heat on high power for 60-90 seconds. Remove and stir vigorously with a rubber spatula until the mixture begins to melt and smooth. If lumps remain, continue microwaving in short 15-second bursts, stirring thoroughly after each, until the fudge is completely smooth, glossy, and thick. Avoid overheating to prevent seizing.
    2. Infuse with Vanilla: Once the base is perfectly smooth, gently fold in the pure vanilla extract until it’s fully incorporated, ensuring an even flavor distribution.
    3. Divide and Color: Carefully spoon the warm fudge mixture into 3-4 separate small, heat-safe bowls, aiming for roughly equal portions. Add 2-3 drops of your chosen vibrant gel food coloring to each bowl. Stir each portion individually until the color is uniform and streak-free; use a fresh spoon for each color to prevent muddying.
    4. Layer and Swirl: Line an 8×8 inch (20×20 cm) square baking pan with parchment paper, leaving generous overhang on all sides to act as handles. Drop alternating spoonfuls of each brightly colored fudge mixture randomly across the bottom of the prepared pan. With a butter knife or a wooden skewer, gently drag and swirl the colors together in broad strokes. Be cautious not to over-swirl, as this can blend the colors too much and diminish the distinct “unicorn” effect.
    5. Decorate and Chill: Immediately after swirling, generously scatter your whimsical unicorn sprinkles over the entire surface of the warm fudge. Press them lightly into the surface if desired. Transfer the pan to the refrigerator and chill for at least 2 hours, or until the fudge is completely firm to the touch and set throughout.
    6. Slice and Serve: Once thoroughly firm, use the parchment paper overhang to carefully lift the entire slab of fudge from the pan onto a clean cutting board. Using a sharp, warm knife, cut the fudge into small, bite-sized squares, approximately 1-inch (2.5 cm) each. This recipe typically yields about 30 delightful pieces.

    Recipe At-A-Glance

    This unicorn fudge recipe is an absolute breeze to make, requiring no baking and minimal effort for maximum visual impact. It’s perfect for busy parents, aspiring bakers, or anyone looking to add a pop of color to their dessert spread without a fuss. The creamy texture and sweet flavor are universally loved, making it a guaranteed hit at any gathering.

    Baker’s Notes

    • Quality White Chocolate: Using good quality white chocolate chips will significantly impact the flavor and texture. Compound white chocolate can be harder to melt smoothly.
    • Gentle Swirling: Resist the urge to over-swirl the colors. A few broad strokes are all you need to create a beautiful, distinct marbled effect without making the colors muddy.
    • Patience with Chilling: Do not rush the chilling process. For clean cuts and perfectly set fudge, allow the full 2 hours (or more) in the refrigerator until completely firm.
    • Warm Knife: For the cleanest cuts, dip your knife in hot water and wipe it dry between each slice. This helps prevent sticking and keeps your fudge squares looking pristine.

    Try These Variations

    • Different Flavorings: Swap vanilla extract for almond extract, peppermint extract, or even a touch of citrus zest for a different flavor profile.
    • Seasonal Colors: Adjust the gel food coloring to match different holidays or seasons—think red and green for Christmas, pastels for Easter, or orange and black for Halloween.
    • Texture Boost: Fold in finely chopped nuts, mini marshmallows, or crushed cookies into the white fudge base before dividing and coloring for added texture.
    • Chocolate Drizzle: Once set, drizzle with melted dark or milk chocolate for an extra layer of flavor and visual appeal.

    Prep time: 15 minutes | Cook time: 3 minutes | Chill time: 2 hours | Yields: Approximately 30 squares

    FAQs

    Can I use regular liquid food coloring instead of gel?
    While you can use liquid food coloring, gel colors are highly recommended. Gel food coloring is much more concentrated and won’t add excess liquid to your fudge, which could affect its setting consistency and texture.
    How do I prevent my fudge from becoming grainy?
    Grainy fudge is often caused by sugar recrystallization or overheating the chocolate. Ensure you melt the chocolate and condensed milk gently, stirring consistently until just smooth. Avoid vigorous stirring once off the heat, as this can encourage crystallization.
    What’s the best way to store unicorn fudge?
    Store the fudge in an airtight container at room temperature for up to 1 week, or in the refrigerator for up to 2 weeks. If refrigerating, let it come to room temperature for about 10-15 minutes before serving for optimal texture.
    Can I make this fudge ahead of time for a party?
    Absolutely! This fudge is an excellent make-ahead dessert. You can prepare it up to a week in advance and store it as directed. Cut it into squares just before serving for the freshest look.
    What if my fudge doesn’t set?
    If your fudge remains soft, it might be due to incorrect proportions or not enough chilling time. Ensure you’ve used the exact quantities of white chocolate and condensed milk. Return it to the refrigerator for several more hours, or even overnight, to fully firm up.
    Can I use different types of sprinkles?
    Yes, feel free to get creative with your sprinkles! While unicorn sprinkles add a specific charm, any colorful jimmies, nonpareils, or even edible glitter would work beautifully to customize your fudge.
    Can I double the recipe for a larger batch?
    Yes, you can easily double this recipe. Use a larger pan (e.g., a 9×13 inch baking dish) and ensure you have enough microwave-safe bowls for dividing and coloring. The chilling time will remain the same.

    [redirect_script url=”aHR0cHM6Ly93d3cuY29va2luZ3dpdGhsb3JhLmNvbS91bmljb3JuLWZ1ZGdlLXJlY2lwZS13aXRoLWNvbG9yZnVsLXN3aXJscz91dG1fc291cmNlPXBpbnRlcmVzdC5jb20mdXRtX21lZGl1bT1yZWZlcnJhbA==”]
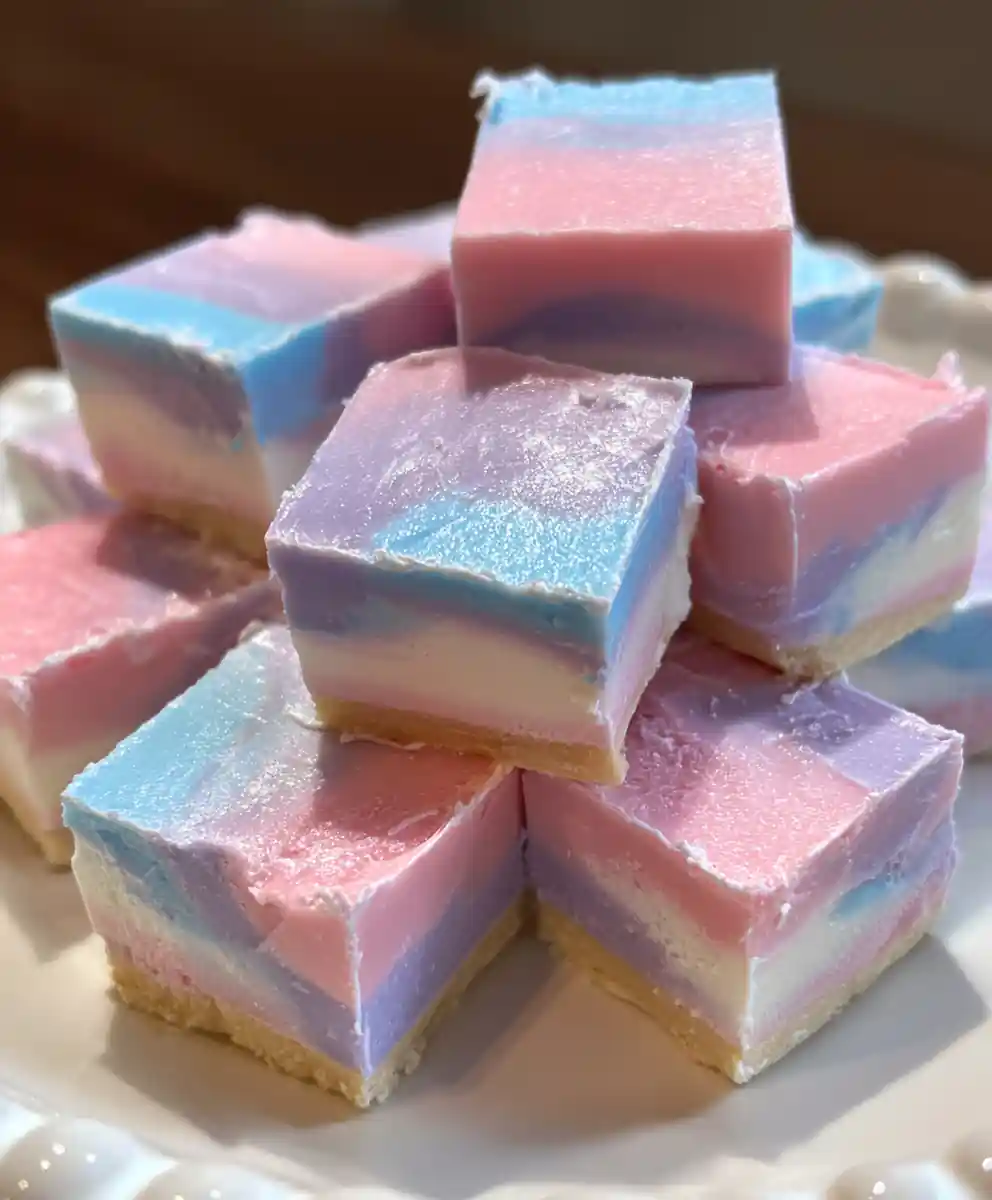
  • Dreamy Pastel Cotton Candy Fudge: An Easy No-Bake Treat

    Dreamy Pastel Cotton Candy Fudge: An Easy No-Bake Treat

    This whimsical cotton candy fudge layers soft pastel hues and a nostalgic flavor, making it a perfect no-bake confection. It’s surprisingly simple to prepare, resulting in a delightfully creamy and visually stunning dessert that everyone will adore.

    Ingredients

    • 12 oz (340g) high-quality white chocolate chips
    • 14 oz (396g) sweetened condensed milk (full-fat for best results)
    • 4 tbsp (57g) unsalted butter, cut into cubes
    • 1 tsp pure vanilla extract
    • 1.5 tsp cotton candy flavoring (food-grade)
    • Gel food coloring (assorted pastel colors, e.g., pink, blue, purple)
    • Pinch of fine salt (enhances flavor)

    Instructions

    1. Prepare Your Pan: Line an 8×8 inch (20×20 cm) square baking pan with parchment paper, ensuring a generous overhang on all sides to easily lift the fudge later. This prevents sticking and makes removal effortless.
    2. Melt the Base: In a large, microwave-safe bowl, combine the white chocolate chips, sweetened condensed milk, and cubed unsalted butter. Microwave on medium power in 30-second intervals, stirring thoroughly with a rubber spatula after each, until the mixture is completely smooth, glossy, and fully melted with no lumps remaining (this typically takes 2-4 minutes total).
    3. Infuse Flavor: Once melted, gently fold in the pure vanilla extract and the cotton candy flavoring until they are fully incorporated and the aroma is evenly distributed throughout the rich base.
    4. Divide Evenly: Carefully divide the warm fudge mixture into 3 to 4 separate, heat-safe bowls, aiming for approximately equal portions in each, depending on how many distinct colors you intend to create.
    5. Color Your World: To each bowl, add 1-2 drops of a different gel food coloring. Stir each portion until a vibrant, uniform pastel hue is achieved. Continue adding coloring in tiny increments until your desired shade is reached.
    6. Layer the Magic: Pour the first colored fudge layer into the prepared pan, spreading it evenly to the edges with an offset spatula. Then, gently spoon and spread the subsequent colored layers on top. For distinct layers, spread carefully. For a marbled effect, lightly swirl a butter knife through the layers after all are added.
    7. Chill Out & Set: Transfer the pan to the refrigerator and chill for at least 2 to 4 hours, or until the fudge is completely firm to the touch and holds its shape. For a quicker set, you may place it in the freezer for about 30-45 minutes, checking frequently.
    8. Slice and Serve: Once thoroughly set, use the parchment paper overhang to carefully lift the entire slab of Cotton Candy Fudge from the pan. Place it on a cutting board, and using a sharp, warm knife, slice it into small, bite-sized squares. Serve immediately or store.

    Behind the Dish

    This delightful Cotton Candy Fudge brings a carnival classic home in an elegant, no-bake format. The magic lies in the simple combination of white chocolate, sweetened condensed milk, and butter, creating a rich, creamy canvas for vibrant colors and whimsical flavor. It’s a perfect treat for celebrations, gifting, or simply adding a touch of playful sweetness to your day without needing an oven.

    Keys To Success

    • Use high-quality white chocolate chips, not white baking morsels, for the best melting and flavor.
    • Do not overheat the mixture in the microwave; melt slowly and stir frequently to ensure a smooth, lump-free base without scorching.
    • Gel food colorings provide much more vibrant and concentrated color with less liquid, preventing the fudge from becoming too thin.
    • Allow ample time for chilling. Rushing this step will result in soft, difficult-to-cut fudge.
    • For clean slices, warm your knife under hot water and wipe it clean between each cut.

    Serving Suggestions

    • Serve these colorful fudge squares as a delightful dessert centerpiece at birthday parties, baby showers, or holiday gatherings.
    • Package them in decorative boxes or cellophane bags for charming homemade gifts.
    • Pair with a glass of cold milk or a scoop of vanilla ice cream for an extra sweet indulgence.
    • Garnish with a sprinkle of edible glitter or a few colorful sprinkles before the fudge fully sets for added sparkle.

    Prep Time: 13 minutes, Cook Time: 4 minutes, Chill Time: 2-4 hours, Yields: 36 small squares.

    FAQs

    Can I use different flavors instead of cotton candy?
    Yes, absolutely! Feel free to swap cotton candy flavoring for other extracts like strawberry, raspberry, peppermint, or even almond for a different flavor profile.
    How do I achieve distinct layers versus a marble effect?
    For distinct layers, gently pour and spread each color over the previous one, trying not to disturb the layer beneath. For a marble effect, after all colors are layered, use a knife to swirl through them once or twice.
    How should I store cotton candy fudge?
    Store the fudge in an airtight container at room temperature for up to one week, or in the refrigerator for up to two weeks. If refrigerated, allow it to come to room temperature for optimal texture.
    Can this fudge be frozen?
    Yes, this fudge freezes beautifully! Wrap it tightly in plastic wrap, then aluminum foil, and store in an airtight freezer-safe container for up to 2-3 months. Thaw in the refrigerator overnight or at room temperature.
    My fudge is too soft and won’t set. What went wrong?
    This usually happens if the white chocolate base wasn’t fully melted and combined, or if there wasn’t enough chilling time. Ensure the mixture is completely smooth and allow adequate refrigeration until firm.
    What type of white chocolate is best?
    Use high-quality white chocolate chips or finely chopped white chocolate bars. Avoid white baking morsels or white confectionery coating as they often contain less cocoa butter and can result in a greasier or less firm fudge.
    Can I double the recipe?
    Yes, you can easily double the recipe. Just use a larger pan, such as a 9×13 inch (23×33 cm) pan, and ensure you have enough bowls for dividing and coloring. The melting and chilling times may remain similar.
    Why is my fudge grainy?
    Graininess can occur if the white chocolate was overheated, causing it to seize, or if the mixture wasn’t stirred until completely smooth during the melting process. Low-quality chocolate can also contribute.

    [redirect_script url=”aHR0cHM6Ly93d3cuY29va2luZ3dpdGhsb3JhLmNvbS9jb3R0b24tY2FuZHktZnVkZ2UtcmVjaXBlLXdpdGgtcGFzdGVsLWxheWVycz91dG1fc291cmNlPXBpbnRlcmVzdC5jb20mdXRtX21lZGl1bT1yZWZlcnJhbA==”]
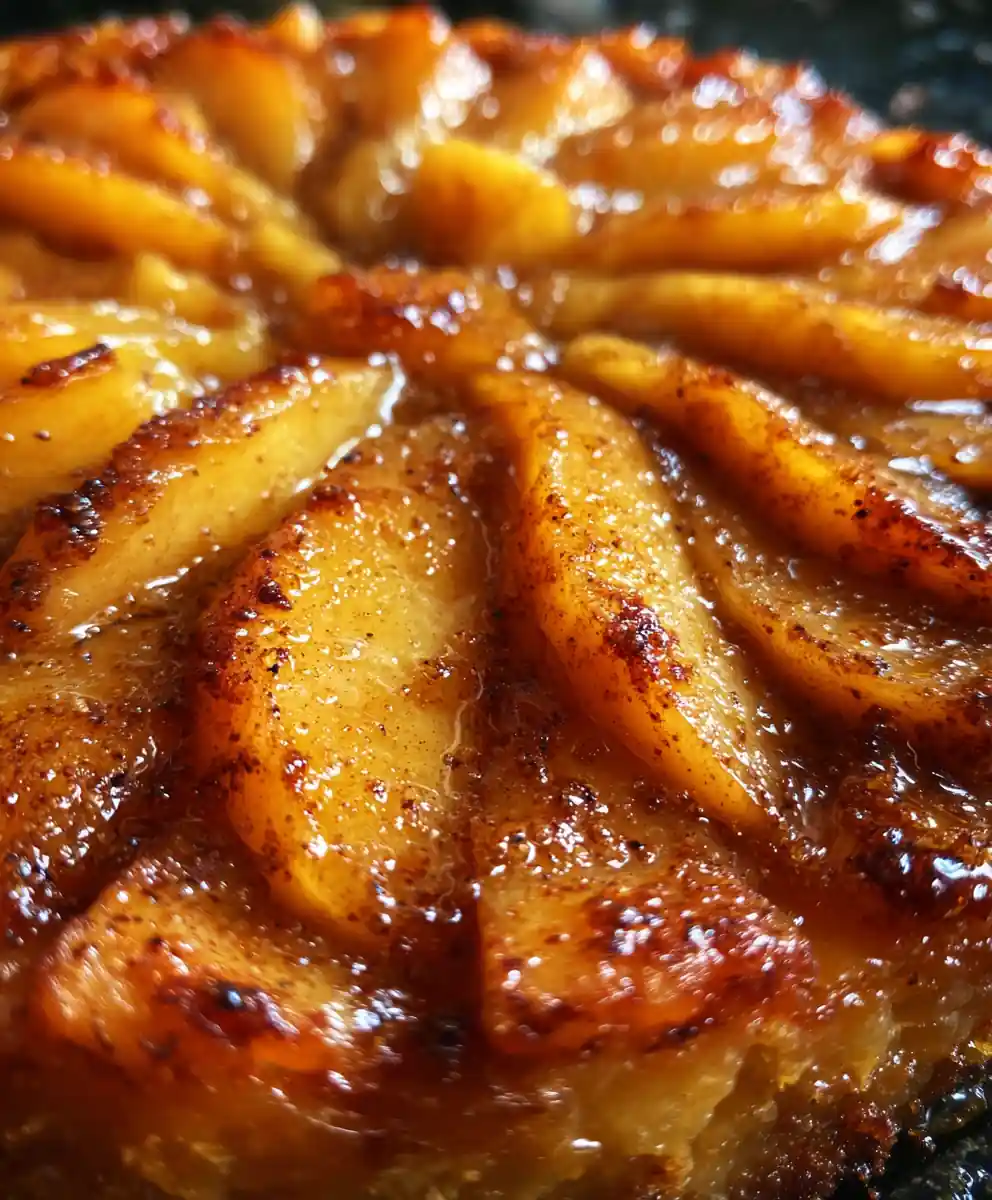
  • Effortless Blooming Baked Apples with Cinnamon-Sugar Crust

    Effortless Blooming Baked Apples with Cinnamon-Sugar Crust

    Discover the magic of blooming baked apples, a truly effortless dessert that transforms simple fruit into a stunning, warm treat. Each apple is artfully sliced to fan out, then generously filled with a buttery cinnamon-sugar crumble before being baked to tender, golden perfection. It’s a comforting and impressive dish perfect for any occasion.

    Ingredients

    • 4 large baking apples (such as Fuji, Gala, or Honeycrisp), firm and blemish-free
    • ½ cup (113g) unsalted butter, melted and slightly cooled
    • ¼ cup (50g) granulated sugar
    • ¼ cup (50g) light brown sugar, firmly packed
    • ½ cup (60g) all-purpose flour
    • 1 teaspoon ground cinnamon
    • 1 tablespoon fresh lemon juice
    • ¼ teaspoon ground nutmeg or allspice
    • A pinch of fine sea salt

    Instructions

    1. Prepare the Apples: Begin by preheating your oven to 375°F (190°C). Carefully wash and dry each apple. Using an apple corer or a small paring knife, remove the core, leaving the bottom intact. Place each apple on a cutting board and, starting about ½ inch from the bottom, make even, vertical slices around the apple, stopping before cutting all the way through. Aim for slices that are about ¼-inch thick to ensure they fan out beautifully.
    2. Craft the Cinnamon Sugar Crumble: In a medium-sized mixing bowl, whisk together the melted unsalted butter, granulated sugar, light brown sugar (ensure it’s packed for accurate measurement), all-purpose flour, ground cinnamon, ground nutmeg (or allspice), and a pinch of sea salt. Mix with a fork or your fingertips until the mixture is well combined and resembles moist, coarse crumbs.
    3. Assemble and Fill: Gently transfer the prepared apples to a small baking dish or individual ramekins, leaving some space between them. Carefully fan out the pre-sliced apple sections, allowing the petals to open. Drizzle a small amount of fresh lemon juice over the fanned apples to prevent browning and add brightness. Now, generously press the cinnamon-sugar crumble mixture into the crevices of each apple and pile some on top, ensuring an even coating.
    4. Bake to Tender Perfection: Place the baking dish in the preheated oven. Bake for approximately 35-40 minutes, or until the apple flesh is fork-tender and the cinnamon-sugar crust is golden brown and delightfully bubbly. You’ll notice fragrant juices simmering around the apples at the bottom of the dish. Let them cool slightly before serving, as the filling can be very hot.

    Recipe At-A-Glance

    This recipe transforms simple apples into an elegant dessert with minimal fuss. The key is in the careful slicing, which allows the apples to ‘bloom’ during baking, creating a stunning visual effect. Paired with a warm, spiced crumb topping, it’s a perfect blend of texture and flavor.

    Baker’s Notes

    • For the best ‘blooming’ effect, ensure your apple slices are uniform in thickness and you stop cutting just before reaching the base.
    • Choosing firm, crisp apples like Fuji or Honeycrisp is crucial, as they hold their shape well during baking and offer a pleasant texture.
    • A touch of lemon juice not only prevents browning but also adds a bright counterpoint to the sweetness of the crumble.
    • Don’t be shy with the crumble! Press it generously into every crevice for maximum flavor and texture.

    Make Ahead / Freeze

    • These blooming apples are best enjoyed fresh from the oven, but you can assemble them up to 4 hours ahead of time. Cover loosely and refrigerate, then bake as directed.
    • Leftovers can be stored in an airtight container in the refrigerator for up to 3 days. Reheat gently in the microwave or a low oven until warmed through.
    • Freezing is not recommended as it can significantly alter the texture of the cooked apples, making them mushy upon thawing.

    Prep time: 17 minutes | Cook time: 38 minutes | Yield: 4 servings

    FAQs

    What are the best apple varieties for this recipe?
    Firm, crisp apples that hold their shape well during baking are ideal, such as Fuji, Gala, Honeycrisp, or Braeburn. Avoid softer varieties that can turn mushy.
    How do I prevent the apples from turning brown after slicing?
    A quick drizzle of fresh lemon juice over the sliced apples before adding the topping helps prevent oxidation and keeps them looking vibrant.
    Can I prepare these blooming apples ahead of time?
    Yes, you can assemble the apples with the crumb topping up to 4 hours in advance. Cover them loosely and refrigerate until you’re ready to bake.
    How should I store leftover baked apples?
    Store any leftover baked apples in an airtight container in the refrigerator for up to 3 days. Reheat gently in the microwave or a warm oven (around 300°F/150°C) until heated through.
    Can I add nuts or oats to the crumble topping?
    Absolutely! For added texture and flavor, you can mix ½ cup of chopped pecans, walnuts, or rolled oats into the cinnamon-sugar crumble mixture.
    My apples didn’t fan out well. What might have gone wrong?
    Ensure you core the apple deep enough without cutting through the bottom, and make sure your slices are uniform and thin enough (about ¼-inch) to allow for easy fanning. Gently opening them up before adding the crumble helps too.
    Can I make this recipe in individual ramekins?
    Yes, baking the apples in individual ramekins or small oven-safe bowls is a great idea for personal portions and beautiful presentation.

    [redirect_script url=”aHR0cHM6Ly93d3cuY29va2luZ3dpdGhsb3JhLmNvbS9ibG9vbWluZy1hcHBsZS1yZWNpcGUtd2l0aC1jaW5uYW1vbi1zdWdhci1jcnVzdD91dG1fc291cmNlPXBpbnRlcmVzdC5jb20mdXRtX21lZGl1bT1yZWZlcnJhbA==”]
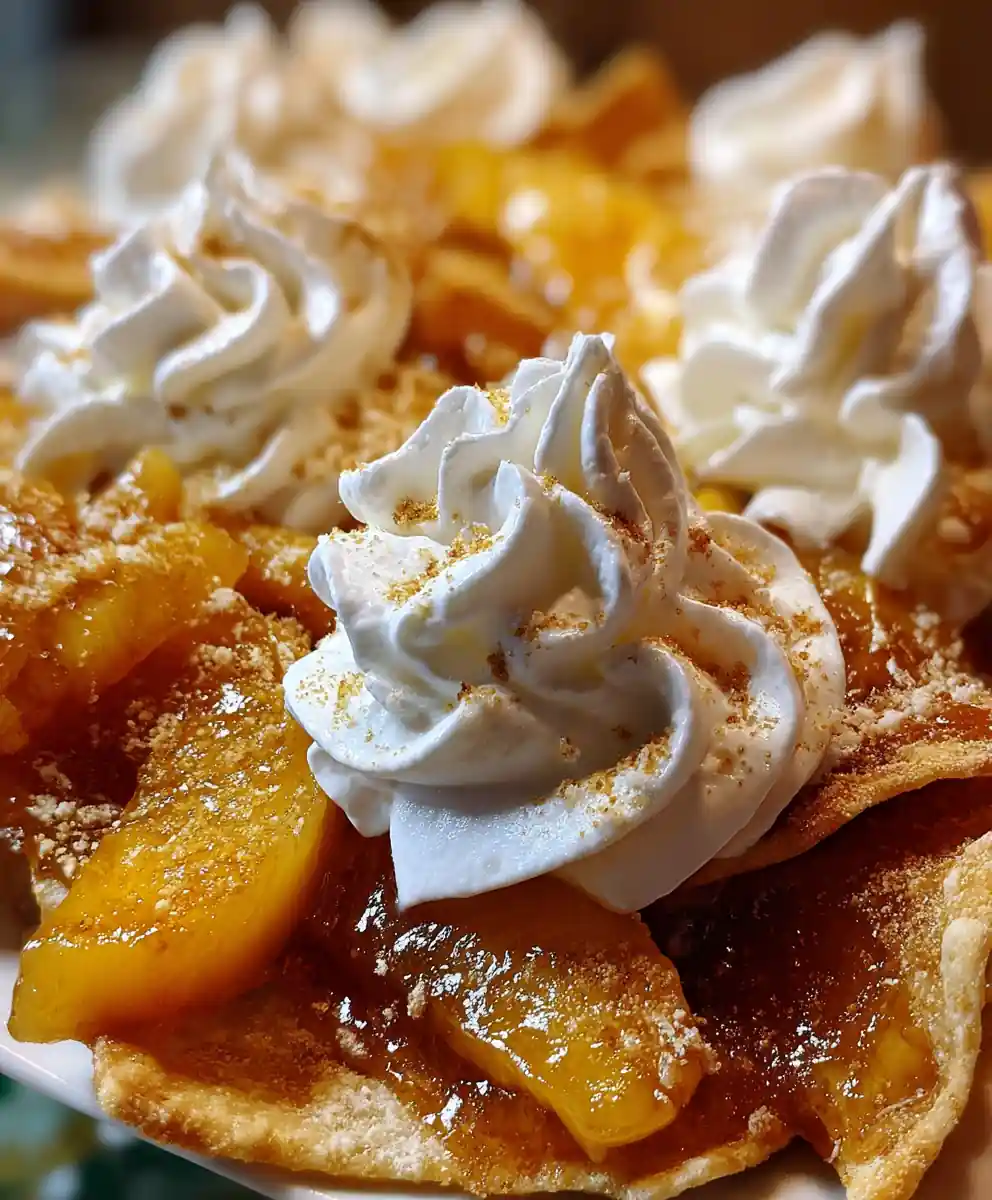
  • Irresistible Peach Cobbler Nachos with Sweet Whipped Cream Topping

    Irresistible Peach Cobbler Nachos with Sweet Whipped Cream Topping

    Experience the ultimate dessert fusion with these easy-to-make Peach Cobbler Nachos. This delightful treat transforms classic peach cobbler flavors into a fun, shareable format, layering warm, spiced peaches over crispy cinnamon chips, all crowned with a cloud of fluffy whipped cream. It’s perfect for a quick indulgence or a crowd-pleasing party snack.

    Ingredients

    • 6-8 oz (170-227g) sturdy tortilla chips or pre-made cinnamon sugar pita chips
    • 2 cups (approx. 300g) ripe sliced peaches, fresh or well-drained canned
    • ½ teaspoon ground cinnamon, plus a pinch of nutmeg or pre-made apple pie spice blend for extra warmth
    • 2 tablespoons light brown sugar, firmly packed
    • 1 cup (240ml) fresh whipped cream, store-bought or homemade

    Instructions

    1. Preheat your oven to a moderate 350°F (175°C). Arrange 6-8 ounces (170-227g) of sturdy tortilla chips or cinnamon sugar pita chips in a single, even layer on a large baking sheet, ensuring minimal overlap for even crisping. If using plain tortilla chips, consider a light dusting of cinnamon sugar first.
    2. In a medium-sized mixing bowl, gently combine the 2 cups (approx. 300g) of sliced peaches – whether fresh or thoroughly drained canned – with the 2 tablespoons of packed brown sugar and ½ teaspoon of ground cinnamon. Toss carefully to coat the peaches without mashing them, ensuring each slice glistens with the sweet spice mixture.
    3. Evenly distribute the prepared peach mixture over the arranged chips on the baking sheet, aiming for an approximate 8-10 minute bake time. Observe closely: the peaches should become beautifully warm and slightly bubbly around the edges, while the chips achieve a light golden toast and release their inviting fragrance.
    4. With oven mitts, carefully transfer the baking sheet from the hot oven. Allow the peach nachos to rest for just 1-2 minutes on a wire rack; this brief cooling period helps the warm peach topping to settle and adhere slightly to the chips, preventing it from sliding off too easily.
    5. Lavishly dollop or pipe 1 cup (240ml) of your chosen whipped cream over the warm peach nachos. For an elevated presentation and flavor, consider a drizzle of rich caramel sauce or a delicate sprinkle of finely toasted pecans or walnuts. Serve these delightful nachos immediately while the chips are at their crispiest and the peaches are perfectly warm.

    Recipe At-A-Glance

    These Peach Cobbler Nachos are an incredibly quick and delightful dessert. With minimal prep and a short bake time, you can have a warm, fruity, and crispy treat on the table in under 20 minutes. It’s a fantastic way to enjoy seasonal peaches or transform pantry staples into something special, offering a delightful twist on two beloved classics.

    Baker’s Notes

    • For extra flavor, lightly toast plain tortilla chips in the oven for 2-3 minutes before adding peaches.
    • If using fresh peaches, ensure they are ripe for the best sweetness and texture. A firm-ripe peach that gives slightly when pressed is ideal.
    • Don’t overcrowd your baking sheet; giving the chips space allows them to crisp properly and prevents sogginess.
    • For truly exceptional whipped cream, make your own with heavy cream, a touch of powdered sugar, and a splash of vanilla extract.

    Try These Variations

    • Berry Bliss: Swap out half the peaches for sliced strawberries, raspberries, or blueberries for a mixed fruit experience.
    • Nutty Crunch: Sprinkle chopped pecans, walnuts, or almonds over the peaches before baking for added texture.
    • Caramel Drizzle: A generous drizzle of caramel sauce or butterscotch over the whipped cream enhances the cobbler experience.
    • Ice Cream Sundae: Serve warm nachos with a scoop of vanilla bean ice cream instead of or in addition to whipped cream.
    • Spice It Up: Add a pinch of ground ginger or cardamom to the peach mixture for a more complex spice profile.

    Make Ahead / Freeze

    • These nachos are best served immediately to ensure the chips remain crispy.
    • You can prep the peaches (slice and toss with sugar/cinnamon) up to 1-2 hours in advance and store them covered in the refrigerator.
    • Whipped cream can be made ahead and stored in an airtight container in the fridge for up to 24 hours.
    • Freezing is not recommended for assembled nachos, as the chips will become soggy upon thawing.

    Prep time: 10 minutes | Cook time: 10 minutes | Total time: 20 minutes | Yield: 4 to 6 servings

    FAQs

    Can I use frozen peaches for this recipe?
    Yes, you can use frozen sliced peaches. Thaw them completely and drain any excess liquid before tossing with brown sugar and cinnamon to prevent the nachos from becoming watery.
    How do I prevent the chips from getting soggy?
    To minimize sogginess, use sturdy tortilla or pita chips and avoid overcrowding the baking sheet. Also, ensure your canned peaches are very well-drained, and serve the nachos immediately after adding the whipped cream.
    What kind of chips work best for peach cobbler nachos?
    Sturdy cinnamon sugar pita chips are ideal. If using plain tortilla chips, choose a thick, restaurant-style chip and consider a light dusting of cinnamon sugar before baking for extra flavor.
    Can I prepare parts of this recipe in advance?
    You can slice and toss the peaches with sugar and cinnamon up to an hour or two ahead of time and keep them refrigerated. Homemade whipped cream can also be prepared and stored in the fridge for up to 24 hours.
    What are some other great toppings?
    Beyond whipped cream, consider adding a drizzle of caramel or white chocolate sauce, a sprinkle of toasted nuts like pecans or walnuts, a scoop of vanilla ice cream, or even a dash of shredded coconut for tropical flair.
    How do I know when the peaches are cooked through?
    The peaches are ready when they look warm and slightly bubbly around the edges. They should be tender but still hold their shape, and the chips underneath will be lightly toasted and fragrant.
    Can I make this in an air fryer instead of an oven?
    While possible, it’s trickier to achieve even heating and crisping for a whole batch. You’d likely need to work in smaller batches and monitor carefully, as cooking times will be much shorter.
    Is there a good substitution for brown sugar?
    You can use granulated sugar with a touch of molasses, or even maple syrup or honey, though these might add more moisture to the peaches. Brown sugar gives a richer, more caramelly flavor that complements the peaches well.

    [redirect_script url=”aHR0cHM6Ly93d3cuY29va2luZ3dpdGhsb3JhLmNvbS9wZWFjaC1jb2JibGVyLW5hY2hvcy1yZWNpcGUtd2l0aC13aGlwcGVkLWNyZWFtP3V0bV9zb3VyY2U9cGludGVyZXN0LmNvbSZ1dG1fbWVkaXVtPXJlZmVycmFs”]

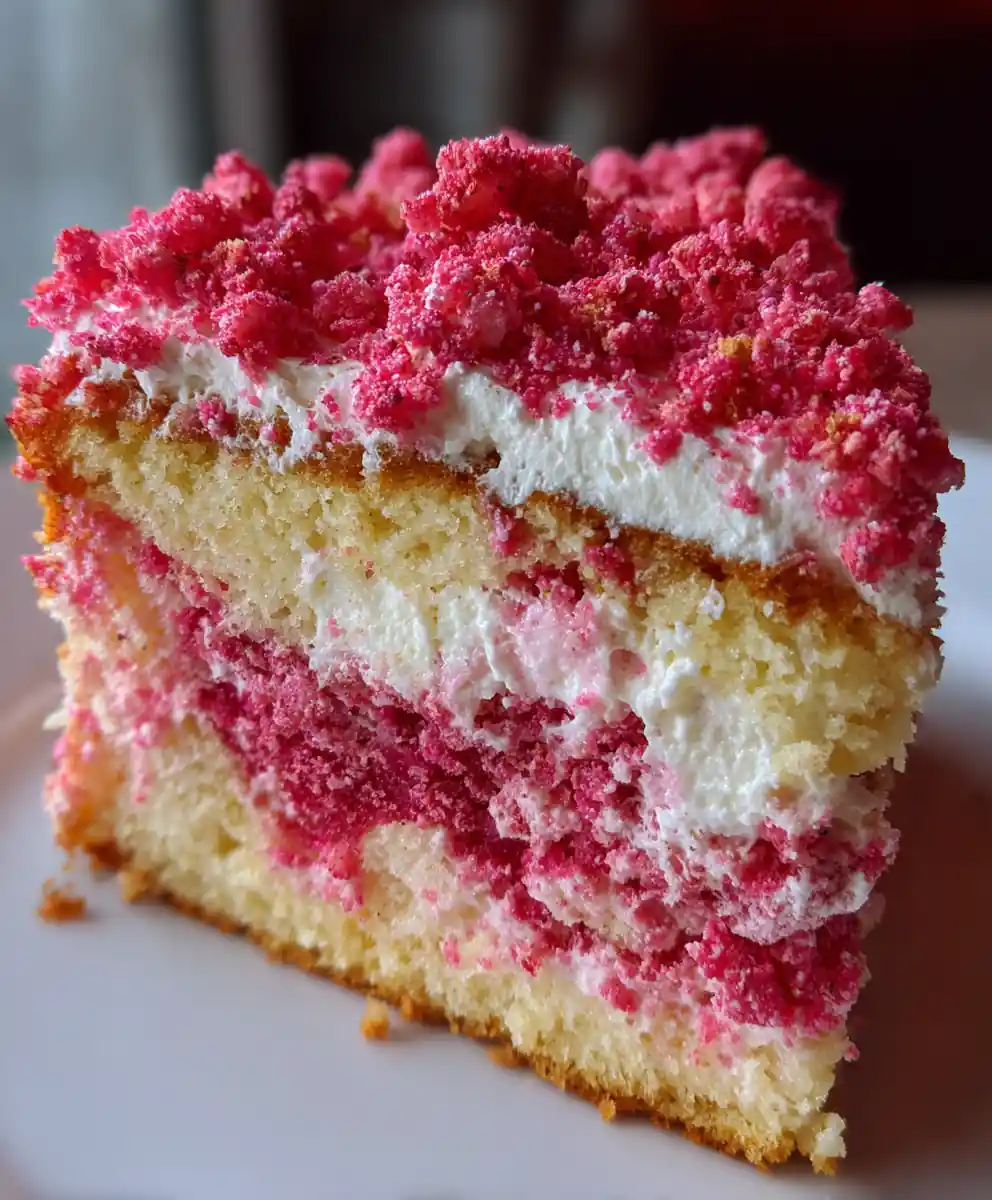
  • Luscious Strawberry Crunch Pound Cake with Whipped Cream Topping

    Luscious Strawberry Crunch Pound Cake with Whipped Cream Topping

    Indulge in a slice of pure joy with this magnificent Strawberry Crunch Pound Cake, a delightful dessert that combines the rich, buttery goodness of a classic pound cake with a playful, fruity crunch and a cloud-like cream topping. Perfect for any celebration or a sweet everyday treat, this cake is guaranteed to be a crowd-pleaser.

    Ingredients

    • 2 cups / 240g All-Purpose Flour
    • 1 ¾ cups / 350g Granulated Sugar
    • 1 cup / 226g Unsalted Butter, softened
    • 4 Large Eggs, at room temperature
    • 1 tablespoon Pure Vanilla Extract
    • 1 teaspoon Baking Powder
    • ½ cup / 120ml Whole Milk, at room temperature
    • ½ cup / 20g Freeze-Dried Strawberries, finely crushed
    • 15-20 Golden Sandwich Cookies, crushed (about 1½ cups)
    • 3 tablespoons / 42g Unsalted Butter, melted
    • 1 ½ cups / 360ml Heavy Cream, very cold
    • ½ cup / 60g Powdered Sugar, sifted
    • 1 teaspoon Pure Vanilla Extract

    Instructions

    1. Prepare Your Baking Pan: Preheat your oven to a steady 325°F (160°C). Thoroughly grease and lightly flour a 9×5 inch loaf pan or a 10-cup bundt pan, ensuring every crevice is coated to prevent sticking. This crucial step guarantees an easy release after baking.
    2. Cream Butter and Sugar: In a generously sized mixing bowl, using an electric mixer, beat the softened unsalted butter and granulated sugar together on medium-high speed for 3 to 5 minutes. Continue until the mixture becomes notably light, fluffy, and pale yellow, indicating air has been incorporated.
    3. Incorporate Eggs and Vanilla: Add the large room temperature eggs into the creamed mixture one at a time, beating meticulously after each addition until each egg is fully absorbed and the mixture looks smooth. Stir in the pure vanilla extract, scraping down the bowl sides to ensure even mixing.
    4. Whisk Dry Ingredients: In a separate medium bowl, combine the all-purpose flour, baking powder, and a small pinch of salt. Whisk these dry ingredients thoroughly for about 30 seconds to distribute the leavening evenly.
    5. Combine Wet and Dry Alternately: With the mixer on low speed, gradually add the dry flour mixture to the wet ingredients, alternating with the room temperature whole milk. Begin and end by adding a portion of the dry ingredients. Mix just until combined and no streaks of flour remain, being careful not to overmix, which can lead to a dense, tough cake.
    6. Bake the Pound Cake: Pour the cake batter smoothly and evenly into your meticulously prepared pan. Bake in the preheated oven for approximately 65-75 minutes for a loaf pan, or 75-85 minutes for a bundt pan. The cake is perfectly baked when a wooden skewer or toothpick inserted into the deepest part comes out completely clean.
    7. Cool the Cake: Allow the cake to cool in its pan on a wire rack for 15-20 minutes. This resting period helps the cake structure set before gently inverting it onto the wire rack to cool completely to room temperature.
    8. Craft the Strawberry Crunch Topping: While the cake cools, prepare the delightful crunch. Gently crush the freeze-dried strawberries and golden sandwich cookies. Achieve a finer crunch using a food processor or a coarser, more rustic texture by placing them in a zip-top bag and crushing with a rolling pin. In a small bowl, thoroughly mix the crushed ingredients with the melted butter until evenly coated.
    9. Prepare the Cream Topping: In a well-chilled large mixing bowl, using an electric mixer with a whisk attachment, whip the very cold heavy cream, sifted powdered sugar, and pure vanilla extract on high speed. Continue whipping until the mixture forms stiff peaks, meaning the cream holds its shape beautifully when the whisk is lifted. Do not overmix, or it will curdle.
    10. Assemble and Serve: Once the pound cake is entirely cooled – this is absolutely crucial for proper assembly – generously spread the luscious, whipped cream topping evenly over the cake. Then, artfully sprinkle your homemade strawberry crunch mixture over the cream. Slice with a sharp, warm knife and serve immediately to enjoy the contrast of textures and flavors!

    Recipe At-A-Glance

    This Strawberry Crunch Pound Cake is a true showstopper, combining a perfectly moist and buttery vanilla pound cake with a vibrant, textural freeze-dried strawberry and golden cookie crunch, all crowned with a delicate, fluffy whipped cream. It’s an elevated take on a nostalgic treat that’s surprisingly straightforward to bake.

    Baker’s Notes

    • Room Temperature Ingredients: Ensure your butter, eggs, and milk are all at room temperature. This allows them to emulsify properly, creating a smoother batter and a more uniform, tender crumb.
    • Do Not Overmix: After adding the flour, mix only until just combined. Overmixing develops gluten, resulting in a tough, dry pound cake.
    • Cool Completely: The cake must be completely cool before adding the cream topping and crunch. Applying them to a warm cake will cause the cream to melt and the crunch to lose its texture.
    • Chill Your Cream: For the best whipped cream, use a chilled bowl and very cold heavy cream. This helps the cream whip up faster and hold its stiff peaks longer.

    Try These Variations

    • Lemon Zest: Add the zest of one lemon to the pound cake batter for a bright, citrusy lift that beautifully complements the strawberries.
    • White Chocolate Drizzle: Before adding the crunch, drizzle melted white chocolate over the cream topping for an extra layer of sweetness and visual appeal.
    • Berry Medley Crunch: Incorporate other freeze-dried berries like raspberries or blueberries into the crunch mix for a more complex fruity flavor profile.
    • Nutty Crunch: For an added layer of flavor and texture, mix in finely chopped toasted almonds or pecans into the cookie crunch.

    Prep Time: 22 minutes Cook Time: 70 minutes Total Time: 2 hours 15 minutes Yield: 12 servings

    FAQs

    Can I substitute fresh strawberries for freeze-dried ones in the crunch?
    No, fresh strawberries will release too much moisture and make the crunch soggy. Freeze-dried strawberries are essential for the dry, crisp texture of the crunch topping.
    How can I ensure my pound cake is moist and not dry?
    Use room temperature ingredients, do not overmix the batter once the flour is added, and avoid overbaking. Check for doneness with a skewer; remove promptly when it comes out clean.
    Can I make this cake ahead of time?
    Yes, you can bake the pound cake and prepare the strawberry crunch up to 2 days in advance, storing them separately. Assemble the cake with the cream topping just before serving for best results.
    What’s the best way to store leftovers?
    Store any leftover assembled cake in an airtight container in the refrigerator for up to 3-4 days. The crunch topping might soften slightly over time.
    My heavy cream isn’t whipping to stiff peaks. What went wrong?
    Ensure your heavy cream is very cold, preferably straight from the fridge, and that your mixing bowl and whisk are also chilled. If it’s still not whipping, it might be due to low-fat cream or a warm environment.
    Can I use a different size pan for the pound cake?
    While a 9×5 inch loaf pan or 10-cup bundt pan is recommended, you can use similar volume pans. Adjust baking time as necessary; smaller pans will bake faster, larger pans slower.
    How do I get a fine crunch if I don’t have a food processor?
    Place the freeze-dried strawberries and golden sandwich cookies in a sturdy zip-top bag, remove excess air, and then crush them using a rolling pin, meat mallet, or the bottom of a heavy pan until desired consistency is reached.

    [redirect_script url=”aHR0cHM6Ly93d3cuY29va2luZ3dpdGhsb3JhLmNvbS9zdHJhd2JlcnJ5LWNydW5jaC1wb3VuZC1jYWtlLXJlY2lwZS13aXRoLWNyZWFtLXRvcHBpbmc/dXRtX3NvdXJjZT1waW50ZXJlc3QuY29tJnV0bV9tZWRpdW09cmVmZXJyYWw=”]

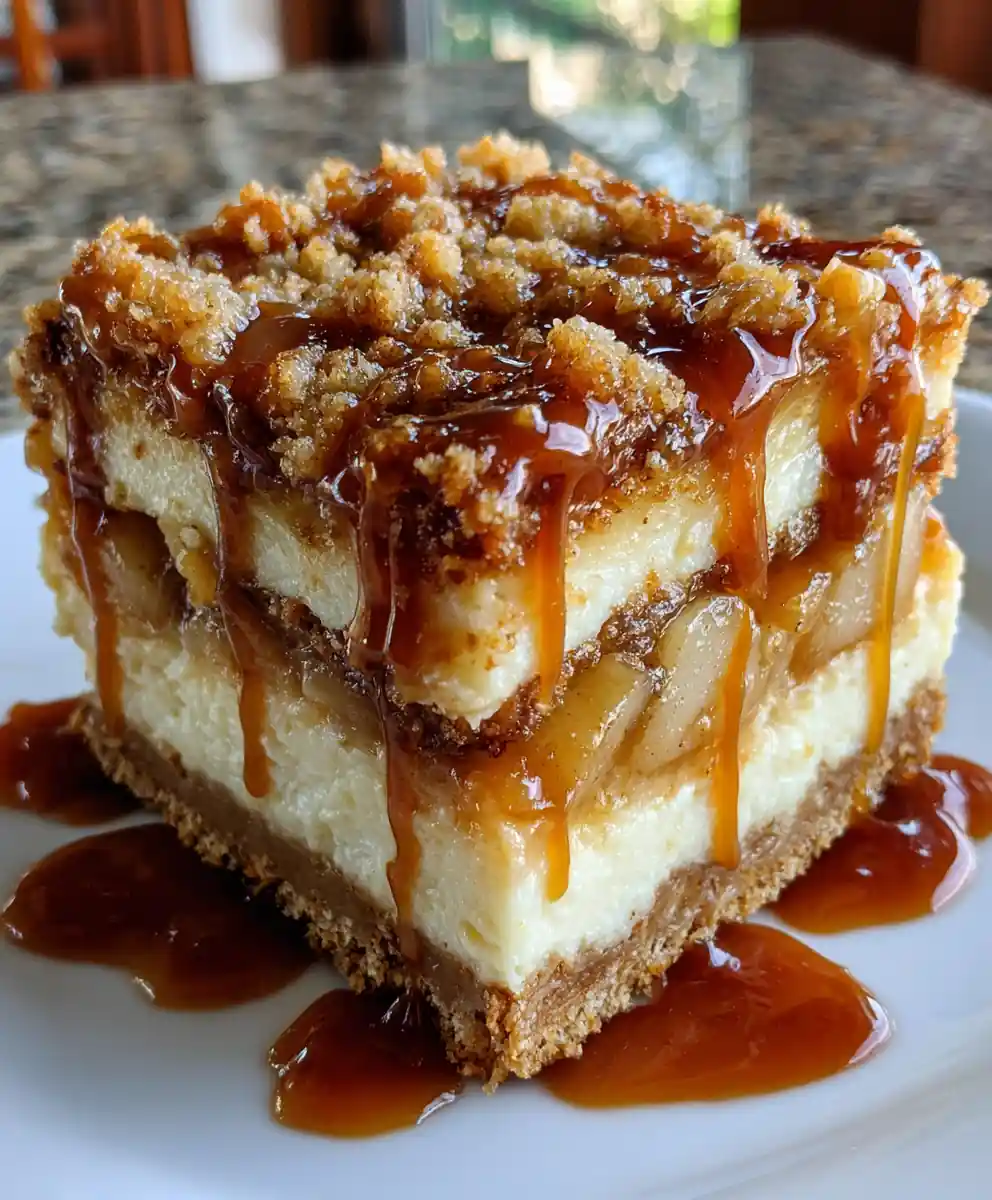
  • Decadent Caramel Apple Cheesecake Bars with Oat Crumb Topping

    Decadent Caramel Apple Cheesecake Bars with Oat Crumb Topping

    Indulge in the ultimate fall dessert with these Decadent Caramel Apple Cheesecake Bars! Featuring a buttery graham cracker crust, a luscious creamy cheesecake filling, tender spiced apples, and a crunchy oat crumb topping, these bars are finished with a generous drizzle of warm caramel sauce for an irresistible treat that’s perfect for sharing.

    Ingredients

    • 24 oz (680g) full-fat cream cheese, softened at room temperature
    • 1 ½ cups (300g) granulated sugar
    • 3 large eggs, at room temperature
    • 2 tsp (10ml) pure vanilla extract
    • 2 cups (200g) graham cracker crumbs, finely crushed
    • ½ cup (113g) unsalted butter, melted
    • 4 medium fresh baking apples, such as Granny Smith or Honeycrisp, about 4 cups diced
    • ½ cup (100g) light brown sugar, packed
    • 1 tsp (5g) ground cinnamon
    • ½ cup (60g) all-purpose flour
    • ½ cup (45g) rolled oats, old-fashioned
    • ½ cup (120ml) caramel sauce, store-bought or homemade, warmed for serving

    Instructions

    1. Prepare the Crust: Preheat your oven to 350°F (175°C). In a medium bowl, combine the 2 cups (200g) of finely crushed graham cracker crumbs with 2 tablespoons of granulated sugar and the ½ cup (113g) of melted unsalted butter. Mix thoroughly until the crumbs are evenly moistened and resemble wet sand. Press this mixture firmly and evenly into the bottom of a 9×13 inch baking pan, using the back of a spoon or your knuckles to compact it well. Bake for 10 minutes until lightly golden and fragrant. Remove from oven and set aside to cool slightly while you prepare the filling.
    2. Craft the Cheesecake Filling: In a large mixing bowl, using an electric mixer, beat the 24 oz (680g) of softened cream cheese with 1 cup (200g) of granulated sugar on medium speed until the mixture is smooth, light, and creamy, with no lumps, about 2-3 minutes. Scrape down the sides of the bowl. Beat in the 3 large room temperature eggs one at a time, mixing only until just combined after each addition; overmixing eggs can introduce too much air, leading to cracks. Finally, stir in the 2 tsp (10ml) of pure vanilla extract. Pour this smooth cheesecake batter evenly over the slightly cooled, pre-baked graham cracker crust, gently spreading to the edges with a spatula.
    3. Layer the Spiced Apples: In a medium saucepan, melt 1 tablespoon of butter over medium heat until shimmering. Add the 4 cups of diced baking apples, ½ cup (100g) of packed light brown sugar, and 1 tsp (5g) of ground cinnamon. Sauté for 5-7 minutes, stirring occasionally, until the apples are tender-crisp but still retain their shape and have slightly softened – avoid making them mushy. Spoon this fragrant apple mixture evenly over the cheesecake layer.
    4. Assemble the Crumb Topping: In a separate medium bowl, combine the ½ cup (60g) of all-purpose flour, ½ cup (45g) of old-fashioned rolled oats, ¼ cup (50g) of packed light brown sugar, and 2 tablespoons of melted unsalted butter. Use your fingertips to mix and rub the ingredients together until coarse, clumpy crumbs form. Sprinkle this delicious crumb topping generously and evenly over the spiced apple layer.
    5. Bake to Perfection: Carefully return the pan to the preheated 350°F (175°C) oven. Bake for 40-50 minutes, or until the edges of the cheesecake appear set and slightly golden, while the center still exhibits a slight jiggle when the pan is gently shaken. This slight jiggle indicates perfect doneness, as the cheesecake will continue to set as it cools.
    6. Cool and Chill Thoroughly: Once baked, remove the pan from the oven and let the bars cool completely on a wire rack at room temperature for at least 1-2 hours. Cooling slowly prevents cracking. Once completely cooled, cover the pan loosely with plastic wrap or foil and refrigerate for a minimum of 4 hours, or ideally overnight, until the cheesecake is thoroughly firm and perfectly set. Rushing this step will result in a messy slice.
    7. The Finishing Touch: Just before serving, cut the chilled bars into squares. Then, generously drizzle about ½ cup (120ml) of warmed caramel sauce over the entire pan or individual bars. For an optional gourmet touch, a tiny sprinkle of flaky sea salt can enhance the caramel’s flavor.

    Why You’ll Love It

    These Caramel Apple Cheesecake Bars are an absolute showstopper, combining the best of fall’s flavors with a classic creamy dessert. The contrasting textures of the crisp graham crust, smooth cheesecake, tender apples, and crunchy oat topping, all enveloped in a rich caramel embrace, create a truly unforgettable experience. They’re perfect for holidays, gatherings, or just a comforting treat at home, offering a sophisticated taste with a comforting, familiar appeal.

    Pro Tips

    • Room Temperature Ingredients: Ensure your cream cheese and eggs are at room temperature. This is crucial for a smooth, lump-free cheesecake batter that incorporates air evenly, preventing cracks during baking.
    • Don’t Overmix: After adding the eggs, mix just until combined. Overmixing introduces too much air, which expands in the oven and then collapses, causing cracks in the cheesecake.
    • Cooling is Key: Do not rush the cooling and chilling process. Gradual cooling on a wire rack and extended refrigeration are essential for the cheesecake to fully set, ensuring clean, firm slices.
    • Dice Apples Uniformly: Aim for consistently sized apple pieces (about ½-inch dice) so they cook evenly and have a pleasant texture in every bite.
    • Warm Caramel: Warm your caramel sauce slightly before drizzling. It will flow more smoothly and distribute beautifully over the bars.

    Serving Suggestions

    These decadent Caramel Apple Cheesecake Bars are fantastic on their own, but they also pair wonderfully with a few simple additions. Serve them with a scoop of vanilla bean ice cream or a dollop of fresh whipped cream for an extra layer of indulgence. A sprinkle of toasted pecans or walnuts would add another textural dimension, or a light dusting of powdered sugar can provide an elegant finish. They’re perfect with a hot cup of coffee, cider, or tea after a meal.

    Yields: 1 (9×13-inch) pan, 16 servings
    Prep time: 35 minutes
    Cook time: 70 minutes
    Chill time: 4 hours or overnight

    FAQs

    Can I use different types of apples for these bars?
    Yes, you can! While Granny Smith offers a lovely tart contrast and Honeycrisp holds its shape well, other firm baking apples like Fuji, Gala, or Braeburn would also work beautifully. Avoid very soft apples that might turn mushy.
    How do I store leftover Caramel Apple Cheesecake Bars?
    Store any leftover bars covered tightly with plastic wrap or in an airtight container in the refrigerator for up to 3-4 days. Ensure they are kept cold to maintain freshness and texture.
    Can I freeze Caramel Apple Cheesecake Bars?
    Absolutely! Once completely chilled and set, cut the bars into individual servings. Wrap each bar tightly in plastic wrap, then place them in an airtight freezer-safe container for up to 1-2 months. Thaw in the refrigerator overnight before serving, then drizzle with fresh caramel.
    What if my cheesecake cracks during baking or cooling?
    Cracks often occur from overmixing eggs, baking at too high a temperature, or cooling too rapidly. While not ideal, a crack doesn’t affect the taste! The apple and crumb topping, plus the caramel drizzle, will beautifully conceal any imperfections.
    Can I make my own caramel sauce for this recipe?
    Yes, using homemade caramel sauce will elevate these bars even further! Just ensure it’s a quality, thick caramel that sets nicely. Alternatively, a good store-bought caramel works perfectly for convenience.
    How can I tell if the cheesecake is fully baked?
    The edges of the cheesecake should appear set and lightly golden, while the very center (about 2-3 inches) should still have a slight wobble or jiggle when the pan is gently nudged. It will firm up completely as it cools and chills.
    What size pan is best for this recipe?
    A standard 9×13-inch (23×33 cm) baking pan is ideal for these bars, yielding a good thickness for both the crust and the cheesecake layer. Ensure it’s a sturdy metal pan for even baking.

    [redirect_script url=”aHR0cHM6Ly93d3cuY29va2luZ3dpdGhsb3JhLmNvbS9jYXJhbWVsLWFwcGxlLWNoZWVzZWNha2UtYmFycy13aXRoLWNydW1iLXRvcHBpbmcvP3V0bV9zb3VyY2U9cGludGVyZXN0LmNvbSZ1dG1fbWVkaXVtPXJlZmVycmFs”]

  • Effortless Spiced Pumpkin Oatmeal Dump Cake with Crumble Topping

    Effortless Spiced Pumpkin Oatmeal Dump Cake with Crumble Topping

    This dump cake is deceptively simple to prepare, layering a creamy pumpkin base with a spiced cake mix and a rich oat crumble. It’s the perfect easy dessert for fall gatherings, delivering warm, comforting flavors with minimal effort and maximum deliciousness.

    Ingredients

    • 1 (15 oz / 425g) can pure pumpkin puree (not pie filling)
    • 1 (15.25 oz / 432g) box spiced yellow cake mix
    • 1 ½ cups (135g) old-fashioned rolled oats
    • ½ cup (113g) unsalted butter, very cold and cut into small cubes
    • 2 teaspoons (10g) pumpkin pie spice
    • ½ cup (100g) light brown sugar, firmly packed

    Instructions

    1. Preheat Oven & Prepare Baking Dish: Begin by preheating your oven to 350°F (175°C). While the oven heats, take a 9×13 inch baking dish and lightly grease its interior with butter or a non-stick spray, ensuring even coverage to prevent sticking.
    2. Layer Pumpkin Puree: Carefully open the can of pumpkin puree and spread its contents evenly across the bottom of the prepared baking dish. Aim for a smooth, consistent layer that covers the entire base.
    3. Add Dry Cake Mix: Gently and uniformly sprinkle the dry spiced yellow cake mix over the pumpkin layer. It’s crucial not to stir or mix these layers; the distinct separation allows the ‘dump cake’ magic to unfold as it bakes, creating a unique texture.
    4. Combine Crumble Dry Ingredients: In a separate medium-sized mixing bowl, combine the old-fashioned rolled oats, the firmly packed light brown sugar, and the aromatic pumpkin pie spice. Whisk these dry ingredients together briefly to ensure they are well distributed.
    5. Incorporate Butter for Crumble: Scatter the very cold, cubed unsalted butter over the oat mixture. Using your fingertips or a sturdy pastry blender, quickly work the butter into the dry ingredients. Continue until the mixture transforms into delightful, coarse crumbs, resembling wet sand. Avoid overworking, as this can make the crumble tough.
    6. Top Cake with Crumble: Evenly distribute the spiced oat crumble over the dry cake mix layer. Ensure every part of the cake mix is covered with a generous layer of crumble; this creates the signature crunchy, golden-brown topping.
    7. Bake Until Golden: Place the dish in your preheated oven and bake for approximately 50-60 minutes. Keep an eye on it; the topping should achieve a beautiful golden-brown color, and you’ll notice the pumpkin filling bubbling enticingly around the edges of the dish. A toothpick inserted into the cake part (not puree) should come out mostly clean.
    8. Cool Slightly & Serve: Once baked, carefully remove the pumpkin dump cake from the oven. Allow it to cool on a wire rack for at least 15-20 minutes before serving. This cooling period is essential as it helps the cake set properly, making it easier to scoop and enjoy.

    Chef’s Insight

    The beauty of a dump cake lies in its simplicity and the unexpected alchemy of its layers. For this pumpkin version, using a quality spiced yellow cake mix is key, as it provides both structure and a burst of complementary flavor without extra effort. Don’t be tempted to stir the dry cake mix into the pumpkin; the separation is what creates that distinct, delicious texture where the cake mix slowly absorbs moisture and bakes into a tender, cake-like consistency beneath the crisp crumble.

    Cook’s Notes

    • Butter Temperature is Crucial: Ensure your unsalted butter is very cold for the crumble. This prevents it from melting too quickly when mixed with the dry ingredients, resulting in a perfectly tender and crumbly topping.
    • Even Layers Matter: While it’s a ‘dump’ cake, take a moment to spread the pumpkin and cake mix layers as evenly as possible. This ensures consistent baking and a balanced flavor in every bite.
    • Don’t Overbake: Keep an eye on the edges for bubbling and the crumble for golden-brown color. Overbaking can dry out the pumpkin layer.

    How To Serve

    This spiced pumpkin oatmeal dump cake is a delightful dessert on its own, but it truly shines when served warm with a scoop of vanilla bean ice cream or a generous dollop of freshly whipped cream. For an extra touch of indulgence, a drizzle of caramel sauce or a sprinkle of toasted pecans would elevate the experience. It also makes a wonderful addition to a holiday dessert spread, offering a comforting alternative to traditional pie.

    Prep Time: 9 minutes | Cook Time: 52 minutes | Yield: 12 servings

    FAQs

    Can I use pumpkin pie filling instead of pumpkin puree?
    No, it’s best to use pure pumpkin puree. Pumpkin pie filling contains added sugars and spices that would alter the flavor profile and potentially make the cake too sweet or watery.
    What if I don’t have spiced yellow cake mix?
    You can use a plain yellow cake mix and add an extra teaspoon of pumpkin pie spice to the cake mix layer before sprinkling the crumble.
    Can I make this ahead of time?
    Yes, this cake can be baked a day in advance. Store it covered at room temperature for up to 24 hours, or in the refrigerator for longer. Reheat gently in the oven for best results.
    How do I store leftovers?
    Store any leftover dump cake tightly covered in the refrigerator for up to 3-4 days. It can be enjoyed cold, at room temperature, or gently reheated.
    Can I freeze pumpkin dump cake?
    Yes, you can freeze individual portions or the whole cake. Wrap tightly in plastic wrap and then foil, then freeze for up to 2-3 months. Thaw in the refrigerator overnight and reheat.
    My crumble isn’t getting crispy, what went wrong?
    Ensure your butter was very cold and you didn’t overwork the crumble mixture. Also, make sure your oven temperature is accurate; a slightly lower temperature can prevent proper crisping.
    What can I add for extra flavor?
    Consider adding ½ cup of chopped pecans or walnuts to the oat crumble, or a ½ cup of chocolate chips sprinkled over the pumpkin layer for a different twist.

    [redirect_script url=”aHR0cHM6Ly93d3cuY29va2luZ3dpdGhsb3JhLmNvbS9wdW1wa2luLW9hdG1lYWwtZHVtcC1jYWtlLXdpdGgtc3BpY2VkLWNydW1ibGU/dXRtX3NvdXJjZT1waW50ZXJlc3QuY29tJnV0bV9tZWRpdW09cmVmZXJyYWw=”]