Author: Sarah Johnson

  • Spiced Indian Cauliflower Sabzi: An Easy Vegetarian Delight

    Spiced Indian Cauliflower Sabzi: An Easy Vegetarian Delight

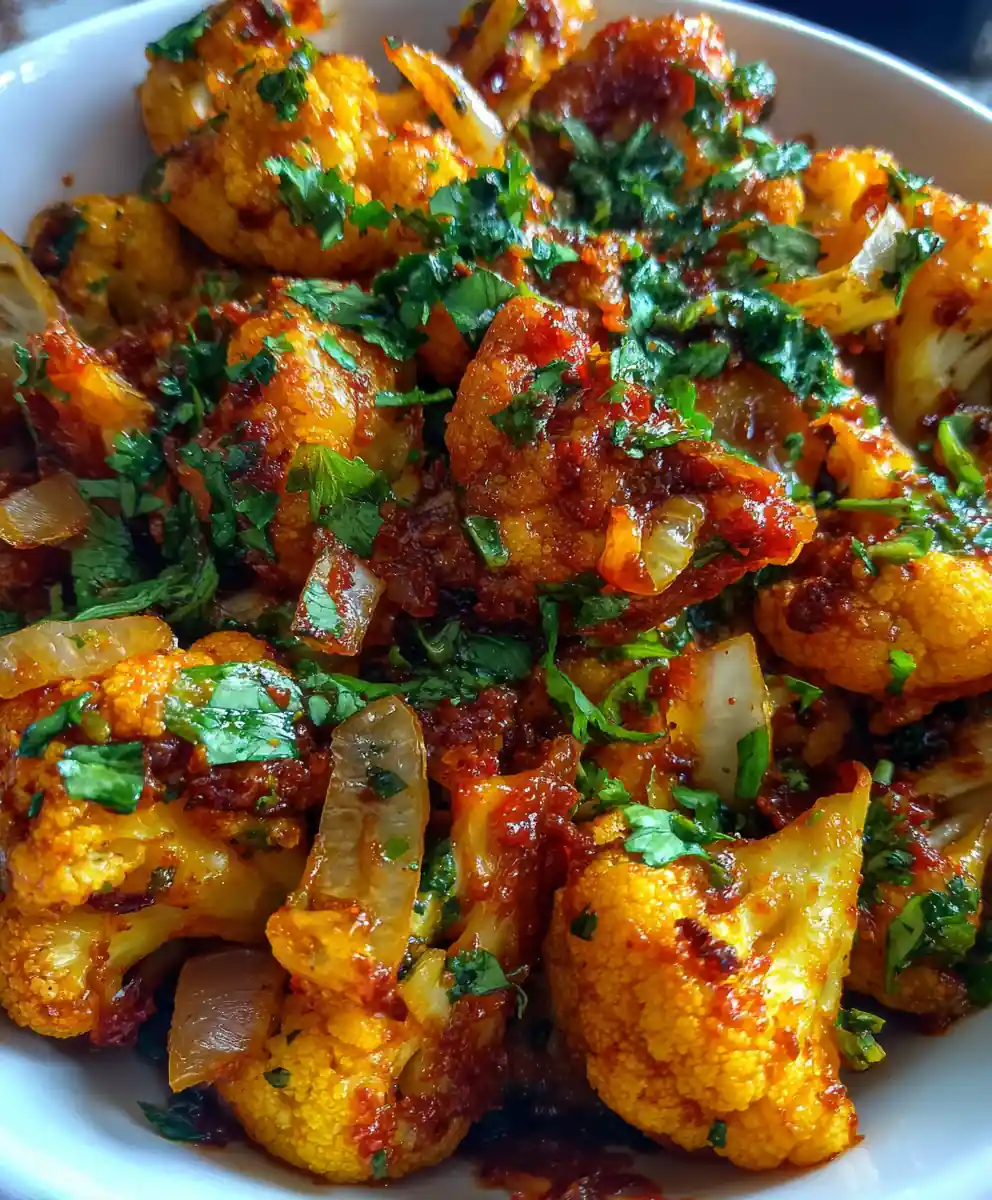
    Unlock the vibrant flavors of India with this incredibly easy and healthy Cauliflower Sabzi recipe. This vegetarian main or side dish features tender cauliflower florets coated in a rich, aromatic tomato and spice blend, perfect for a quick weeknight meal.

    Ingredients

    • 1 medium head (about 2 lbs or 900g) cauliflower, cut into 1-inch florets
    • 1 medium onion, finely chopped
    • 1 tbsp ginger-garlic paste (or 3 cloves garlic and 1-inch ginger, freshly grated)
    • 1 can (14.5 oz or 410g) diced tomatoes, well drained, or 1 cup fresh chopped tomatoes
    • 2 tbsp ghee or vegetable oil
    • 1 tsp cumin powder, ground
    • 1 tsp coriander powder, ground
    • ½ tsp turmeric powder, ground
    • Pinch cayenne powder (optional)
    • 1 tsp garam masala, ground
    • 2 tbsp fresh cilantro, finely chopped
    • ¼ cup water
    • Salt, to taste

    Instructions

    1. Prep the Cauliflower: Begin by thoroughly washing and drying your medium head of cauliflower. Carefully cut it into uniform 1-inch, bite-sized florets. Consistency in size ensures even cooking.
    2. Sauté Aromatics: Heat 2 tablespoons of ghee or vegetable oil in a large, heavy-bottomed skillet or pot over medium heat until shimmering. Add the finely chopped onion and sauté for 6-8 minutes, stirring frequently, until it softens and turns translucent, developing a sweet base. Next, stir in the ginger-garlic paste and cook for just 1 minute more, until its aromatic fragrance is released. Avoid browning the garlic.
    3. Spice It Up: Reduce the heat slightly. Add 1 teaspoon ground cumin powder, 1 teaspoon ground coriander powder, ½ teaspoon ground turmeric powder, and a pinch of cayenne powder (if desired for a gentle heat). Cook for a brief 30-45 seconds, stirring constantly to prevent burning, allowing the spices to toast and bloom their full, fragrant oils.
    4. Add Tomatoes: Pour in the well-drained diced tomatoes (or fresh chopped tomatoes). Stir well, then cook for about 5-7 minutes, occasionally mashing the tomatoes with the back of your spoon, until they break down and the mixture thickens into a rich, pulpy sauce. This allows the tomato’s tartness to mellow.
    5. Cook the Cauliflower: Add the prepared cauliflower florets and ¼ cup of water to the skillet. Stir thoroughly to ensure all the florets are coated evenly with the vibrant tomato-spice mixture. Cover the skillet tightly and cook for 15-18 minutes over medium-low heat, or until the cauliflower is tender-crisp but still holds its shape. Stir every 5-7 minutes to prevent sticking and ensure even cooking.
    6. Finish with Garam Masala & Cilantro: Remove the lid. Stir in 1 teaspoon ground garam masala and 2 tablespoons of fresh, finely chopped cilantro. Cook for just 1 minute more, allowing the garam masala to infuse its warm, complex aroma and the cilantro to brighten the dish. Taste and season generously with salt as needed. Serve hot.

    Chef’s Insight

    This Cauliflower Sabzi isn’t just a side; it’s a testament to how simple vegetables can be transformed into something truly spectacular with the right blend of spices and cooking techniques. The key is blooming the spices correctly and not overcooking the cauliflower, preserving its slight bite and sweet flavor.

    Cook’s Notes

    • Ensure your cauliflower florets are uniform in size for even cooking. Smaller florets cook faster.
    • Don’t rush the onion sauté; caramelizing it properly lays a crucial flavor foundation.
    • Blooming spices in oil briefly before adding liquids unlocks their full aromatic potential.
    • Adjust cayenne to your heat preference. For a milder dish, omit it entirely.
    • If using fresh tomatoes, choose ripe, juicy ones for the best flavor.

    Customize It

    • Add Other Veggies: Incorporate peas, potatoes (cook longer), or bell peppers for a more varied sabzi.
    • Protein Boost: Stir in cooked chickpeas, paneer cubes, or even scrambled eggs at the end.
    • Creamy Touch: A tablespoon of coconut milk or cashew cream at the very end adds richness.
    • Freshness: A squeeze of fresh lemon or lime juice just before serving brightens all the flavors.

    Keep & Reheat

    • Storage: Leftover Cauliflower Sabzi can be stored in an airtight container in the refrigerator for up to 3-4 days.
    • Reheating: Reheat gently on the stovetop over medium-low heat, adding a splash of water if needed to prevent drying out. Microwave reheating is also an option, but the stovetop method yields better texture.
    • Freezing: While possible, freezing cauliflower can alter its texture, making it softer. If freezing, cool completely then store in freezer-safe containers for up to 2 months. Thaw overnight in the fridge and reheat as directed.

    Prep time: 17 minutes. Cook time: 35 minutes. Yields: 4 servings.

    FAQs

    Can I use frozen cauliflower for this sabzi?
    Yes, you can use frozen cauliflower florets. Do not add the ¼ cup of water as frozen cauliflower releases its own moisture, and cook for a slightly shorter time, checking for tenderness.
    How spicy is this dish?
    The cayenne powder is optional and can be adjusted to your preference. A pinch provides a mild warmth, but you can omit it for a completely non-spicy version or add more for extra heat.
    What if my sabzi is too dry?
    If the sabzi seems too dry during cooking, add a tablespoon or two of hot water or vegetable broth to maintain moisture and prevent sticking. Stir it in gradually until the desired consistency is reached.
    Is this recipe naturally vegan?
    This recipe can easily be made vegan by substituting the ghee with an equal amount of vegetable oil or any other plant-based oil of your choice.
    Can I prepare this dish in advance?
    Yes, Cauliflower Sabzi is excellent for make-ahead meals. It can be cooked a day or two in advance and stored in an airtight container in the refrigerator.
    What does it mean to “bloom the spices”?
    Blooming spices refers to cooking them briefly in hot oil (or ghee) at the beginning of the cooking process. This technique helps to release their fat-soluble flavor compounds, intensifying their aroma and taste in the final dish.
    How do I know when the cauliflower is tender-crisp?
    The cauliflower is tender-crisp when it can be easily pierced with a fork but still retains a slight firmness and bite. Avoid overcooking, which can lead to mushy cauliflower.

    [redirect_script url=”aHR0cHM6Ly93d3cuY29va2luZ3dpdGhsb3JhLmNvbS9jYXVsaWZsb3dlci1zYWJ6aS1yZWNpcGUtd2l0aC1pbmRpYW4tc3BpY2VzP3V0bV9zb3VyY2U9cGludGVyZXN0LmNvbSZ1dG1fbWVkaXVtPXJlZmVycmFs”]

  • Irresistible Pecan Pie Bread Pudding with Decadent Bourbon Sauce

    Irresistible Pecan Pie Bread Pudding with Decadent Bourbon Sauce

    Indulge in a comforting classic with this luscious Pecan Pie Bread Pudding, a delightful dessert that transforms simple ingredients into an extraordinary treat. Featuring tender, vanilla-infused bread studded with crunchy pecans and drizzled with a decadent optional bourbon sauce, this pudding offers all the nostalgic flavors of pecan pie in an easy-to-serve format perfect for any occasion.

    Ingredients

    • 8-10 cups stale bread (challah, brioche, or French), cut into 1-inch cubes
    • 4 large eggs, room temperature
    • 2 cups (480ml) whole milk or heavy cream
    • ¾ cup (150g) granulated sugar
    • 1 tablespoon pure vanilla extract
    • 1 cup (115g) chopped pecans
    • ½ cup (113g) unsalted butter, divided
    • ½ cup (100g) packed light brown sugar
    • ¼ cup (60ml) heavy cream
    • 2 tablespoons (30ml) bourbon, optional
    • 1 pinch fine sea salt

    Instructions

    1. Prepare Your Bread Base: Begin by preparing 8-10 cups of day-old challah, brioche, or French bread, ensuring it’s cut into uniform 1-inch cubes. If your bread isn’t sufficiently stale, spread the cubes in a single layer on a baking sheet and allow them to air dry for 1-2 hours, or toast them briefly in a low oven at 200°F (95°C) for about 15 minutes until slightly crisp but not browned. This step is crucial for optimal custard absorption.
    2. Whisk the Rich Custard: In a generously sized mixing bowl, whisk together the 4 large, room temperature eggs, 2 cups of whole milk (or for an extra rich pudding, use heavy cream), ¾ cup of granulated sugar, 1 tablespoon of pure vanilla extract, and a pinch of fine sea salt. Whisk vigorously until all ingredients are thoroughly combined and the sugar has dissolved, creating a smooth and uniform custard base.
    3. Combine, Soak & Integrate Flavors: Add the prepared bread cubes and the 1 cup of chopped pecans to the custard mixture. Gently fold the bread and pecans into the custard, making sure every piece of bread is fully coated. Allow this mixture to soak at room temperature for 20-30 minutes, periodically pressing the bread down with a spoon to encourage maximum absorption of the liquid, which will result in a supremely moist pudding.
    4. Achieve Golden Perfection in the Oven: While the mixture soaks, preheat your oven to 350°F (175°C). Liberally butter a 9×13 inch baking dish to prevent sticking. Once the soaking time is complete, pour the custard-soaked bread and pecan mixture evenly into the prepared baking dish. Bake for 45-60 minutes, or until the top is beautifully golden brown and the center feels set. A knife inserted near the center should emerge clean, indicating the pudding is cooked through.
    5. Craft the Decadent Bourbon Sauce: As the pudding bakes, melt ½ cup of unsalted butter in a medium saucepan over medium heat. Once melted, whisk in ½ cup of packed light brown sugar, ¼ cup of heavy cream, and the 2 tablespoons of bourbon, if you are using it. Bring the mixture to a gentle simmer, whisking constantly for 5-7 minutes. The sauce will thicken slightly and become glossy; be careful not to scorch it. Remove from heat once thickened to your desired consistency.
    6. Cool, Serve & Garnish with Sauce: Remove the Pecan Pie Bread Pudding from the oven and allow it to cool slightly for about 10-15 minutes before serving. This brief cooling period helps the pudding set further and makes for cleaner slices. Drizzle generously with the warm Bourbon Sauce, allowing it to seep into the tender pudding. Serve warm and savor each delightful bite.

    Why You’ll Love It

    This Pecan Pie Bread Pudding is more than just a dessert; it’s a celebration of comfort food. You’ll adore the way humble ingredients transform into a sophisticated treat with a tender, custardy interior and a delightful crunch from the pecans. The optional bourbon sauce adds a layer of richness that truly elevates the experience, making it perfect for both casual family dinners and elegant holiday gatherings. It’s a fantastic way to use up day-old bread, minimizing waste while maximizing flavor.

    Pro Tips

    • Bread Choice is Key: While challah, brioche, or French bread are excellent, ensure it’s truly stale. Fresh bread absorbs too much liquid and can result in a soggy pudding.
    • Don’t Rush the Soak: The 20-30 minute soaking time is essential for the bread to fully absorb the custard, leading to a perfectly moist and flavorful pudding. Pressing the bread down occasionally helps.
    • Temperature Matters: Room temperature eggs and milk will blend more smoothly into the custard and absorb more evenly into the bread, contributing to a better texture.
    • Perfect Pudding Doneness: The knife test is your best friend. If it comes out clean, the pudding is set. Overbaking can lead to a dry texture, so keep an eye on it after 45 minutes.
    • Bourbon Sauce Control: If you prefer a thicker sauce, simmer it for a minute or two longer, but keep whisking to prevent burning. For a thinner sauce, you can add a touch more cream or milk.

    Serving Suggestions

    • Warm and Saucy: The classic way to enjoy this bread pudding is warm, generously drizzled with the homemade Bourbon Sauce.
    • A La Mode: For an extra decadent treat, serve warm slices with a scoop of vanilla bean ice cream or a dollop of freshly whipped cream. The contrast of hot and cold is delightful.
    • Coffee or Tea Pairing: This rich dessert pairs wonderfully with a strong cup of coffee, espresso, or a robust black tea, balancing its sweetness.
    • Holiday Feast Staple: It makes an excellent addition to any holiday spread, offering a comforting alternative or complement to traditional pecan pie.
    • Brunch Star: Though rich, a smaller portion can even be a luxurious addition to a special brunch menu.

    Yields: 8-10 servings. Prep time: 25 minutes. Cook time: 50 minutes.

    FAQs

    Can I use fresh bread for this recipe?
    While stale bread is preferred for optimal custard absorption and texture, you can use fresh bread if necessary. Simply cut it into cubes and toast it lightly in a 200°F (95°C) oven for 15-20 minutes, or spread it on a baking sheet to air dry for a few hours, to help dry it out.
    What kind of pecans should I use?
    You can use either pecan halves or chopped pecans. If using halves, rough chop them yourself for better distribution and texture within the pudding. Toasting them lightly before adding can also enhance their flavor.
    Can I make Pecan Pie Bread Pudding ahead of time?
    Yes, this bread pudding is an excellent make-ahead dessert. You can assemble it, cover it, and refrigerate it overnight before baking. For the sauce, you can prepare it a day or two in advance and gently reheat it before serving.
    How do I know when the bread pudding is fully cooked?
    The pudding is done when the top is golden brown and a knife inserted into the center comes out clean. The center should be set, not jiggly, indicating the custard has fully cooked through.
    Is the bourbon in the sauce essential, or can I omit it?
    The bourbon is optional but highly recommended as it adds a wonderful depth of flavor. If you prefer to omit it, you can substitute it with an equal amount of milk, cream, or even a splash of pecan liqueur or non-alcoholic vanilla extract for a similar flavor profile.
    How should I store leftovers?
    Store any leftover bread pudding covered tightly in the refrigerator for up to 3-4 days. The sauce can also be stored separately in an airtight container in the fridge.
    Can I freeze this bread pudding?
    Yes, you can freeze baked and cooled bread pudding. Wrap individual portions or the entire dish tightly in plastic wrap, then in foil. It can be frozen for up to 2-3 months. Thaw overnight in the refrigerator and reheat gently.
    What if I don’t have challah or brioche bread?
    French bread or even a good quality sandwich bread (slightly dried out) can be used as alternatives. The key is to use a sturdy, slightly dense bread that can hold up to soaking without becoming mushy.

    [redirect_script url=”aHR0cHM6Ly9lYXN5ZGFzaHJlY2lwZXMuY29tL3BlY2FuLXBpZS1icmVhZC1wdWRkaW5nLXJlY2lwZS13aXRoLWJvdXJib24tc2F1Y2UvP3V0bV9zb3VyY2U9cGludGVyZXN0LmNvbSZ1dG1fbWVkaXVtPXJlZmVycmFs”]

  • Luscious Strawberry Crunch Pound Cake with Whipped Cream Topping

    Luscious Strawberry Crunch Pound Cake with Whipped Cream Topping

    Indulge in a slice of pure joy with this magnificent Strawberry Crunch Pound Cake, a delightful dessert that combines the rich, buttery goodness of a classic pound cake with a playful, fruity crunch and a cloud-like cream topping. Perfect for any celebration or a sweet everyday treat, this cake is guaranteed to be a crowd-pleaser.

    Ingredients

    • 2 cups / 240g All-Purpose Flour
    • 1 ¾ cups / 350g Granulated Sugar
    • 1 cup / 226g Unsalted Butter, softened
    • 4 Large Eggs, at room temperature
    • 1 tablespoon Pure Vanilla Extract
    • 1 teaspoon Baking Powder
    • ½ cup / 120ml Whole Milk, at room temperature
    • ½ cup / 20g Freeze-Dried Strawberries, finely crushed
    • 15-20 Golden Sandwich Cookies, crushed (about 1½ cups)
    • 3 tablespoons / 42g Unsalted Butter, melted
    • 1 ½ cups / 360ml Heavy Cream, very cold
    • ½ cup / 60g Powdered Sugar, sifted
    • 1 teaspoon Pure Vanilla Extract

    Instructions

    1. Prepare Your Baking Pan: Preheat your oven to a steady 325°F (160°C). Thoroughly grease and lightly flour a 9×5 inch loaf pan or a 10-cup bundt pan, ensuring every crevice is coated to prevent sticking. This crucial step guarantees an easy release after baking.
    2. Cream Butter and Sugar: In a generously sized mixing bowl, using an electric mixer, beat the softened unsalted butter and granulated sugar together on medium-high speed for 3 to 5 minutes. Continue until the mixture becomes notably light, fluffy, and pale yellow, indicating air has been incorporated.
    3. Incorporate Eggs and Vanilla: Add the large room temperature eggs into the creamed mixture one at a time, beating meticulously after each addition until each egg is fully absorbed and the mixture looks smooth. Stir in the pure vanilla extract, scraping down the bowl sides to ensure even mixing.
    4. Whisk Dry Ingredients: In a separate medium bowl, combine the all-purpose flour, baking powder, and a small pinch of salt. Whisk these dry ingredients thoroughly for about 30 seconds to distribute the leavening evenly.
    5. Combine Wet and Dry Alternately: With the mixer on low speed, gradually add the dry flour mixture to the wet ingredients, alternating with the room temperature whole milk. Begin and end by adding a portion of the dry ingredients. Mix just until combined and no streaks of flour remain, being careful not to overmix, which can lead to a dense, tough cake.
    6. Bake the Pound Cake: Pour the cake batter smoothly and evenly into your meticulously prepared pan. Bake in the preheated oven for approximately 65-75 minutes for a loaf pan, or 75-85 minutes for a bundt pan. The cake is perfectly baked when a wooden skewer or toothpick inserted into the deepest part comes out completely clean.
    7. Cool the Cake: Allow the cake to cool in its pan on a wire rack for 15-20 minutes. This resting period helps the cake structure set before gently inverting it onto the wire rack to cool completely to room temperature.
    8. Craft the Strawberry Crunch Topping: While the cake cools, prepare the delightful crunch. Gently crush the freeze-dried strawberries and golden sandwich cookies. Achieve a finer crunch using a food processor or a coarser, more rustic texture by placing them in a zip-top bag and crushing with a rolling pin. In a small bowl, thoroughly mix the crushed ingredients with the melted butter until evenly coated.
    9. Prepare the Cream Topping: In a well-chilled large mixing bowl, using an electric mixer with a whisk attachment, whip the very cold heavy cream, sifted powdered sugar, and pure vanilla extract on high speed. Continue whipping until the mixture forms stiff peaks, meaning the cream holds its shape beautifully when the whisk is lifted. Do not overmix, or it will curdle.
    10. Assemble and Serve: Once the pound cake is entirely cooled – this is absolutely crucial for proper assembly – generously spread the luscious, whipped cream topping evenly over the cake. Then, artfully sprinkle your homemade strawberry crunch mixture over the cream. Slice with a sharp, warm knife and serve immediately to enjoy the contrast of textures and flavors!

    Recipe At-A-Glance

    This Strawberry Crunch Pound Cake is a true showstopper, combining a perfectly moist and buttery vanilla pound cake with a vibrant, textural freeze-dried strawberry and golden cookie crunch, all crowned with a delicate, fluffy whipped cream. It’s an elevated take on a nostalgic treat that’s surprisingly straightforward to bake.

    Baker’s Notes

    • Room Temperature Ingredients: Ensure your butter, eggs, and milk are all at room temperature. This allows them to emulsify properly, creating a smoother batter and a more uniform, tender crumb.
    • Do Not Overmix: After adding the flour, mix only until just combined. Overmixing develops gluten, resulting in a tough, dry pound cake.
    • Cool Completely: The cake must be completely cool before adding the cream topping and crunch. Applying them to a warm cake will cause the cream to melt and the crunch to lose its texture.
    • Chill Your Cream: For the best whipped cream, use a chilled bowl and very cold heavy cream. This helps the cream whip up faster and hold its stiff peaks longer.

    Try These Variations

    • Lemon Zest: Add the zest of one lemon to the pound cake batter for a bright, citrusy lift that beautifully complements the strawberries.
    • White Chocolate Drizzle: Before adding the crunch, drizzle melted white chocolate over the cream topping for an extra layer of sweetness and visual appeal.
    • Berry Medley Crunch: Incorporate other freeze-dried berries like raspberries or blueberries into the crunch mix for a more complex fruity flavor profile.
    • Nutty Crunch: For an added layer of flavor and texture, mix in finely chopped toasted almonds or pecans into the cookie crunch.

    Prep Time: 22 minutes Cook Time: 70 minutes Total Time: 2 hours 15 minutes Yield: 12 servings

    FAQs

    Can I substitute fresh strawberries for freeze-dried ones in the crunch?
    No, fresh strawberries will release too much moisture and make the crunch soggy. Freeze-dried strawberries are essential for the dry, crisp texture of the crunch topping.
    How can I ensure my pound cake is moist and not dry?
    Use room temperature ingredients, do not overmix the batter once the flour is added, and avoid overbaking. Check for doneness with a skewer; remove promptly when it comes out clean.
    Can I make this cake ahead of time?
    Yes, you can bake the pound cake and prepare the strawberry crunch up to 2 days in advance, storing them separately. Assemble the cake with the cream topping just before serving for best results.
    What’s the best way to store leftovers?
    Store any leftover assembled cake in an airtight container in the refrigerator for up to 3-4 days. The crunch topping might soften slightly over time.
    My heavy cream isn’t whipping to stiff peaks. What went wrong?
    Ensure your heavy cream is very cold, preferably straight from the fridge, and that your mixing bowl and whisk are also chilled. If it’s still not whipping, it might be due to low-fat cream or a warm environment.
    Can I use a different size pan for the pound cake?
    While a 9×5 inch loaf pan or 10-cup bundt pan is recommended, you can use similar volume pans. Adjust baking time as necessary; smaller pans will bake faster, larger pans slower.
    How do I get a fine crunch if I don’t have a food processor?
    Place the freeze-dried strawberries and golden sandwich cookies in a sturdy zip-top bag, remove excess air, and then crush them using a rolling pin, meat mallet, or the bottom of a heavy pan until desired consistency is reached.

    [redirect_script url=”aHR0cHM6Ly93d3cuY29va2luZ3dpdGhsb3JhLmNvbS9zdHJhd2JlcnJ5LWNydW5jaC1wb3VuZC1jYWtlLXJlY2lwZS13aXRoLWNyZWFtLXRvcHBpbmc/dXRtX3NvdXJjZT1waW50ZXJlc3QuY29tJnV0bV9tZWRpdW09cmVmZXJyYWw=”]

  • Decadent Caramel Apple Cheesecake Bars with Oat Crumb Topping

    Decadent Caramel Apple Cheesecake Bars with Oat Crumb Topping

    Indulge in the ultimate fall dessert with these Decadent Caramel Apple Cheesecake Bars! Featuring a buttery graham cracker crust, a luscious creamy cheesecake filling, tender spiced apples, and a crunchy oat crumb topping, these bars are finished with a generous drizzle of warm caramel sauce for an irresistible treat that’s perfect for sharing.

    Ingredients

    • 24 oz (680g) full-fat cream cheese, softened at room temperature
    • 1 ½ cups (300g) granulated sugar
    • 3 large eggs, at room temperature
    • 2 tsp (10ml) pure vanilla extract
    • 2 cups (200g) graham cracker crumbs, finely crushed
    • ½ cup (113g) unsalted butter, melted
    • 4 medium fresh baking apples, such as Granny Smith or Honeycrisp, about 4 cups diced
    • ½ cup (100g) light brown sugar, packed
    • 1 tsp (5g) ground cinnamon
    • ½ cup (60g) all-purpose flour
    • ½ cup (45g) rolled oats, old-fashioned
    • ½ cup (120ml) caramel sauce, store-bought or homemade, warmed for serving

    Instructions

    1. Prepare the Crust: Preheat your oven to 350°F (175°C). In a medium bowl, combine the 2 cups (200g) of finely crushed graham cracker crumbs with 2 tablespoons of granulated sugar and the ½ cup (113g) of melted unsalted butter. Mix thoroughly until the crumbs are evenly moistened and resemble wet sand. Press this mixture firmly and evenly into the bottom of a 9×13 inch baking pan, using the back of a spoon or your knuckles to compact it well. Bake for 10 minutes until lightly golden and fragrant. Remove from oven and set aside to cool slightly while you prepare the filling.
    2. Craft the Cheesecake Filling: In a large mixing bowl, using an electric mixer, beat the 24 oz (680g) of softened cream cheese with 1 cup (200g) of granulated sugar on medium speed until the mixture is smooth, light, and creamy, with no lumps, about 2-3 minutes. Scrape down the sides of the bowl. Beat in the 3 large room temperature eggs one at a time, mixing only until just combined after each addition; overmixing eggs can introduce too much air, leading to cracks. Finally, stir in the 2 tsp (10ml) of pure vanilla extract. Pour this smooth cheesecake batter evenly over the slightly cooled, pre-baked graham cracker crust, gently spreading to the edges with a spatula.
    3. Layer the Spiced Apples: In a medium saucepan, melt 1 tablespoon of butter over medium heat until shimmering. Add the 4 cups of diced baking apples, ½ cup (100g) of packed light brown sugar, and 1 tsp (5g) of ground cinnamon. Sauté for 5-7 minutes, stirring occasionally, until the apples are tender-crisp but still retain their shape and have slightly softened – avoid making them mushy. Spoon this fragrant apple mixture evenly over the cheesecake layer.
    4. Assemble the Crumb Topping: In a separate medium bowl, combine the ½ cup (60g) of all-purpose flour, ½ cup (45g) of old-fashioned rolled oats, ¼ cup (50g) of packed light brown sugar, and 2 tablespoons of melted unsalted butter. Use your fingertips to mix and rub the ingredients together until coarse, clumpy crumbs form. Sprinkle this delicious crumb topping generously and evenly over the spiced apple layer.
    5. Bake to Perfection: Carefully return the pan to the preheated 350°F (175°C) oven. Bake for 40-50 minutes, or until the edges of the cheesecake appear set and slightly golden, while the center still exhibits a slight jiggle when the pan is gently shaken. This slight jiggle indicates perfect doneness, as the cheesecake will continue to set as it cools.
    6. Cool and Chill Thoroughly: Once baked, remove the pan from the oven and let the bars cool completely on a wire rack at room temperature for at least 1-2 hours. Cooling slowly prevents cracking. Once completely cooled, cover the pan loosely with plastic wrap or foil and refrigerate for a minimum of 4 hours, or ideally overnight, until the cheesecake is thoroughly firm and perfectly set. Rushing this step will result in a messy slice.
    7. The Finishing Touch: Just before serving, cut the chilled bars into squares. Then, generously drizzle about ½ cup (120ml) of warmed caramel sauce over the entire pan or individual bars. For an optional gourmet touch, a tiny sprinkle of flaky sea salt can enhance the caramel’s flavor.

    Why You’ll Love It

    These Caramel Apple Cheesecake Bars are an absolute showstopper, combining the best of fall’s flavors with a classic creamy dessert. The contrasting textures of the crisp graham crust, smooth cheesecake, tender apples, and crunchy oat topping, all enveloped in a rich caramel embrace, create a truly unforgettable experience. They’re perfect for holidays, gatherings, or just a comforting treat at home, offering a sophisticated taste with a comforting, familiar appeal.

    Pro Tips

    • Room Temperature Ingredients: Ensure your cream cheese and eggs are at room temperature. This is crucial for a smooth, lump-free cheesecake batter that incorporates air evenly, preventing cracks during baking.
    • Don’t Overmix: After adding the eggs, mix just until combined. Overmixing introduces too much air, which expands in the oven and then collapses, causing cracks in the cheesecake.
    • Cooling is Key: Do not rush the cooling and chilling process. Gradual cooling on a wire rack and extended refrigeration are essential for the cheesecake to fully set, ensuring clean, firm slices.
    • Dice Apples Uniformly: Aim for consistently sized apple pieces (about ½-inch dice) so they cook evenly and have a pleasant texture in every bite.
    • Warm Caramel: Warm your caramel sauce slightly before drizzling. It will flow more smoothly and distribute beautifully over the bars.

    Serving Suggestions

    These decadent Caramel Apple Cheesecake Bars are fantastic on their own, but they also pair wonderfully with a few simple additions. Serve them with a scoop of vanilla bean ice cream or a dollop of fresh whipped cream for an extra layer of indulgence. A sprinkle of toasted pecans or walnuts would add another textural dimension, or a light dusting of powdered sugar can provide an elegant finish. They’re perfect with a hot cup of coffee, cider, or tea after a meal.

    Yields: 1 (9×13-inch) pan, 16 servings
    Prep time: 35 minutes
    Cook time: 70 minutes
    Chill time: 4 hours or overnight

    FAQs

    Can I use different types of apples for these bars?
    Yes, you can! While Granny Smith offers a lovely tart contrast and Honeycrisp holds its shape well, other firm baking apples like Fuji, Gala, or Braeburn would also work beautifully. Avoid very soft apples that might turn mushy.
    How do I store leftover Caramel Apple Cheesecake Bars?
    Store any leftover bars covered tightly with plastic wrap or in an airtight container in the refrigerator for up to 3-4 days. Ensure they are kept cold to maintain freshness and texture.
    Can I freeze Caramel Apple Cheesecake Bars?
    Absolutely! Once completely chilled and set, cut the bars into individual servings. Wrap each bar tightly in plastic wrap, then place them in an airtight freezer-safe container for up to 1-2 months. Thaw in the refrigerator overnight before serving, then drizzle with fresh caramel.
    What if my cheesecake cracks during baking or cooling?
    Cracks often occur from overmixing eggs, baking at too high a temperature, or cooling too rapidly. While not ideal, a crack doesn’t affect the taste! The apple and crumb topping, plus the caramel drizzle, will beautifully conceal any imperfections.
    Can I make my own caramel sauce for this recipe?
    Yes, using homemade caramel sauce will elevate these bars even further! Just ensure it’s a quality, thick caramel that sets nicely. Alternatively, a good store-bought caramel works perfectly for convenience.
    How can I tell if the cheesecake is fully baked?
    The edges of the cheesecake should appear set and lightly golden, while the very center (about 2-3 inches) should still have a slight wobble or jiggle when the pan is gently nudged. It will firm up completely as it cools and chills.
    What size pan is best for this recipe?
    A standard 9×13-inch (23×33 cm) baking pan is ideal for these bars, yielding a good thickness for both the crust and the cheesecake layer. Ensure it’s a sturdy metal pan for even baking.

    [redirect_script url=”aHR0cHM6Ly93d3cuY29va2luZ3dpdGhsb3JhLmNvbS9jYXJhbWVsLWFwcGxlLWNoZWVzZWNha2UtYmFycy13aXRoLWNydW1iLXRvcHBpbmcvP3V0bV9zb3VyY2U9cGludGVyZXN0LmNvbSZ1dG1fbWVkaXVtPXJlZmVycmFs”]

  • Effortless Spiced Pumpkin Oatmeal Dump Cake with Crumble Topping

    Effortless Spiced Pumpkin Oatmeal Dump Cake with Crumble Topping

    This dump cake is deceptively simple to prepare, layering a creamy pumpkin base with a spiced cake mix and a rich oat crumble. It’s the perfect easy dessert for fall gatherings, delivering warm, comforting flavors with minimal effort and maximum deliciousness.

    Ingredients

    • 1 (15 oz / 425g) can pure pumpkin puree (not pie filling)
    • 1 (15.25 oz / 432g) box spiced yellow cake mix
    • 1 ½ cups (135g) old-fashioned rolled oats
    • ½ cup (113g) unsalted butter, very cold and cut into small cubes
    • 2 teaspoons (10g) pumpkin pie spice
    • ½ cup (100g) light brown sugar, firmly packed

    Instructions

    1. Preheat Oven & Prepare Baking Dish: Begin by preheating your oven to 350°F (175°C). While the oven heats, take a 9×13 inch baking dish and lightly grease its interior with butter or a non-stick spray, ensuring even coverage to prevent sticking.
    2. Layer Pumpkin Puree: Carefully open the can of pumpkin puree and spread its contents evenly across the bottom of the prepared baking dish. Aim for a smooth, consistent layer that covers the entire base.
    3. Add Dry Cake Mix: Gently and uniformly sprinkle the dry spiced yellow cake mix over the pumpkin layer. It’s crucial not to stir or mix these layers; the distinct separation allows the ‘dump cake’ magic to unfold as it bakes, creating a unique texture.
    4. Combine Crumble Dry Ingredients: In a separate medium-sized mixing bowl, combine the old-fashioned rolled oats, the firmly packed light brown sugar, and the aromatic pumpkin pie spice. Whisk these dry ingredients together briefly to ensure they are well distributed.
    5. Incorporate Butter for Crumble: Scatter the very cold, cubed unsalted butter over the oat mixture. Using your fingertips or a sturdy pastry blender, quickly work the butter into the dry ingredients. Continue until the mixture transforms into delightful, coarse crumbs, resembling wet sand. Avoid overworking, as this can make the crumble tough.
    6. Top Cake with Crumble: Evenly distribute the spiced oat crumble over the dry cake mix layer. Ensure every part of the cake mix is covered with a generous layer of crumble; this creates the signature crunchy, golden-brown topping.
    7. Bake Until Golden: Place the dish in your preheated oven and bake for approximately 50-60 minutes. Keep an eye on it; the topping should achieve a beautiful golden-brown color, and you’ll notice the pumpkin filling bubbling enticingly around the edges of the dish. A toothpick inserted into the cake part (not puree) should come out mostly clean.
    8. Cool Slightly & Serve: Once baked, carefully remove the pumpkin dump cake from the oven. Allow it to cool on a wire rack for at least 15-20 minutes before serving. This cooling period is essential as it helps the cake set properly, making it easier to scoop and enjoy.

    Chef’s Insight

    The beauty of a dump cake lies in its simplicity and the unexpected alchemy of its layers. For this pumpkin version, using a quality spiced yellow cake mix is key, as it provides both structure and a burst of complementary flavor without extra effort. Don’t be tempted to stir the dry cake mix into the pumpkin; the separation is what creates that distinct, delicious texture where the cake mix slowly absorbs moisture and bakes into a tender, cake-like consistency beneath the crisp crumble.

    Cook’s Notes

    • Butter Temperature is Crucial: Ensure your unsalted butter is very cold for the crumble. This prevents it from melting too quickly when mixed with the dry ingredients, resulting in a perfectly tender and crumbly topping.
    • Even Layers Matter: While it’s a ‘dump’ cake, take a moment to spread the pumpkin and cake mix layers as evenly as possible. This ensures consistent baking and a balanced flavor in every bite.
    • Don’t Overbake: Keep an eye on the edges for bubbling and the crumble for golden-brown color. Overbaking can dry out the pumpkin layer.

    How To Serve

    This spiced pumpkin oatmeal dump cake is a delightful dessert on its own, but it truly shines when served warm with a scoop of vanilla bean ice cream or a generous dollop of freshly whipped cream. For an extra touch of indulgence, a drizzle of caramel sauce or a sprinkle of toasted pecans would elevate the experience. It also makes a wonderful addition to a holiday dessert spread, offering a comforting alternative to traditional pie.

    Prep Time: 9 minutes | Cook Time: 52 minutes | Yield: 12 servings

    FAQs

    Can I use pumpkin pie filling instead of pumpkin puree?
    No, it’s best to use pure pumpkin puree. Pumpkin pie filling contains added sugars and spices that would alter the flavor profile and potentially make the cake too sweet or watery.
    What if I don’t have spiced yellow cake mix?
    You can use a plain yellow cake mix and add an extra teaspoon of pumpkin pie spice to the cake mix layer before sprinkling the crumble.
    Can I make this ahead of time?
    Yes, this cake can be baked a day in advance. Store it covered at room temperature for up to 24 hours, or in the refrigerator for longer. Reheat gently in the oven for best results.
    How do I store leftovers?
    Store any leftover dump cake tightly covered in the refrigerator for up to 3-4 days. It can be enjoyed cold, at room temperature, or gently reheated.
    Can I freeze pumpkin dump cake?
    Yes, you can freeze individual portions or the whole cake. Wrap tightly in plastic wrap and then foil, then freeze for up to 2-3 months. Thaw in the refrigerator overnight and reheat.
    My crumble isn’t getting crispy, what went wrong?
    Ensure your butter was very cold and you didn’t overwork the crumble mixture. Also, make sure your oven temperature is accurate; a slightly lower temperature can prevent proper crisping.
    What can I add for extra flavor?
    Consider adding ½ cup of chopped pecans or walnuts to the oat crumble, or a ½ cup of chocolate chips sprinkled over the pumpkin layer for a different twist.

    [redirect_script url=”aHR0cHM6Ly93d3cuY29va2luZ3dpdGhsb3JhLmNvbS9wdW1wa2luLW9hdG1lYWwtZHVtcC1jYWtlLXdpdGgtc3BpY2VkLWNydW1ibGU/dXRtX3NvdXJjZT1waW50ZXJlc3QuY29tJnV0bV9tZWRpdW09cmVmZXJyYWw=”]

  • Easy Homemade Rocky Road Fudge with Gooey Marshmallow Chunks

    Easy Homemade Rocky Road Fudge with Gooey Marshmallow Chunks

    Indulge in the nostalgic delight of homemade rocky road fudge. This no-bake treat effortlessly combines rich chocolate, soft marshmallows, and crunchy nuts into a perfectly set confection that’s surprisingly simple to make.

    Ingredients

    • 14 ounces (397g) sweetened condensed milk, full-fat
    • 2 cups (340g) good quality chocolate chips (semi-sweet or milk)
    • ½ cup (113g) unsalted butter, cut into pieces
    • 1 teaspoon pure vanilla extract
    • 3 cups (150g) mini marshmallows
    • 1 cup (115g) chopped nuts (such as walnuts or pecans)

    Instructions

    1. Melt the Base Ingredients: In a medium-sized heavy-bottomed saucepan, combine the cut unsalted butter, chocolate chips, and sweetened condensed milk. Place the saucepan over low heat. Stir continuously with a rubber spatula or wooden spoon, ensuring the mixture melts slowly and evenly without scorching. Continue stirring for about 7-9 minutes until the chocolate is fully melted and the mixture is smooth, glossy, and well combined. Crucially, do not allow it to boil, as this can cause the fudge to seize or become grainy.
    2. Infuse Flavor and Texture: Immediately remove the saucepan from the heat. Stir in the pure vanilla extract until fully incorporated. Working quickly, gently fold in the mini marshmallows and chopped nuts. Continue folding until these ingredients are evenly distributed throughout the warm chocolate mixture. Speed is important here, as the fudge will begin to set as it cools.
    3. Prepare and Press into Pan: Promptly pour the warm fudge mixture into an 8×8 inch (20×20 cm) baking pan that has been fully lined with parchment paper, leaving a generous overhang on all sides. This parchment sling will make for effortless removal later. Use an offset spatula or the back of a spoon to firmly and evenly press the fudge into the pan, ensuring a compact and smooth surface.
    4. Chill Until Firm: Transfer the pan to the refrigerator and allow the fudge to chill for a minimum of 2½ to 3 hours, or until it is completely firm to the touch. Adequate chilling is essential for clean cuts and the proper fudge consistency.
    5. Slice and Serve: Once thoroughly chilled, use the parchment paper overhang to carefully lift the solid block of fudge out of the pan and onto a cutting board. For perfect squares, warm a sharp knife under hot water, dry it, and then slice the fudge into 1-inch (2.5 cm) pieces. Repeat warming and drying the knife between cuts for the cleanest results.

    Why You’ll Love It

    This Rocky Road Fudge recipe is an absolute dream for anyone craving a quick, satisfying dessert with minimal fuss. It’s a no-bake wonder that comes together with just a few ingredients, delivering a rich chocolatey base studded with chewy marshmallows and crunchy nuts. Perfect for gifting, holiday platters, or simply a sweet treat for yourself.

    Pro Tips

    • Quality Ingredients Matter: Use good quality chocolate chips for the best flavor and texture. High-fat condensed milk also contributes to a creamier fudge.
    • Low and Slow Melting: Never rush the melting process. Low heat prevents the chocolate from burning and ensures a smooth, lump-free base. Stirring constantly is key.
    • Working Quickly: Once the chocolate base is melted and removed from heat, work swiftly to incorporate the vanilla, marshmallows, and nuts before the mixture starts to cool and thicken too much.
    • Parchment Paper is Your Friend: Lining the pan with parchment paper is crucial for easy removal. Leave an overhang to create handles.
    • Warm Knife for Clean Cuts: For perfectly neat squares, dip your knife in hot water and wipe it dry between each cut. This helps glide through the fudge and prevent sticking.

    Leftovers & Reheating

    • Storage: Store rocky road fudge in an airtight container at room temperature for up to 1 week, or in the refrigerator for up to 2 weeks. If refrigerating, let it come to room temperature for 15-20 minutes before serving for the best texture.
    • Freezing: This fudge freezes beautifully! Wrap individual pieces tightly in plastic wrap, then place them in a freezer-safe bag or container. It can be frozen for up to 2-3 months. Thaw at room temperature for several hours before enjoying.
    • Make Ahead: Rocky Road Fudge is an excellent make-ahead dessert. Prepare it days in advance and keep it chilled until you’re ready to serve.

    Prep Time: 17 minutes | Cook Time: 8 minutes | Chill Time: 2½ hours | Total Time: 2 hours 35 minutes | Yield: Approximately 36 squares

    FAQs

    Can I use different types of chocolate chips?
    Yes, you can use a mix of semi-sweet, milk, or even dark chocolate chips, or just one type, depending on your preference for sweetness and chocolate intensity.
    What if my fudge doesn’t set properly?
    If your fudge is too soft, it likely didn’t chill long enough, or the mixture might have been cooked too high or not long enough. Ensure you’re using full-fat sweetened condensed milk and chill for the recommended time.
    Can I substitute the nuts?
    Absolutely! Walnuts and pecans are classic, but you can also use almonds, peanuts, or even omit them if you prefer a nut-free version. Lightly toasting nuts beforehand can enhance their flavor.
    How do I get clean cuts when slicing?
    The best trick is to use a sharp knife that has been warmed under hot water and then wiped dry. Repeat this process for each cut to achieve perfectly clean, non-sticky slices.
    Is there a way to make this fudge dairy-free?
    For a dairy-free version, use dairy-free chocolate chips, a plant-based butter alternative, and dairy-free sweetened condensed milk (often made with coconut milk).
    Can I add other mix-ins?
    Yes, feel free to get creative! Sprinkles, crushed cookies, pretzels, or dried fruit can be folded in with the marshmallows and nuts for extra flavor and texture.
    What’s the best way to store leftover fudge?
    Store leftover fudge in an airtight container at room temperature for up to a week, or in the refrigerator for up to two weeks. It also freezes well for longer storage.

    [redirect_script url=”aHR0cHM6Ly93d3cuY29va2luZ3dpdGhsb3JhLmNvbS9yZWNpcGUtZm9yLXJvY2t5LXJvYWQtZnVkZ2Utd2l0aC1tYXJzaG1hbGxvdy1jaHVua3M/dXRtX3NvdXJjZT1waW50ZXJlc3QuY29tJnV0bV9tZWRpdW09cmVmZXJyYWw=”]

  • Effortless Golden Butter Swim Biscuits: A One-Dish Wonder

    Effortless Golden Butter Swim Biscuits: A One-Dish Wonder

    Dive into the simplest biscuit experience with these incredibly easy Butter Swim Biscuits. Baked in a pool of melted butter, they emerge golden, tender, and perfectly moist, offering a delightful texture that’s both soft and slightly crisp.

    Ingredients

    • 2 cups (240g) all-purpose flour, unbleached
    • 2 tablespoons (25g) granulated sugar
    • 1 tablespoon baking powder, aluminum-free
    • 1 teaspoon fine sea salt
    • 1 cup (240ml) whole milk, cold
    • 1 stick (½ cup/113g) unsalted butter, melted

    Instructions

    1. Preheat your oven to a hot 450°F (230°C). While the oven heats, melt the 1 stick (½ cup) unsalted butter in a microwave-safe bowl or small saucepan until fully liquid. Carefully pour the shimmering melted butter into a 9×13 inch baking dish, tilting the dish gently to ensure the entire bottom is evenly coated.
    2. In a large mixing bowl, thoroughly whisk together the 2 cups all-purpose flour, 2 tablespoons granulated sugar, 1 tablespoon baking powder, and 1 teaspoon salt. Ensure there are no lumps and the leavening agent is well distributed for an even rise.
    3. Add the 1 cup cold whole milk directly into the bowl with the dry ingredients. Using a sturdy spoon or rubber spatula, mix just until the ingredients are moistened and a shaggy, sticky dough forms. Be careful not to overmix, as this develops gluten and can lead to tough biscuits; a few dry streaks are perfectly fine.
    4. With a large spoon, carefully dollop spoonfuls of the sticky biscuit dough evenly over the melted butter in the prepared baking dish. Once all the dough is in the dish, gently spread it towards the edges with the back of your spoon or a spatula, ensuring it forms a relatively even layer. Do not press down too firmly.
    5. Transfer the dish to the preheated oven and bake for 20 minutes, or until the tops of the biscuits are beautifully golden brown, puffed up, and cooked through. The edges should appear slightly crispy where they meet the butter. A toothpick inserted into the center should come out clean. Allow them to cool slightly in the dish before serving warm.

    Recipe At-A-Glance

    These butter swim biscuits are a revelation in simplicity and flavor. With just six basic ingredients, you can whip up a batch of incredibly tender, buttery biscuits in under 30 minutes. The genius lies in baking the dough directly in a pool of melted butter, ensuring every bite is rich and moist with a perfectly crisp bottom. Ideal for breakfast, brunch, or alongside savory dishes.

    Baker’s Notes

    • Do not overmix the dough. Overworking the flour develops gluten, which results in tough, dense biscuits instead of light, fluffy ones. Mix only until just combined.
    • For extra flaky layers, ensure your milk is very cold. The contrast with the hot oven helps create steam and lift.
    • Resist the urge to check the oven frequently. Let the biscuits bake undisturbed for at least 15 minutes to allow them to rise properly and set.
    • Adjust baking time slightly based on your oven; ovens can vary. Look for deep golden tops and puffed centers.

    Try These Variations

    • For a cheesy twist, fold in ½ cup shredded cheddar cheese with the dry ingredients.
    • Sweeten them further by adding 1 teaspoon vanilla extract to the milk or by sprinkling coarse sugar on top before baking.
    • For a savory herb biscuit, mix in 1 tablespoon chopped fresh chives or dried dill with the dry ingredients.
    • Add a touch of warmth with ¼ teaspoon ground cinnamon or nutmeg to the dry mix.

    Prep time: 8 minutes Cook time: 20 minutes Yield: 12 medium biscuits

    FAQs

    Can I use cold butter instead of melted?
    No, the melted butter is crucial for this recipe. It creates the ‘butter swim’ effect, ensuring incredibly moist biscuits and preventing them from sticking while baking.
    What kind of flour is best for biscuits?
    All-purpose flour works perfectly for these biscuits. While self-rising flour could work, you’d need to adjust the baking powder and salt, so stick with all-purpose for the specified ratios.
    My biscuits didn’t rise, what went wrong?
    The most common culprits are old or expired baking powder, or overmixing the dough. Ensure your baking powder is fresh and mix the dough minimally, just until moistened.
    How should I store leftover butter swim biscuits?
    Store cooled biscuits in an airtight container at room temperature for up to 2-3 days. Reheat gently in the microwave for 15-20 seconds or in a warm oven for a few minutes.
    Can I make these biscuits ahead of time?
    The dough is best baked immediately. However, you can melt the butter and whisk the dry ingredients the night before. Combine the wet and dry ingredients just before baking.
    Can I use a different size baking dish?
    A 9×13 inch dish is ideal for the specified quantity, ensuring the biscuits are snugly nestled and benefit from the butter pool. If you use a smaller dish, the biscuits will be taller and may need a minute or two longer to cook. A larger dish might result in thinner, crispier biscuits.
    Can I freeze butter swim biscuits?
    Yes, baked and cooled biscuits can be frozen in an airtight freezer bag for up to 1 month. Thaw at room temperature and reheat in a low oven (300°F/150°C) until warm through.

    [redirect_script url=”aHR0cHM6Ly9lYXN5ZGFzaHJlY2lwZXMuY29tL2J1dHRlci1zd2ltLWJpc2N1aXQtcmVjaXBlLWJ1dHRlcnktcGFuLWJha2VkLz91dG1fc291cmNlPXBpbnRlcmVzdC5jb20mdXRtX21lZGl1bT1yZWZlcnJhbA==”]

  • Classic Palmer House Brownies with Toasted Walnut Topping

    Classic Palmer House Brownies with Toasted Walnut Topping

    Experience the timeless delight of these fudgy Palmer House Brownies, crowned with a crunchy layer of toasted walnuts. This classic recipe delivers a perfect balance of rich chocolate flavor and satisfying texture, making it an ideal treat for any occasion.

    Ingredients

    • Unsalted butter, softened: 1 cup (226g)
    • Granulated sugar: 2 cups (400g)
    • Large eggs, room temperature: 4
    • Pure vanilla extract: 2 teaspoons
    • All-purpose flour, sifted: 1 cup (120g)
    • Unsweetened cocoa powder: ¾ cup (75g)
    • Baking powder: ½ teaspoon
    • Fine sea salt: ½ teaspoon
    • Walnuts, roughly chopped: 1 cup (120g)

    Instructions

    1. Prepare your baking pan: Preheat your oven to a steady 350°F (175°C). Take a 9×13 inch baking pan and line it thoroughly with parchment paper, allowing a generous overhang on the longer sides. This parchment “sling” will be your secret weapon for effortlessly lifting the cooled brownies from the pan later.
    2. Melt butter and combine with sugar: In a spacious, heavy-bottomed saucepan, gently melt the unsalted butter over very low heat until it’s completely liquid. Remove the pan from the heat immediately. Add the granulated sugar, stirring vigorously with a wooden spoon or spatula until the sugar is fully incorporated and the mixture looks uniform, about 1-2 minutes. This initial step helps dissolve some of the sugar.
    3. Incorporate wet ingredients: Into the warm butter-sugar mixture, crack in the large eggs one by one. After each egg, beat it in thoroughly until no streaks of yolk remain and the mixture is smooth and glossy. Once all eggs are incorporated, stir in the pure vanilla extract, appreciating its aromatic fragrance as it blends in.
    4. Whisk dry ingredients: In a separate, medium-sized bowl, combine the sifted all-purpose flour, unsweetened cocoa powder, baking powder, and fine sea salt. Whisk these dry ingredients together diligently for about 30 seconds to ensure they are fully aerated and evenly distributed, which prevents pockets of leavener.
    5. Gently combine mixtures: Gradually add the dry ingredient mixture into the wet ingredients in two or three additions. Use a spatula to mix very gently, folding just until no streaks of flour are visible. Crucially, avoid overmixing, as excessive gluten development will lead to dense, tough brownies instead of a tender, fudgy texture.
    6. Fold in internal walnuts: Measure out half of your roughly chopped walnuts. Gently fold these nuts into the prepared brownie batter. Distribute them evenly throughout for an enjoyable textural contrast in every bite.
    7. Pour and top the batter: Carefully transfer the rich brownie batter into your parchment-lined 9×13 inch baking pan. Use an offset spatula or the back of a spoon to spread the batter evenly into all corners. Generously sprinkle the remaining half of the chopped walnuts over the entire surface of the batter, pressing them lightly to adhere.
    8. Bake to perfection: Place the pan into your preheated 350°F (175°C) oven and bake for 26-28 minutes. Begin checking around the 25-minute mark. The brownies are ready when a wooden toothpick or cake tester inserted into the center comes out with moist crumbs attached – not wet batter – and the edges appear set and slightly pulled away from the sides of the pan.
    9. Cool completely: Remove the baked brownies from the oven and set the pan on a wire rack. Allow them to cool completely in the pan for at least 2-3 hours, or even longer. This extended cooling time is absolutely essential for the brownies to set properly, ensuring clean, perfect slices and that signature fudgy consistency.

    Pro Tips

    • Room Temperature Ingredients: Ensure eggs and butter are at room temperature for a smoother, more emulsified batter, leading to a superior texture.
    • Do Not Overmix: The most common pitfall! Mix dry ingredients into wet until just combined to prevent tough, cakey brownies.
    • Cooling is Crucial: Resist the urge to cut warm brownies. They need to cool completely to achieve that dense, fudgy center and clean edges.
    • Parchment Overhang: Don’t skip this! It makes lifting the entire slab of brownies out of the pan effortless for neat slicing.

    Serving Suggestions

    • Classic Plain: Enjoy them as is, letting their rich flavor shine.
    • A La Mode: Warm slightly and serve with a scoop of vanilla bean ice cream.
    • Drizzled Delights: A drizzle of homemade caramel sauce or a sprinkle of flaky sea salt elevates the experience.
    • Coffee Companion: Pair with a hot cup of coffee, a latte, or a cold glass of milk for a comforting treat.

    Storage & Make-Ahead

    • At Room Temperature: Store cooled brownies in an airtight container at room temperature for up to 3-4 days.
    • Refrigerated: For a firmer, chewier brownie, store in an airtight container in the refrigerator for up to a week. Bring to room temperature or warm slightly before serving.
    • Freezing: Tightly wrap individual brownies or the entire slab in plastic wrap, then aluminum foil. Freeze for up to 2-3 months. Thaw at room temperature.
    • Make-Ahead: The batter can be made up to 24 hours in advance and stored in the fridge, but bring to room temp before baking.

    Prep Time: 18 minutes. Cook Time: 28 minutes. Yield: 16 decadent brownies.

    FAQs

    Can I use salted butter instead of unsalted?
    While unsalted butter allows for precise salt control, you can use salted butter. Just reduce the added salt in the recipe from ½ teaspoon to ¼ teaspoon to prevent them from being too salty.
    Why are my brownies cakey instead of fudgy?
    Cakey brownies often result from overmixing the batter after adding the flour. Overmixing develops gluten, leading to a lighter, more cake-like texture. Mix only until the dry ingredients are just incorporated.
    What’s the best way to cut brownies cleanly?
    Ensure the brownies are completely cooled. For extra neat cuts, refrigerate the pan for 30 minutes before cutting, and use a sharp knife wiped clean between each slice. A plastic knife can also yield surprisingly clean edges.
    Can I substitute different nuts for walnuts?
    Absolutely! Pecans, almonds, or even a mix of nuts would be delicious. For best flavor, toast any nuts lightly before adding them to the batter.
    How do I know when the brownies are done baking?
    The edges should look set and slightly pulled away from the pan. A toothpick inserted into the center should come out with moist crumbs attached, but no wet batter. Undercooking slightly yields a fudgier result, while overbaking makes them dry.
    Can I make these brownies gluten-free?
    You can experiment with a 1:1 gluten-free all-purpose flour blend. Ensure the blend contains xanthan gum, or add ½ teaspoon per cup of flour, to maintain texture. Results may vary slightly.
    What size pan is best if I don’t have a 9×13?
    A 9×9 inch pan will work for a thicker brownie, but you’ll need to increase the baking time significantly, possibly up to 40-50 minutes, and watch carefully for doneness. A thinner brownie will result in a larger pan like 10×15, requiring less bake time.

    [redirect_script url=”aHR0cHM6Ly93d3cuY29va2luZ3dpdGhsb3JhLmNvbS9wYWxtZXItaG91c2UtYnJvd25pZS1yZWNpcGUtd2l0aC13YWxudXQtdG9wcGluZz91dG1fc291cmNlPXBpbnRlcmVzdC5jb20mdXRtX21lZGl1bT1yZWZlcnJhbA==”]

  • Irresistible Spiced Pumpkin Scones with Sweet Maple Glaze

    Irresistible Spiced Pumpkin Scones with Sweet Maple Glaze

    Embrace the cozy flavors of autumn with these delightful Spiced Pumpkin Scones, perfectly balanced with a luxurious maple glaze. This recipe promises tender, fragrant scones bursting with warm spices and the subtle sweetness of pumpkin, making them an ideal treat for breakfast, brunch, or an afternoon pick-me-up.

    Ingredients

    • 2 cups all-purpose flour, unbleached
    • 1 cup pumpkin puree, pure (not pie filling)
    • ½ cup light brown sugar, packed
    • ½ cup unsalted butter, very cold and cubed
    • 1 tbsp baking powder, aluminum-free
    • ½ tsp baking soda
    • 1 tsp ground cinnamon, Ceylon
    • ½ tsp ground nutmeg, freshly grated
    • ½ tsp ground ginger
    • ¼ tsp ground cloves (or 1 ½ tsp quality pumpkin pie spice blend)
    • ½ cup heavy cream, cold (or full-fat buttermilk)
    • ¼ cup pure maple syrup, Grade A
    • 1 ½ cups powdered sugar, sifted
    • 2-3 tbsp whole milk or additional heavy cream (for glaze)
    • ½ tsp fine sea salt
    • 1 tsp pure vanilla extract
    • 1 tsp blackstrap molasses (optional, for deeper flavor and color)

    Instructions

    1. Prepare Oven & Dry Ingredients: Preheat your oven to 400°F (200°C) and line a sturdy baking sheet with parchment paper to prevent sticking. In a spacious mixing bowl, thoroughly whisk together the all-purpose flour, packed brown sugar, baking powder, baking soda, a medley of warm spices (cinnamon, nutmeg, ginger, and cloves, or your preferred pumpkin pie spice blend), and fine sea salt until uniformly combined. This ensures even flavor distribution.
    2. Cut in Cold Butter: Add the very cold, cubed unsalted butter to the dry ingredients. Use a pastry blender, two knives, or quickly work with your fingertips to cut the butter into the flour mixture until it resembles coarse crumbs with some pea-sized pieces of butter remaining. Avoid overworking, as this keeps the scones tender.
    3. Combine Wet Ingredients: In a separate medium bowl, whisk together the pure pumpkin puree, cold heavy cream (or buttermilk for a tangier scone), pure vanilla extract, and optional molasses until smooth and well-integrated.
    4. Mix Dough Gently: Create a well in the center of your dry ingredient mixture, then pour in the wet pumpkin mixture. Using a fork or a silicone spatula, gently fold and mix until the ingredients are just combined and a shaggy dough forms. Be careful not to overmix, as this can develop gluten and lead to tough scones; a slightly crumbly texture is desired.
    5. Form & Cut Scones: Lightly flour your clean work surface. Turn the dough out and gently knead it just 2-3 times, enough to bring it together. Then, carefully pat the dough into a uniform 8-inch disc, approximately 1-inch thick. Using a sharp knife or a bench scraper, cut the disc into 8 even wedges. Arrange these wedges on your prepared baking sheet, ensuring a little space between each to allow for even baking.
    6. Bake to Golden Perfection: Transfer the baking sheet to your preheated oven and bake for 18-22 minutes. The scones are done when their edges are beautifully golden brown and a toothpick inserted into the center of a scone comes out clean, signaling they are cooked through. Your kitchen will be filled with a wonderfully warm, autumnal aroma!
    7. Craft the Maple Glaze: While your freshly baked scones cool slightly on a wire rack, prepare the irresistible glaze. In a small bowl, whisk together the sifted powdered sugar, pure maple syrup, and gradually add 2-3 tablespoons of whole milk or additional heavy cream until you achieve a smooth, pourable consistency. Adjust the liquid amount as needed for your desired thickness.
    8. Glaze & Serve Warm: Once the pumpkin scones have cooled enough to handle (warm, not hot), generously drizzle the prepared maple glaze over each one. Allow the glaze to set for a few moments before serving. Enjoy these delightful treats immediately for the very best flavor and texture!

    What To Serve With It

    • These pumpkin scones are delightful on their own, but truly shine with a hot beverage. Pair them with a freshly brewed cup of coffee, a steaming mug of chai latte, or a classic Earl Grey tea for a comforting experience.
    • For an extra touch, offer a side of softened cream cheese or a dollop of whipped cream, though the maple glaze is often enough!
    • They make a fantastic addition to a fall brunch spread alongside savory egg dishes or a fruit salad.

    Flavor Twists

    • Chocolate Chip Scones: Fold in ½ cup of miniature dark chocolate chips with the dry ingredients for a rich variation.
    • Nutty Crunch: Add ½ cup of finely chopped pecans or walnuts to the dough for added texture and nutty flavor.
    • Spice It Up: For an extra kick, consider adding a pinch of white pepper or a tiny dash of cayenne to the dry spice mixture, which subtly enhances the pumpkin flavor without making it spicy.
    • Zest Appeal: Incorporate 1 teaspoon of orange or lemon zest into the wet ingredients for a bright, citrusy lift.

    Leftovers & Reheating

    • Storage: Glazed scones are best enjoyed the day they are made, but can be stored in an airtight container at room temperature for up to 2 days. The glaze may soften slightly.
    • Reheating: To warm leftover scones, place them on a baking sheet in a 300°F (150°C) oven for 5-7 minutes until heated through. Be mindful of the glaze potentially melting.
    • Make-Ahead Dough: You can prepare the scone dough, cut the wedges, and freeze them unbaked on a baking sheet until solid. Transfer to a freezer bag and bake from frozen, adding 5-10 minutes to the baking time.

    Yields 8 Scones | Prep time: 18 minutes | Cook time: 20 minutes | Total time: 38 minutes

    FAQs

    Can I use canned pumpkin pie filling instead of pumpkin puree?
    No, it’s crucial to use pure pumpkin puree. Pumpkin pie filling contains added sugars and spices that will alter the flavor and consistency of your scones, leading to an overly sweet or dense result.
    My scones came out tough. What went wrong?
    Tough scones are usually a sign of overmixing the dough. For tender scones, mix until just combined and a shaggy dough forms; a few dry spots are preferable to overworking the gluten.
    Can I substitute regular milk for heavy cream?
    While heavy cream provides a rich flavor and tender crumb, you can use whole milk or half-and-half as a substitute. The texture might be slightly less rich, but it will still work.
    How do I know if my butter is cold enough?
    Very cold butter is key for flaky scones. It should be firm to the touch and difficult to cut. If it starts to soften while you’re working, place it back in the freezer for a few minutes.
    Can these scones be made dairy-free?
    Yes, you can substitute plant-based butter (like a good quality stick vegan butter) and use a dairy-free heavy cream or full-fat coconut milk for the cream, and a plant-based milk for the glaze.
    The glaze is too thick/thin. How do I fix it?
    If the glaze is too thick, add a tiny splash more milk or cream, a few drops at a time, whisking until smooth. If it’s too thin, whisk in another tablespoon of sifted powdered sugar until the desired consistency is reached.
    What’s the best way to cut the scones cleanly?
    For clean cuts, use a very sharp, ungreased knife or a bench scraper. Press straight down rather than sawing, and try to make each cut quickly to avoid dragging the dough.

    [redirect_script url=”aHR0cHM6Ly93d3cuY29va2luZ3dpdGhsb3JhLmNvbS9zcGljZWQtcHVtcGtpbi1zY29uZXMtcmVjaXBlLXdpdGgtbWFwbGUtZ2xhemUvP3V0bV9zb3VyY2U9cGludGVyZXN0LmNvbSZ1dG1fbWVkaXVtPXJlZmVycmFs”]

  • Classic Pecan Tassies: Irresistible Mini Pecan Pies

    Classic Pecan Tassies: Irresistible Mini Pecan Pies

    Experience the joy of baking these charming Classic Pecan Tassies, miniature pecan pies that are perfect for any occasion. Each bite-sized treat features a tender, buttery cream cheese crust cradling a rich, gooey pecan filling, promising a delightful blend of textures and flavors. Simple to prepare, these elegant tassies are an unforgettable sweet indulgence that will impress everyone.

    Ingredients

    • 1 cup (226g) cold unsalted butter, cut into small cubes
    • 8 oz (226g) softened cream cheese
    • 2 cups (240g) all-purpose flour
    • 1 ½ cups (300g) packed light brown sugar
    • ¾ cup (180ml) light corn syrup or pure maple syrup
    • 2 large eggs, at room temperature
    • 1 teaspoon pure vanilla extract
    • 1 ½ cups (170g) pecans, halved or roughly chopped

    Instructions

    1. Prepare the Cream Cheese Crust: In the bowl of a food processor, combine the cold, cubed unsalted butter, softened cream cheese, and all-purpose flour. Pulse briefly, then process until a cohesive, soft dough forms, typically within 15-20 seconds. Be cautious not to overmix, which can lead to a tough crust. Gather the dough into a disc, wrap it tightly in plastic, and chill in the refrigerator for at least 25 minutes to allow it to firm up, making it easier to handle.
    2. Shape the Tassie Shells: Once chilled, pinch off small portions of dough, approximately 1 tablespoon each. Press each dough ball evenly into the cups of a mini muffin tin. Your thumb works well for this, creating a thin, uniform shell that extends up the sides. There’s no need to pre-bake these crusts, saving you a step! This recipe yields about 24 mini pies.
    3. Craft the Gooey Pecan Filling: In a medium mixing bowl, whisk together the packed light brown sugar, corn syrup (or maple syrup), room temperature large eggs, and pure vanilla extract until the mixture is smooth and well combined. This liquid gold forms the base of your rich, caramel-like filling. Gently fold in the pecans until every piece is thoroughly coated.
    4. Fill the Crusts: Carefully spoon the pecan filling into each unbaked crust. Fill each cup about two-thirds full to leave room for the filling to bubble and expand slightly during baking without overflowing.
    5. Bake to Golden Perfection: Preheat your oven to 350°F (175°C). Bake the mini pecan pies for 25-30 minutes, or until the crusts turn a lovely golden brown and the filling appears set and slightly puffed. To check for doneness, a toothpick inserted near the center of a filling should come out mostly clean with just a few moist crumbs.
    6. Cool and Enjoy: Allow the baked pecan tassies to cool in their mini muffin tins for 10-15 minutes. This crucial cooling period helps the filling set properly and makes them significantly easier to remove without breaking. After the initial cooling, transfer them to a wire rack to cool completely before serving for the best texture and flavor.

    Pro Tips

    • Ensure your butter for the crust is very cold, and your cream cheese is softened but not warm, for the best dough consistency.
    • When shaping the crust, aim for an even thickness to ensure uniform baking. Too thick on the bottom can leave it undercooked.
    • Don’t overmix the filling once the pecans are added; a gentle fold ensures they are evenly distributed without bruising them.
    • For extra flavor, you can lightly toast the pecans before adding them to the filling, enhancing their nutty aroma.
    • If using maple syrup, choose a good quality, dark amber variety for a richer flavor profile.

    Storage & Make-Ahead

    • Cooled pecan tassies can be stored in an airtight container at room temperature for up to 3 days, or in the refrigerator for up to 5 days.
    • For longer storage, freeze cooled tassies in a single layer on a baking sheet until solid, then transfer to a freezer-safe bag or container for up to 3 months. Thaw at room temperature or gently reheat in a low oven.
    • The dough can be made ahead and stored in the refrigerator for up to 2 days, or frozen for up to 1 month. Thaw frozen dough in the refrigerator before using.

    Essential Equipment

    • Food processor or pastry blender for the crust
    • Mini muffin tin (24-cup)
    • Medium mixing bowls
    • Whisk
    • Measuring cups and spoons
    • Wire cooling rack

    Prep Time: 1 hour | Cook Time: 27 minutes | Yield: 24 mini pies

    FAQs

    Can I use a different type of nut instead of pecans?
    Yes, you can substitute walnuts or even chopped almonds for pecans, though the flavor profile will differ slightly. Ensure they are roughly chopped to the same size as pecans.
    My crust is tough; what did I do wrong?
    A tough crust usually results from overmixing the dough. Process just until the ingredients are combined and a soft dough forms. Overworking develops the gluten, making the crust less tender.
    Can I make a full-sized pecan pie with this recipe?
    This recipe is specifically formulated for mini tassies, including the crust-to-filling ratio and baking time. Adapting it for a full-sized pie would require significant adjustments to crust thickness, filling volume, and bake time.
    How do I know when the filling is perfectly set?
    The filling is set when it no longer jiggles excessively in the center. A toothpick inserted near the middle should come out mostly clean, indicating it’s cooked through without being dry.
    What if I don’t have corn syrup?
    Maple syrup is listed as a direct substitute in the recipe, offering a slightly different but equally delicious flavor. You can also use golden syrup or a homemade simple syrup (equal parts sugar and water boiled down) in a pinch.
    Can these be made ahead for a party?
    Absolutely! Pecan tassies are excellent make-ahead treats. They can be baked and stored at room temperature for a couple of days, or frozen for up to three months. This makes them perfect for holiday gatherings or entertaining.
    Why did my filling bubble over in the oven?
    This usually happens if the muffin cups are overfilled. Ensure you’re only filling each unbaked crust about two-thirds full, allowing adequate space for the filling to expand during baking.

    [redirect_script url=”aHR0cHM6Ly9lYXN5ZGFzaHJlY2lwZXMuY29tL3BlY2FuLXRhc3NpZS1yZWNpcGUtbWluaS1wZWNhbi1waWVzLz91dG1fc291cmNlPXBpbnRlcmVzdC5jb20mdXRtX21lZGl1bT1yZWZlcnJhbA==”]