Author: Sarah Johnson

  • Creamy Broccoli Kugel Recipe: A Hearty & Simple Side Dish

    Creamy Broccoli Kugel Recipe: A Hearty & Simple Side Dish

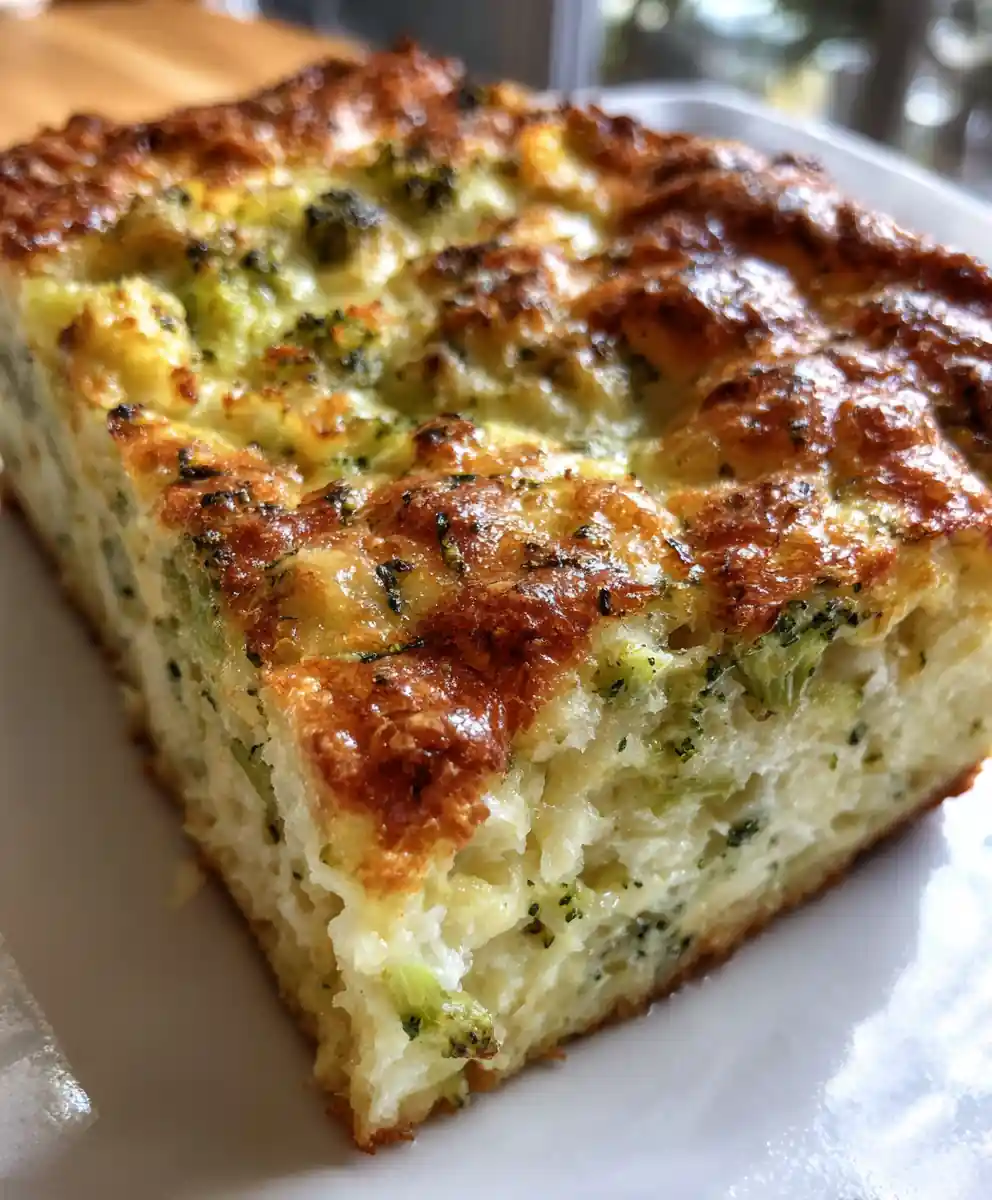
    Discover how to create a delicious and comforting Creamy Broccoli Kugel, a perfect savory side dish that’s surprisingly easy to prepare. This recipe guides you to a golden-brown, flavorful kugel, ideal for family meals or special occasions.

    Ingredients

    • 16 oz (450g) frozen chopped broccoli, thawed completely and thoroughly squeezed dry
    • 4 large eggs, at room temperature
    • 1 cup (240g) cottage cheese or sour cream (full-fat recommended for best texture)
    • ½ cup (60g) all-purpose flour or matzo meal (for Passover)
    • 1 small yellow onion, grated or finely diced
    • 2 tablespoons unsalted butter or a neutral oil (like olive or vegetable oil), divided
    • 1 teaspoon kosher salt
    • ½ teaspoon freshly ground black pepper
    • ½ teaspoon garlic powder

    Instructions

    1. Preheat your oven to 350°F (175°C) and prepare your baking dish. Lightly grease a 9×13 inch (23×33 cm) baking dish generously with 1 tablespoon of butter or oil, ensuring all surfaces are coated to prevent sticking.
    2. Optionally, sauté the aromatics for deeper flavor. In a small skillet over medium heat, melt the remaining 1 tablespoon of butter or oil. Add the finely diced or grated onion and cook, stirring occasionally, until it becomes soft and translucent, usually 4-6 minutes. This step mellows the onion’s flavor. Set aside to cool slightly.
    3. In a large mixing bowl, thoroughly whisk together the room temperature large eggs until slightly frothy. Incorporate the cottage cheese or sour cream, salt, freshly ground black pepper, and garlic powder. If you skipped sautéing the onions, add any remaining melted butter or oil now to the wet mixture. Mix until everything is smoothly combined.
    4. Gradually incorporate the flour or matzo meal into the wet ingredients. Add it in small batches, stirring gently with a whisk or spatula until just combined and no dry streaks remain. Avoid overmixing, which can lead to a denser, less tender kugel texture.
    5. Carefully fold in the prepared broccoli and sautéed onions. Ensure the thawed and very well-squeezed dry chopped broccoli is evenly distributed throughout the batter. Add the cooled sautéed onions (if you prepared them) and fold them in until just combined.
    6. Transfer the kugel mixture into your prepared 9×13 inch baking dish, spreading it evenly with a spatula. Bake for 48-55 minutes, or until the top achieves a beautiful golden-brown hue and the center feels set. To check for doneness, a thin knife or toothpick inserted into the middle should emerge clean.

    Pro Tips

    • Squeeze Broccoli Well: This is critical! Excess moisture will make your kugel watery. Use paper towels or a clean kitchen towel to press out as much liquid as possible after thawing.
    • Don’t Overmix: Once the flour or matzo meal is added, mix only until just combined. Overmixing can develop the gluten, leading to a denser, less tender kugel.
    • Room Temperature Eggs: Using room temperature eggs helps them combine more easily and creates a smoother, more uniform batter.
    • Optional Topping: For an extra layer of flavor and texture, sprinkle a handful of breadcrumbs or crushed cornflakes mixed with a little melted butter over the top during the last 15 minutes of baking.

    Serving Suggestions

    • This versatile broccoli kugel makes an excellent side dish for roasted chicken, brisket, or fish.
    • It pairs wonderfully with other traditional Jewish holiday dishes, or as a comforting weeknight addition.
    • Serve it warm, straight from the oven, perhaps with a dollop of sour cream or Greek yogurt on the side.

    Storage & Make-Ahead

    • Refrigeration: Leftover kugel can be stored in an airtight container in the refrigerator for up to 3-4 days. Reheat individual slices in the microwave or a warm oven.
    • Freezing: To freeze, cool the kugel completely, then wrap it tightly in plastic wrap and aluminum foil. It can be frozen for up to 2-3 months. Thaw in the refrigerator overnight before reheating.
    • Make Ahead: You can prepare the kugel mixture up to 24 hours in advance and store it covered in the refrigerator. Stir well before pouring into the baking dish and baking as directed.

    Prep time: 15 minutes | Cook time: 50 minutes | Total time: 1 hour 5 minutes | Yield: 8 servings

    FAQs

    Can I use fresh broccoli instead of frozen?
    Yes, you can! Steam or blanch fresh broccoli florets until tender-crisp, then chop them finely and make sure to squeeze out all excess moisture before adding to the mixture.
    What can I substitute for cottage cheese?
    Sour cream or Greek yogurt are excellent substitutions, providing a similar tang and moisture. Ricotta cheese can also work for a slightly different texture.
    Is this recipe gluten-free?
    If you use matzo meal instead of all-purpose flour, and ensure all other ingredients are certified gluten-free, then the kugel can be gluten-free. Always check labels.
    How do I know when the kugel is fully cooked?
    The kugel is ready when the top is golden brown and a knife or toothpick inserted into the center comes out clean. The center should feel firm, not jiggly.
    Can I add other vegetables?
    Absolutely! Chopped mushrooms, carrots, or spinach (squeezed dry) could be incorporated. Adjust quantities slightly to maintain the kugel’s consistency.
    Why is my kugel watery?
    The most common reason for a watery kugel is insufficient squeezing of the thawed broccoli. Ensure it’s very dry before adding to the batter.
    Can I bake this in individual ramekins?
    Yes, for individual portions, bake in greased ramekins. Baking time will be shorter, likely 20-30 minutes, so keep an eye on them.

    [redirect_script url=”aHR0cHM6Ly9lYXN5ZGFzaHJlY2lwZXMuY29tL2Jyb2Njb2xpLWt1Z2VsLXJlY2lwZS1zYXZvcnktYmFrZWQtY2Fzc2Vyb2xlLz91dG1fc291cmNlPXBpbnRlcmVzdC5jb20mdXRtX21lZGl1bT1yZWZlcnJhbA==”]

  • Irresistible Ugly Duckling Cake with Tangy Pineapple Topping

    Irresistible Ugly Duckling Cake with Tangy Pineapple Topping

    Discover the delightful simplicity of this Ugly Duckling Cake, a surprisingly moist and tender sheet cake that gets its charm from a warm, sweet-tart crushed pineapple topping. Baked in a single pan and finished with a flavorful glaze poured directly over the hot cake, this recipe ensures every bite is infused with tropical goodness. It’s an easy-to-make dessert perfect for sharing at any gathering or enjoying as a comforting treat at home.

    Ingredients

    • 2 cups (240g) all-purpose flour, spooned and leveled
    • 1 ½ cups (300g) granulated sugar (for cake batter)
    • 2 large eggs, at room temperature
    • ½ cup (120ml) vegetable oil, or other neutral oil like canola
    • 1 cup (240ml) whole milk, at room temperature
    • 2 teaspoons baking powder, fresh and active
    • 1 teaspoon pure vanilla extract
    • 1 (20 oz) can (567g) crushed pineapple, undrained
    • ½ cup (100g) granulated sugar (for topping)
    • ¼ cup (57g) unsalted butter, cut into small pieces

    Instructions

    1. Preheat Oven and Prepare Pan: Begin by preheating your oven to a steady 350°F (175°C). Select a 9×13 inch baking pan and lightly grease the interior, then dust it evenly with flour, tapping out any excess. This creates a non-stick surface, ensuring your cake releases easily.
    2. Combine Dry Cake Ingredients: In a spacious mixing bowl, meticulously whisk together the 2 cups of all-purpose flour, 1 ½ cups of granulated sugar, and 2 teaspoons of baking powder. Whisk thoroughly for 1-2 minutes until all dry ingredients are uniformly blended, preventing lumps and ensuring even leavening.
    3. Mix Wet Cake Ingredients: In a separate, medium-sized bowl, whisk together the 2 large room-temperature eggs, ½ cup of vegetable oil, 1 cup of room-temperature milk, and 1 teaspoon of pure vanilla extract. Continue whisking until the mixture is smoothly emulsified and well combined, about 1 minute.
    4. Gently Combine Wet and Dry: Create a well in the center of your dry ingredients, then pour the wet mixture into it. Using a whisk or spatula, mix gently until the ingredients are just combined and no streaks of dry flour remain. Be careful not to overmix, as this can develop the gluten too much, resulting in a tough cake.
    5. Bake the Cake Base: Carefully pour the prepared batter evenly into your greased and floured 9×13 inch pan, spreading it to the edges. Transfer to the preheated oven and bake for 32-37 minutes. The cake is done when its top springs back lightly when touched, and a toothpick or cake tester inserted into the very center comes out completely clean.
    6. Simmer the Pineapple Topping: While the cake bakes, prepare your luscious topping. In a medium saucepan, combine the entire 20 oz can of undrained crushed pineapple, ½ cup of granulated sugar, and ¼ cup of unsalted butter. Place over medium heat and bring to a gentle simmer, stirring frequently for 6-8 minutes. The mixture should thicken slightly and become glossy; avoid a rolling boil.
    7. Saturate the Hot Cake: As soon as the baked cake emerges from the oven, while it is still piping hot, immediately and evenly pour the warm, thickened pineapple topping over its entire surface. The heat from the cake will help absorb the topping, infusing it with flavor and moisture.
    8. Cool Completely Before Serving: Resist the urge to cut into the cake immediately! Allow the cake to cool completely on a wire rack for at least 2-3 hours before slicing and serving. This resting period allows the topping to set and the cake’s structure to stabilize for clean slices and optimal flavor.

    Chef’s Insight

    This Ugly Duckling Cake truly lives up to its name – it’s unpretentious but delivers incredible flavor and moistness. The genius lies in pouring the hot pineapple topping over the hot cake, creating a self-glazing effect that locks in moisture and infuses every crumb with sweet, tangy pineapple. Don’t be tempted to skip the cooling step; it’s essential for the topping to set properly and for clean slices.

    Cook’s Notes

    • Room Temperature Ingredients: Ensure eggs and milk are at room temperature. This allows them to emulsify better with the oil, creating a smoother, more uniform batter and a finer-crumbed cake.
    • Do Not Overmix: Once the wet and dry ingredients are combined, mix only until no dry streaks remain. Overmixing develops gluten, which can make the cake dense and chewy instead of light and tender.
    • Even Topping Distribution: When pouring the pineapple topping, try to spread it as evenly as possible. A spatula or the back of a spoon can help ensure every slice gets a generous portion of that delicious glaze.
    • Clean Toothpick Test: A truly clean toothpick means no wet batter. If you see moist crumbs, bake for a few more minutes. Undercooking can lead to a sunken center.

    How To Serve

    • Serve this cake slightly chilled or at room temperature for the best flavor and texture.
    • A dollop of freshly whipped cream or a scoop of vanilla bean ice cream makes an excellent accompaniment.
    • For a touch of elegance, garnish each slice with a fresh mint sprig or a few toasted coconut flakes.
    • This cake is substantial enough on its own for a dessert, or it can be a delightful addition to a brunch spread.

    Keep & Reheat

    • Storage: Store leftover Ugly Duckling Cake, covered tightly with plastic wrap or in an airtight container, at room temperature for up to 2 days, or in the refrigerator for up to 4-5 days. Refrigeration will firm up the topping slightly.
    • Freezing: For longer storage, slice the cooled cake into individual portions. Wrap each slice tightly in plastic wrap, then aluminum foil, and place in a freezer-safe bag or container. Freeze for up to 2-3 months.
    • Thawing/Reheating: Thaw frozen slices in the refrigerator overnight or at room temperature for a few hours. This cake is best served at room temperature after thawing; reheating is not typically necessary or recommended as it can alter the texture.

    Prep time: 18 minutes | Cook time: 45 minutes | Total time: 3 hours 3 minutes | Yield: 12-16 servings

    FAQs

    Can I use fresh pineapple instead of canned?
    While canned crushed pineapple (undrained) is specified for its consistent moisture and convenience, you could try fresh, finely minced pineapple. However, you’d need to add a bit of liquid (like pineapple juice) to the topping to achieve the right consistency, as fresh pineapple has less natural juice.
    What if I don’t have a 9×13 inch pan?
    A 9×13 inch pan is ideal for the recommended baking time and thickness. If using a different size, adjust baking time and monitor closely. A slightly smaller pan might require a longer bake time, while a larger one could bake faster. Ensure the total volume matches roughly.
    How do I know when the cake is perfectly baked?
    The cake is ready when the top springs back when gently pressed, and a wooden skewer or toothpick inserted into the very center comes out clean, without any wet batter attached.
    Can I make this cake gluten-free?
    You may be able to substitute the all-purpose flour with a 1:1 gluten-free baking blend that contains xanthan gum. Results can vary, but many blends work well in simple sheet cakes like this one.
    Why is my pineapple topping too thin or too thick?
    If your topping is too thin after simmering, continue to cook and stir for a few more minutes to reduce it further. If it’s too thick, you can stir in a tablespoon or two of pineapple juice or water to reach your desired consistency.
    Can I add other flavors or mix-ins to the cake?
    Absolutely! Consider folding in ½ cup of shredded coconut or chopped pecans/walnuts into the cake batter for added texture. A pinch of cinnamon or nutmeg could also complement the pineapple flavor nicely.
    Is this cake suitable for freezing?
    Yes, this cake freezes beautifully. Once completely cooled, slice it into individual portions, wrap them tightly, and store in the freezer for up to 2-3 months. Thaw in the refrigerator before serving.
    My cake sank in the middle, what happened?
    A sunken cake often indicates it was either underbaked, the oven door was opened too soon, or it was overmixed. Ensure your oven temperature is accurate and resist opening the oven frequently during baking.

    [redirect_script url=”aHR0cHM6Ly9lYXN5ZGFzaHJlY2lwZXMuY29tL3VnbHktZHVja2xpbmctY2FrZS1yZWNpcGUtd2l0aC1waW5lYXBwbGUtdG9wcGluZy8/dXRtX3NvdXJjZT1waW50ZXJlc3QuY29tJnV0bV9tZWRpdW09cmVmZXJyYWw=”]

  • Classic Homestyle Biscuits and Sausage Gravy for a Hearty Breakfast

    Classic Homestyle Biscuits and Sausage Gravy for a Hearty Breakfast

    Embrace a comforting breakfast tradition with this exquisite recipe for flaky buttermilk biscuits crowned with a rich, savory sausage gravy. This dish transforms simple ingredients into a deeply satisfying meal, perfect for leisurely weekend mornings or a nourishing start to any day. Our detailed guide ensures you achieve light, tender biscuits and a perfectly creamy gravy every time, turning your kitchen into a beacon of warmth and flavor.

    Ingredients

    • 2 cups (240g) all-purpose flour, unbleached
    • 1 tbsp (15g) baking powder, aluminum-free
    • ½ tsp (2.5g) baking soda
    • ½ cup (113g) unsalted butter, very cold and cubed
    • ¾ cup (180ml) cold buttermilk, full-fat
    • ½ tsp (3g) fine sea salt
    • 1 tsp (4g) granulated sugar
    • 1 lb (450g) lean ground turkey breakfast sausage
    • ¼ cup (30g) all-purpose flour
    • 3 cups (720ml) whole milk or 2% milk, warmed slightly
    • ½ tsp (3g) fine sea salt
    • ¼ tsp (1g) freshly ground black pepper
    • Pinch of cayenne pepper, optional

    Instructions

    1. Begin by preheating your oven to 425°F (220°C) and lining a standard baking sheet with parchment paper; this ensures even baking and prevents sticking.
    2. In a spacious mixing bowl, thoroughly whisk together the all-purpose flour, baking powder, baking soda, salt, and granulated sugar until well combined. This distributes the leavening agents evenly for optimal rise.
    3. Incorporate the very cold, cubed unsalted butter into the dry mixture using a pastry blender or your fingertips, working quickly to avoid melting. Continue until the mixture resembles coarse crumbs with some pea-sized butter pieces still visible; these pockets create steam for flakiness.
    4. Pour in the cold buttermilk, mixing gently with a spoon or your hands until just combined into a shaggy dough. Avoid overmixing, as this develops gluten, which can result in tough biscuits; a few dry streaks are acceptable.
    5. Transfer the biscuit dough onto a lightly floured surface. Gently pat it out to a uniform 1-inch (2.5 cm) thickness. Using a 2-3 inch round biscuit cutter, press straight down without twisting to cut out individual biscuits. For enhanced flakiness, gently fold the dough in half once or twice before the final patting and cutting.
    6. Arrange the cut biscuits on the prepared baking sheet. For soft, pillowy sides, place them close enough to touch slightly; for crisper edges, space them about 1 inch apart. Bake for 12-15 minutes, or until the tops are golden brown and they have risen beautifully.
    7. As the biscuits bake, begin preparing the gravy. In a large, heavy-bottomed skillet, cook the ground turkey breakfast sausage over medium heat, breaking it apart with a spoon as it browns, until no pink remains, typically 5-7 minutes.
    8. Once the sausage is thoroughly cooked, carefully drain any excessive rendered grease, leaving approximately 2 tablespoons (30ml) of flavorful drippings in the pan. This fat is essential for creating a rich roux base.
    9. Sprinkle the ¼ cup of all-purpose flour evenly over the cooked sausage and drippings. Stir constantly with a whisk or wooden spoon for 1-2 minutes, allowing the flour to cook out its raw taste and form a light golden roux with the fat.
    10. Gradually whisk in the milk, beginning with a small splash to create a smooth paste with the roux, then slowly incorporating the remaining milk. Continue stirring continuously over medium heat until the gravy thickens to a spoonable consistency and gently simmers, which typically takes 5-8 minutes.
    11. Season the simmering gravy generously with the remaining ½ teaspoon of salt, ¼ teaspoon of black pepper, and the optional pinch of cayenne pepper. Taste and adjust seasonings as needed. Simmer gently for another 2-3 minutes, stirring frequently, until the gravy reaches your preferred velvety consistency. If it’s too thick, add a tablespoon or two of milk; if too thin, simmer for a bit longer.

    Cook’s Notes

    • For extra light biscuits, ensure all your dairy ingredients (butter and buttermilk) are as cold as possible. This prevents the butter from melting too soon, creating steam pockets for maximum rise.
    • Do not overmix the biscuit dough; a light hand is key. Overmixing develops gluten, leading to tough, dense biscuits instead of light and airy ones.
    • When cutting biscuits, press straight down with your cutter. Twisting can seal the edges, inhibiting the biscuit’s ability to rise to its full potential.

    How To Serve

    • Serve hot biscuits immediately, split open and generously smothered with the warm, creamy sausage gravy.
    • For a complete brunch spread, pair with scrambled eggs, crispy bacon or extra sausage links, and a side of fresh fruit.
    • A sprinkle of fresh chopped parsley or chives adds a lovely pop of color and herbaceous freshness to the finished dish.

    Keep & Reheat

    • Biscuits are best enjoyed fresh, but leftover biscuits can be stored in an airtight container at room temperature for up to 2 days, or refrigerated for up to 4 days. Reheat gently in a warm oven or microwave.
    • Sausage gravy can be stored in an airtight container in the refrigerator for up to 3-4 days. Reheat gently over low heat on the stovetop, adding a splash of milk or water if it has thickened too much.
    • Freezing is not recommended for assembled biscuits and gravy as the texture of both components can degrade significantly upon thawing.

    Yield: 8 servings. Prep time: 28 minutes. Cook time: 33 minutes. Total time: 1 hour.

    FAQs

    How do I get my biscuits really flaky?
    The key to flaky biscuits is using very cold butter and buttermilk. The cold butter creates steam pockets as it melts in the oven, forming those desirable flaky layers. Avoid overworking the dough, which can melt the butter prematurely.
    My gravy is too thick/thin. How can I fix it?
    If your gravy is too thick, gradually whisk in a tablespoon or two of warm milk until it reaches your desired consistency. If it’s too thin, simmer it gently for a few extra minutes, stirring frequently, allowing it to reduce and thicken.
    Can I use a different type of sausage?
    Absolutely! While ground turkey breakfast sausage offers a lighter option, you can easily substitute it with pork breakfast sausage for a richer, more traditional flavor. Adjust seasoning as needed.
    What if I don’t have buttermilk?
    You can make a quick buttermilk substitute by adding 1 tablespoon of lemon juice or white vinegar to a liquid measuring cup, then filling it with regular milk (dairy or non-dairy) to the ¾ cup line. Let it sit for 5-10 minutes until it slightly curdles before using.
    Can I make the biscuits ahead of time?
    You can prepare the biscuit dough, cut out the biscuits, and then freeze them raw on a baking sheet until solid. Transfer to an airtight freezer bag and bake from frozen, adding a few extra minutes to the baking time, or refrigerate the cut biscuits on a parchment-lined tray for up to 12 hours before baking.
    Why is it important not to twist the biscuit cutter?
    Twisting the biscuit cutter can seal the edges of the dough, preventing the biscuits from rising properly and forming distinct layers. Always press straight down and lift straight up for the best rise and texture.
    What gives the gravy its creamy texture?
    The creamy texture of the gravy comes from creating a roux (a mixture of flour and the sausage drippings) and then slowly whisking in milk. The flour acts as a thickening agent, creating a smooth, velvety sauce as it cooks with the milk.

    [redirect_script url=”aHR0cHM6Ly93d3cuY29va2luZ3dpdGhsb3JhLmNvbS9zaW1wbGUtYmlzY3VpdHMtYW5kLWdyYXZ5LXJlY2lwZS13aXRoLWNyZWFteS1zYXVjZS8/dXRtX3NvdXJjZT1waW50ZXJlc3QuY29tJnV0bV9tZWRpdW09cmVmZXJyYWw=”]

  • Authentic Chicago-Style Hot Dog: The Classic Topped Perfection

    Authentic Chicago-Style Hot Dog: The Classic Topped Perfection

    Dive into the vibrant world of an authentic Chicago-style hot dog, a culinary icon bursting with flavor and tradition. This guide provides the definitive steps to recreate the unique blend of savory, tangy, and slightly spicy toppings that define this beloved street food masterpiece, right in your own kitchen.

    Ingredients

    • 8 (jumbo or standard) all-beef hot dogs, preferably natural casing for a snap
    • 8 fresh poppy seed hot dog buns, ideally steamed for softness
    • ¼ cup (60ml) classic yellow mustard, for tang
    • ¼ cup (60ml) bright green sweet pickle relish (Chicago-style), for iconic color and sweetness
    • ¼ cup (35g) finely diced white onion, for a crisp bite
    • 8 crisp dill pickle spears, whole or halved lengthwise
    • 2 firm, ripe Roma tomatoes, cut into 8 wedges each (16 total)
    • 16-24 pickled sport peppers, for a mild, tangy heat
    • 1-2 teaspoons celery salt, the essential aromatic finish

    Instructions

    1. Begin by heating your hot dogs to perfection. Whether you prefer grilling for a slight char and smoky essence (about 5-7 minutes over medium heat, rotating often), steaming for plump juiciness, or boiling gently, ensure they are thoroughly warmed through before assembly. A well-cooked hot dog is the foundation of a great Chicago Dog.
    2. Prepare your poppy seed buns for their vital role. Lightly steam them in a steamer basket over simmering water for about 15-30 seconds, or briefly microwave for 10-15 seconds wrapped in a damp paper towel. The goal is a soft, pliable, and warm bun, crucial for cradling the toppings without tearing.
    3. Carefully nestle a warmed hot dog into each freshly steamed poppy seed bun. Next, apply a generous, wavy stream of classic yellow mustard directly down one side of the hot dog, setting the tangy base for the layers to come.
    4. Now, the iconic layering begins. First, create a vibrant line of bright green sweet pickle relish along the opposite side of the mustard. Sprinkle the finely diced white onion over the relish for a fresh crunch. Tuck two tomato wedges neatly between the hot dog and the bun on one side, ensuring they are secure. On the other side, place one crisp dill pickle spear. Finally, strategically nestle 2-3 pickled sport peppers alongside the hot dog for that signature kick.
    5. Complete your masterpiece with the quintessential flourish: a light, even dusting of celery salt over the entire assembled hot dog. This aromatic seasoning is not merely a garnish; it’s the non-negotiable final touch that harmonizes all the distinct flavors, making it unmistakably a Chicago-style hot dog.

    Keep & Reheat

    Chicago Dogs are best enjoyed immediately after assembly for optimal freshness and texture. If you have leftover components, store them separately in airtight containers in the refrigerator for up to 3 days. Reheat hot dogs gently and refresh buns briefly before assembling a new dog. Freezing assembled dogs is not recommended as toppings will become watery upon thawing.

    Common Pitfalls

    • The Ketchup Crime: Never, ever put ketchup on a Chicago Dog. It’s a fundamental rule. The balance of flavors is perfected without it.
    • Over-Topping: While generous, ensure toppings are balanced so the dog remains edible and the bun doesn’t tear.
    • Cold Buns: A cold, stiff bun detracts significantly from the experience; always steam or warm them.
    • Wrong Relish: Using standard sweet relish instead of bright green Chicago-style relish misses a key visual and flavor component.

    Know Your Ingredients

    The success of an authentic Chicago Dog lies in its specific components. Poppy Seed Buns provide a unique texture and visual appeal. The Bright Green Sweet Pickle Relish is not just any relish; its vivid color and specific sweetness are hallmarks. Sport Peppers offer a mild, pickled heat, distinct from other chili peppers. Finally, Celery Salt acts as a magic ingredient, tying all the diverse flavors together with its earthy, savory notes.

    Prep Time: 16 minutes Cook Time: 8 minutes Yields: 8 servings

    FAQs

    Can I use any hot dog?
    For an authentic experience, stick to all-beef hot dogs, preferably jumbo or standard size. Avoid highly seasoned or cheese-filled varieties that would overpower the classic toppings.
    What if I can’t find poppy seed buns?
    While iconic, if poppy seed buns are unavailable, a good quality regular hot dog bun will work. You can lightly brush the tops with egg wash and sprinkle with poppy seeds before a quick toast for a similar effect.
    Where can I find bright green relish and sport peppers?
    These specific Chicago-style ingredients are often found in the condiment aisle of larger supermarkets or specialty food stores. Look for brands that explicitly label them as “Chicago-style” or “sport peppers.”
    Is celery salt really necessary?
    Yes, celery salt is crucial! It’s the unifying seasoning that brings all the distinct flavors of a Chicago Dog together, adding an earthy, savory, and slightly salty finish that makes it truly authentic.
    Can I prepare the toppings ahead of time?
    Absolutely. You can dice the white onion and cut the tomato wedges a day in advance, storing them separately in airtight containers in the refrigerator. This speeds up assembly when you’re ready to serve.
    How do I prevent the bun from tearing?
    Steaming the buns makes them incredibly soft and pliable, which is key. Also, don’t overload the hot dog; arrange toppings neatly and ensure the hot dog fits snugly but not overly tightly in the bun.
    Why is ketchup forbidden on a Chicago Dog?
    The Chicago Dog’s intricate flavor profile is carefully balanced between savory, tangy, sweet, and mild heat. Ketchup, with its dominant sweet and acidic profile, would disrupt this balance and mask the other key ingredients, which is why it’s traditionally omitted.

    [redirect_script url=”aHR0cHM6Ly9lYXN5ZGFzaHJlY2lwZXMuY29tL2NoaWNhZ28tZG9nLXJlY2lwZS13aXRoLWFsbC10aGUtdG9wcGluZ3MvP3V0bV9zb3VyY2U9cGludGVyZXN0LmNvbSZ1dG1fbWVkaXVtPXJlZmVycmFs”]

  • Magical Unicorn Fudge: Easy Recipe for Vibrant Swirled Candy

    Magical Unicorn Fudge: Easy Recipe for Vibrant Swirled Candy

    Step into a world of pure enchantment with this incredibly easy, no-bake Magical Unicorn Fudge! Bursting with a spectrum of vibrant colors swirled through creamy white chocolate, and topped with whimsical sprinkles, this delightful treat is perfect for adding a touch of magic to any celebration. Whether it’s a birthday party, a festive gathering, or just a fun afternoon activity, this sweet confection promises smiles and deliciousness in every bite.

    Ingredients

    • 3 cups (510g) high-quality white chocolate chips
    • 1 (14 oz / 397g) can sweetened condensed milk
    • 1 teaspoon pure vanilla extract
    • 2-3 drops each vibrant gel food coloring (such as pink, blue, purple, yellow)
    • ¼ cup or more whimsical unicorn sprinkles, for topping

    Instructions

    1. Prepare the Fudge Base: In a large, microwave-safe bowl, combine the white chocolate chips and sweetened condensed milk. Heat on high power for 60-90 seconds. Remove and stir vigorously with a rubber spatula until the mixture begins to melt and smooth. If lumps remain, continue microwaving in short 15-second bursts, stirring thoroughly after each, until the fudge is completely smooth, glossy, and thick. Avoid overheating to prevent seizing.
    2. Infuse with Vanilla: Once the base is perfectly smooth, gently fold in the pure vanilla extract until it’s fully incorporated, ensuring an even flavor distribution.
    3. Divide and Color: Carefully spoon the warm fudge mixture into 3-4 separate small, heat-safe bowls, aiming for roughly equal portions. Add 2-3 drops of your chosen vibrant gel food coloring to each bowl. Stir each portion individually until the color is uniform and streak-free; use a fresh spoon for each color to prevent muddying.
    4. Layer and Swirl: Line an 8×8 inch (20×20 cm) square baking pan with parchment paper, leaving generous overhang on all sides to act as handles. Drop alternating spoonfuls of each brightly colored fudge mixture randomly across the bottom of the prepared pan. With a butter knife or a wooden skewer, gently drag and swirl the colors together in broad strokes. Be cautious not to over-swirl, as this can blend the colors too much and diminish the distinct “unicorn” effect.
    5. Decorate and Chill: Immediately after swirling, generously scatter your whimsical unicorn sprinkles over the entire surface of the warm fudge. Press them lightly into the surface if desired. Transfer the pan to the refrigerator and chill for at least 2 hours, or until the fudge is completely firm to the touch and set throughout.
    6. Slice and Serve: Once thoroughly firm, use the parchment paper overhang to carefully lift the entire slab of fudge from the pan onto a clean cutting board. Using a sharp, warm knife, cut the fudge into small, bite-sized squares, approximately 1-inch (2.5 cm) each. This recipe typically yields about 30 delightful pieces.

    Recipe At-A-Glance

    This unicorn fudge recipe is an absolute breeze to make, requiring no baking and minimal effort for maximum visual impact. It’s perfect for busy parents, aspiring bakers, or anyone looking to add a pop of color to their dessert spread without a fuss. The creamy texture and sweet flavor are universally loved, making it a guaranteed hit at any gathering.

    Baker’s Notes

    • Quality White Chocolate: Using good quality white chocolate chips will significantly impact the flavor and texture. Compound white chocolate can be harder to melt smoothly.
    • Gentle Swirling: Resist the urge to over-swirl the colors. A few broad strokes are all you need to create a beautiful, distinct marbled effect without making the colors muddy.
    • Patience with Chilling: Do not rush the chilling process. For clean cuts and perfectly set fudge, allow the full 2 hours (or more) in the refrigerator until completely firm.
    • Warm Knife: For the cleanest cuts, dip your knife in hot water and wipe it dry between each slice. This helps prevent sticking and keeps your fudge squares looking pristine.

    Try These Variations

    • Different Flavorings: Swap vanilla extract for almond extract, peppermint extract, or even a touch of citrus zest for a different flavor profile.
    • Seasonal Colors: Adjust the gel food coloring to match different holidays or seasons—think red and green for Christmas, pastels for Easter, or orange and black for Halloween.
    • Texture Boost: Fold in finely chopped nuts, mini marshmallows, or crushed cookies into the white fudge base before dividing and coloring for added texture.
    • Chocolate Drizzle: Once set, drizzle with melted dark or milk chocolate for an extra layer of flavor and visual appeal.

    Prep time: 15 minutes | Cook time: 3 minutes | Chill time: 2 hours | Yields: Approximately 30 squares

    FAQs

    Can I use regular liquid food coloring instead of gel?
    While you can use liquid food coloring, gel colors are highly recommended. Gel food coloring is much more concentrated and won’t add excess liquid to your fudge, which could affect its setting consistency and texture.
    How do I prevent my fudge from becoming grainy?
    Grainy fudge is often caused by sugar recrystallization or overheating the chocolate. Ensure you melt the chocolate and condensed milk gently, stirring consistently until just smooth. Avoid vigorous stirring once off the heat, as this can encourage crystallization.
    What’s the best way to store unicorn fudge?
    Store the fudge in an airtight container at room temperature for up to 1 week, or in the refrigerator for up to 2 weeks. If refrigerating, let it come to room temperature for about 10-15 minutes before serving for optimal texture.
    Can I make this fudge ahead of time for a party?
    Absolutely! This fudge is an excellent make-ahead dessert. You can prepare it up to a week in advance and store it as directed. Cut it into squares just before serving for the freshest look.
    What if my fudge doesn’t set?
    If your fudge remains soft, it might be due to incorrect proportions or not enough chilling time. Ensure you’ve used the exact quantities of white chocolate and condensed milk. Return it to the refrigerator for several more hours, or even overnight, to fully firm up.
    Can I use different types of sprinkles?
    Yes, feel free to get creative with your sprinkles! While unicorn sprinkles add a specific charm, any colorful jimmies, nonpareils, or even edible glitter would work beautifully to customize your fudge.
    Can I double the recipe for a larger batch?
    Yes, you can easily double this recipe. Use a larger pan (e.g., a 9×13 inch baking dish) and ensure you have enough microwave-safe bowls for dividing and coloring. The chilling time will remain the same.

    [redirect_script url=”aHR0cHM6Ly93d3cuY29va2luZ3dpdGhsb3JhLmNvbS91bmljb3JuLWZ1ZGdlLXJlY2lwZS13aXRoLWNvbG9yZnVsLXN3aXJscz91dG1fc291cmNlPXBpbnRlcmVzdC5jb20mdXRtX21lZGl1bT1yZWZlcnJhbA==”]

  • Dreamy Pastel Cotton Candy Fudge: An Easy No-Bake Treat

    Dreamy Pastel Cotton Candy Fudge: An Easy No-Bake Treat

    This whimsical cotton candy fudge layers soft pastel hues and a nostalgic flavor, making it a perfect no-bake confection. It’s surprisingly simple to prepare, resulting in a delightfully creamy and visually stunning dessert that everyone will adore.

    Ingredients

    • 12 oz (340g) high-quality white chocolate chips
    • 14 oz (396g) sweetened condensed milk (full-fat for best results)
    • 4 tbsp (57g) unsalted butter, cut into cubes
    • 1 tsp pure vanilla extract
    • 1.5 tsp cotton candy flavoring (food-grade)
    • Gel food coloring (assorted pastel colors, e.g., pink, blue, purple)
    • Pinch of fine salt (enhances flavor)

    Instructions

    1. Prepare Your Pan: Line an 8×8 inch (20×20 cm) square baking pan with parchment paper, ensuring a generous overhang on all sides to easily lift the fudge later. This prevents sticking and makes removal effortless.
    2. Melt the Base: In a large, microwave-safe bowl, combine the white chocolate chips, sweetened condensed milk, and cubed unsalted butter. Microwave on medium power in 30-second intervals, stirring thoroughly with a rubber spatula after each, until the mixture is completely smooth, glossy, and fully melted with no lumps remaining (this typically takes 2-4 minutes total).
    3. Infuse Flavor: Once melted, gently fold in the pure vanilla extract and the cotton candy flavoring until they are fully incorporated and the aroma is evenly distributed throughout the rich base.
    4. Divide Evenly: Carefully divide the warm fudge mixture into 3 to 4 separate, heat-safe bowls, aiming for approximately equal portions in each, depending on how many distinct colors you intend to create.
    5. Color Your World: To each bowl, add 1-2 drops of a different gel food coloring. Stir each portion until a vibrant, uniform pastel hue is achieved. Continue adding coloring in tiny increments until your desired shade is reached.
    6. Layer the Magic: Pour the first colored fudge layer into the prepared pan, spreading it evenly to the edges with an offset spatula. Then, gently spoon and spread the subsequent colored layers on top. For distinct layers, spread carefully. For a marbled effect, lightly swirl a butter knife through the layers after all are added.
    7. Chill Out & Set: Transfer the pan to the refrigerator and chill for at least 2 to 4 hours, or until the fudge is completely firm to the touch and holds its shape. For a quicker set, you may place it in the freezer for about 30-45 minutes, checking frequently.
    8. Slice and Serve: Once thoroughly set, use the parchment paper overhang to carefully lift the entire slab of Cotton Candy Fudge from the pan. Place it on a cutting board, and using a sharp, warm knife, slice it into small, bite-sized squares. Serve immediately or store.

    Behind the Dish

    This delightful Cotton Candy Fudge brings a carnival classic home in an elegant, no-bake format. The magic lies in the simple combination of white chocolate, sweetened condensed milk, and butter, creating a rich, creamy canvas for vibrant colors and whimsical flavor. It’s a perfect treat for celebrations, gifting, or simply adding a touch of playful sweetness to your day without needing an oven.

    Keys To Success

    • Use high-quality white chocolate chips, not white baking morsels, for the best melting and flavor.
    • Do not overheat the mixture in the microwave; melt slowly and stir frequently to ensure a smooth, lump-free base without scorching.
    • Gel food colorings provide much more vibrant and concentrated color with less liquid, preventing the fudge from becoming too thin.
    • Allow ample time for chilling. Rushing this step will result in soft, difficult-to-cut fudge.
    • For clean slices, warm your knife under hot water and wipe it clean between each cut.

    Serving Suggestions

    • Serve these colorful fudge squares as a delightful dessert centerpiece at birthday parties, baby showers, or holiday gatherings.
    • Package them in decorative boxes or cellophane bags for charming homemade gifts.
    • Pair with a glass of cold milk or a scoop of vanilla ice cream for an extra sweet indulgence.
    • Garnish with a sprinkle of edible glitter or a few colorful sprinkles before the fudge fully sets for added sparkle.

    Prep Time: 13 minutes, Cook Time: 4 minutes, Chill Time: 2-4 hours, Yields: 36 small squares.

    FAQs

    Can I use different flavors instead of cotton candy?
    Yes, absolutely! Feel free to swap cotton candy flavoring for other extracts like strawberry, raspberry, peppermint, or even almond for a different flavor profile.
    How do I achieve distinct layers versus a marble effect?
    For distinct layers, gently pour and spread each color over the previous one, trying not to disturb the layer beneath. For a marble effect, after all colors are layered, use a knife to swirl through them once or twice.
    How should I store cotton candy fudge?
    Store the fudge in an airtight container at room temperature for up to one week, or in the refrigerator for up to two weeks. If refrigerated, allow it to come to room temperature for optimal texture.
    Can this fudge be frozen?
    Yes, this fudge freezes beautifully! Wrap it tightly in plastic wrap, then aluminum foil, and store in an airtight freezer-safe container for up to 2-3 months. Thaw in the refrigerator overnight or at room temperature.
    My fudge is too soft and won’t set. What went wrong?
    This usually happens if the white chocolate base wasn’t fully melted and combined, or if there wasn’t enough chilling time. Ensure the mixture is completely smooth and allow adequate refrigeration until firm.
    What type of white chocolate is best?
    Use high-quality white chocolate chips or finely chopped white chocolate bars. Avoid white baking morsels or white confectionery coating as they often contain less cocoa butter and can result in a greasier or less firm fudge.
    Can I double the recipe?
    Yes, you can easily double the recipe. Just use a larger pan, such as a 9×13 inch (23×33 cm) pan, and ensure you have enough bowls for dividing and coloring. The melting and chilling times may remain similar.
    Why is my fudge grainy?
    Graininess can occur if the white chocolate was overheated, causing it to seize, or if the mixture wasn’t stirred until completely smooth during the melting process. Low-quality chocolate can also contribute.

    [redirect_script url=”aHR0cHM6Ly93d3cuY29va2luZ3dpdGhsb3JhLmNvbS9jb3R0b24tY2FuZHktZnVkZ2UtcmVjaXBlLXdpdGgtcGFzdGVsLWxheWVycz91dG1fc291cmNlPXBpbnRlcmVzdC5jb20mdXRtX21lZGl1bT1yZWZlcnJhbA==”]

  • Effortless Blooming Baked Apples with Cinnamon-Sugar Crust

    Effortless Blooming Baked Apples with Cinnamon-Sugar Crust

    Discover the magic of blooming baked apples, a truly effortless dessert that transforms simple fruit into a stunning, warm treat. Each apple is artfully sliced to fan out, then generously filled with a buttery cinnamon-sugar crumble before being baked to tender, golden perfection. It’s a comforting and impressive dish perfect for any occasion.

    Ingredients

    • 4 large baking apples (such as Fuji, Gala, or Honeycrisp), firm and blemish-free
    • ½ cup (113g) unsalted butter, melted and slightly cooled
    • ¼ cup (50g) granulated sugar
    • ¼ cup (50g) light brown sugar, firmly packed
    • ½ cup (60g) all-purpose flour
    • 1 teaspoon ground cinnamon
    • 1 tablespoon fresh lemon juice
    • ¼ teaspoon ground nutmeg or allspice
    • A pinch of fine sea salt

    Instructions

    1. Prepare the Apples: Begin by preheating your oven to 375°F (190°C). Carefully wash and dry each apple. Using an apple corer or a small paring knife, remove the core, leaving the bottom intact. Place each apple on a cutting board and, starting about ½ inch from the bottom, make even, vertical slices around the apple, stopping before cutting all the way through. Aim for slices that are about ¼-inch thick to ensure they fan out beautifully.
    2. Craft the Cinnamon Sugar Crumble: In a medium-sized mixing bowl, whisk together the melted unsalted butter, granulated sugar, light brown sugar (ensure it’s packed for accurate measurement), all-purpose flour, ground cinnamon, ground nutmeg (or allspice), and a pinch of sea salt. Mix with a fork or your fingertips until the mixture is well combined and resembles moist, coarse crumbs.
    3. Assemble and Fill: Gently transfer the prepared apples to a small baking dish or individual ramekins, leaving some space between them. Carefully fan out the pre-sliced apple sections, allowing the petals to open. Drizzle a small amount of fresh lemon juice over the fanned apples to prevent browning and add brightness. Now, generously press the cinnamon-sugar crumble mixture into the crevices of each apple and pile some on top, ensuring an even coating.
    4. Bake to Tender Perfection: Place the baking dish in the preheated oven. Bake for approximately 35-40 minutes, or until the apple flesh is fork-tender and the cinnamon-sugar crust is golden brown and delightfully bubbly. You’ll notice fragrant juices simmering around the apples at the bottom of the dish. Let them cool slightly before serving, as the filling can be very hot.

    Recipe At-A-Glance

    This recipe transforms simple apples into an elegant dessert with minimal fuss. The key is in the careful slicing, which allows the apples to ‘bloom’ during baking, creating a stunning visual effect. Paired with a warm, spiced crumb topping, it’s a perfect blend of texture and flavor.

    Baker’s Notes

    • For the best ‘blooming’ effect, ensure your apple slices are uniform in thickness and you stop cutting just before reaching the base.
    • Choosing firm, crisp apples like Fuji or Honeycrisp is crucial, as they hold their shape well during baking and offer a pleasant texture.
    • A touch of lemon juice not only prevents browning but also adds a bright counterpoint to the sweetness of the crumble.
    • Don’t be shy with the crumble! Press it generously into every crevice for maximum flavor and texture.

    Make Ahead / Freeze

    • These blooming apples are best enjoyed fresh from the oven, but you can assemble them up to 4 hours ahead of time. Cover loosely and refrigerate, then bake as directed.
    • Leftovers can be stored in an airtight container in the refrigerator for up to 3 days. Reheat gently in the microwave or a low oven until warmed through.
    • Freezing is not recommended as it can significantly alter the texture of the cooked apples, making them mushy upon thawing.

    Prep time: 17 minutes | Cook time: 38 minutes | Yield: 4 servings

    FAQs

    What are the best apple varieties for this recipe?
    Firm, crisp apples that hold their shape well during baking are ideal, such as Fuji, Gala, Honeycrisp, or Braeburn. Avoid softer varieties that can turn mushy.
    How do I prevent the apples from turning brown after slicing?
    A quick drizzle of fresh lemon juice over the sliced apples before adding the topping helps prevent oxidation and keeps them looking vibrant.
    Can I prepare these blooming apples ahead of time?
    Yes, you can assemble the apples with the crumb topping up to 4 hours in advance. Cover them loosely and refrigerate until you’re ready to bake.
    How should I store leftover baked apples?
    Store any leftover baked apples in an airtight container in the refrigerator for up to 3 days. Reheat gently in the microwave or a warm oven (around 300°F/150°C) until heated through.
    Can I add nuts or oats to the crumble topping?
    Absolutely! For added texture and flavor, you can mix ½ cup of chopped pecans, walnuts, or rolled oats into the cinnamon-sugar crumble mixture.
    My apples didn’t fan out well. What might have gone wrong?
    Ensure you core the apple deep enough without cutting through the bottom, and make sure your slices are uniform and thin enough (about ¼-inch) to allow for easy fanning. Gently opening them up before adding the crumble helps too.
    Can I make this recipe in individual ramekins?
    Yes, baking the apples in individual ramekins or small oven-safe bowls is a great idea for personal portions and beautiful presentation.

    [redirect_script url=”aHR0cHM6Ly93d3cuY29va2luZ3dpdGhsb3JhLmNvbS9ibG9vbWluZy1hcHBsZS1yZWNpcGUtd2l0aC1jaW5uYW1vbi1zdWdhci1jcnVzdD91dG1fc291cmNlPXBpbnRlcmVzdC5jb20mdXRtX21lZGl1bT1yZWZlcnJhbA==”]

  • Homemade Bavarian Pretzels with Tangy Dijon Mustard Dip

    Homemade Bavarian Pretzels with Tangy Dijon Mustard Dip

    Master the art of traditional German baking with these irresistible homemade Bavarian Pretzels. This recipe guides you through creating perfectly chewy, deep golden-brown pretzels, complete with the essential baking soda bath for that iconic flavor and crust. Paired with a simple, yet utterly delicious tangy Dijon mustard dip, these pretzels are an impressive treat perfect for any gathering or a cozy snack.

    Ingredients

    • 4 cups (480g) all-purpose or bread flour
    • 2 ¼ teaspoons (1 packet) active dry yeast
    • 1 ½ cups (360ml) warm water, 105-115°F (40-46°C)
    • 1 tablespoon coarse salt, plus extra pretzel salt for topping
    • ½ cup (120g) baking soda
    • ¼ cup (56g) unsalted butter, melted
    • ½ cup (120g) Dijon or stone-ground mustard
    • 2 tablespoons (25g) light brown sugar, packed
    • 1 tablespoon (15ml) white vinegar

    Instructions

    1. Activate the Yeast: In a substantial mixing bowl, combine the warm water (ensuring it’s between 105-115°F or 40-46°C), a small pinch of brown sugar (reserved from the dip ingredients) to feed the yeast, and the active dry yeast. Gently stir, then let this mixture rest undisturbed for 5-10 minutes. Look for a visible layer of foam or bubbles on the surface; this confirms your yeast is active and potent.
    2. Combine Dry and Wet Ingredients: In a separate, larger bowl, thoroughly whisk together the all-purpose or bread flour and the 1 tablespoon of coarse salt, ensuring even distribution. Create a well in the center of the dry ingredients. Pour the activated yeast mixture and the melted unsalted butter into this well.
    3. Form and Knead the Dough: Begin mixing the ingredients with a sturdy spoon or spatula until a shaggy, cohesive dough starts to form. Transfer this dough onto a lightly floured countertop or a clean, sturdy surface. Knead the dough by hand with a push-and-fold motion for 8-10 minutes, or utilize a stand mixer fitted with a dough hook on medium-low speed for 6-8 minutes. The dough should transform into a smooth, pliable, and elastic ball that springs back when gently pressed.
    4. First Proofing: Lightly brush the inside of a clean, large bowl with oil. Place the kneaded dough inside, turning it once to ensure all sides are coated to prevent drying. Cover the bowl securely with plastic wrap or a clean, damp kitchen towel. Allow the dough to rise in a warm, draft-free environment for 60-90 minutes, or until its volume has clearly doubled, indicating proper fermentation.
    5. Shape the Pretzels: Gently deflate the risen dough by pressing it down. Transfer it to a clean surface and divide it into 8-10 equal portions, aiming for consistency in size for even baking. Take each portion and roll it between your palms and the countertop into a long, slender rope, approximately 20-24 inches (50-60 cm) in length, ensuring the ends are slightly tapered. To form the classic pretzel shape, create a U-shape, then cross the ends over each other once, twist them, and bring them back down to gently press onto the bottom curve of the U. Repeat for all pieces.
    6. Prepare the Lye Bath (Baking Soda): Select a wide, shallow pot or a Dutch oven (at least 8-quart capacity). Combine 8 cups of water with the ½ cup of baking soda. Bring this mixture to a vigorous rolling boil over high heat, ensuring all the baking soda has dissolved.
    7. Boil the Pretzels: Carefully, using a large slotted spoon or spider, immerse 1-2 shaped pretzels into the rapidly boiling baking soda solution at a time. Boil each pretzel for precisely 30 seconds per side. During this crucial step, the dough will puff slightly and begin to develop that distinct, slightly rubbery texture characteristic of pretzels, setting the stage for the deep brown crust.
    8. Bake to Golden Perfection: Promptly remove the boiled pretzels from the bath using the slotted spoon, allowing any excess water to drain off. Arrange them on a baking sheet lined with parchment paper, leaving some space between each. Immediately and generously sprinkle the tops with coarse pretzel salt. Transfer to a preheated oven at 400°F (200°C) and bake for 12-15 minutes, or until they achieve a deep, appetizing golden-brown hue and have a firm, shiny crust.
    9. Whip Up the Tangy Mustard Dip: While the pretzels are baking and cooling, prepare the essential accompaniment. In a small mixing bowl, vigorously whisk together the Dijon or stone-ground mustard, the packed light brown sugar, and the white vinegar until smooth and well combined. This simple, tangy dip is the perfect counterpoint to the savory, salty pretzels.

    Baker’s Notes

    • Yeast Activity is Key: Always ensure your yeast is active by performing the proofing step. If it doesn’t foam, your water might be too cold or hot, or the yeast is expired.
    • Flour Choice Matters: For the chewiest pretzels, opt for bread flour. All-purpose flour will still yield delicious results, but with a slightly softer texture.
    • Pretzel Salt: While coarse sea salt works, true pretzel salt adheres better and gives a more authentic appearance and intense salty crunch.
    • Don’t Over-Boil: Boiling for too long can lead to a tough pretzel. Stick to the 30 seconds per side for the ideal texture and crust development.

    Try These Variations

    • Cinnamon Sugar Pretzels: After boiling, instead of salt, brush pretzels with melted butter and sprinkle generously with a cinnamon-sugar mixture before baking.
    • Cheese-Stuffed Pretzels: Before shaping, flatten each dough portion, place a small cube of sharp cheddar or mozzarella in the center, and then seal the dough around it before rolling and shaping.
    • Everything Bagel Pretzels: After the baking soda bath, sprinkle generously with everything bagel seasoning for a savory twist.
    • Sweet Mustard Dip: Add a teaspoon of honey or maple syrup to the mustard dip for extra sweetness.

    Make Ahead / Freeze

    • Dough Ahead: The dough can be prepared up to the first rise, then covered tightly and refrigerated for up to 24 hours. Let it come to room temperature for about 30 minutes before shaping.
    • Baked Pretzels: Cooked and cooled pretzels can be stored in an airtight container at room temperature for 1-2 days. Reheat briefly in a 350°F (175°C) oven or toaster oven for best results.
    • Freezing Baked Pretzels: For longer storage, freeze cooled, baked pretzels in a single layer on a baking sheet until solid, then transfer to a freezer-safe bag for up to 1 month. Thaw at room temperature and reheat as desired.

    Prep Time: 30 minutes | Cook Time: 20 minutes | Rise Time: 60-90 minutes | Yields: 8-10 soft pretzels

    FAQs

    Can I use instant yeast instead of active dry yeast?
    Yes, you can. If using instant yeast, you can typically skip the activation step and mix it directly with the dry ingredients. However, ensuring it’s still active by proofing a small amount is always a good practice.
    What is the purpose of the baking soda bath?
    The baking soda bath is crucial! It gelatinizes the starch on the pretzel’s surface, contributing to the distinct chewy crust, dark brown color, and characteristic flavor that defines a true Bavarian pretzel.
    My dough isn’t rising; what went wrong?
    Several factors can inhibit yeast activity. Ensure your warm water is within the specified temperature range (105-115°F); water that’s too hot can kill the yeast, while water that’s too cold won’t activate it. Also, check the expiration date on your yeast.
    Can I make the pretzel dough ahead of time?
    Absolutely! After the first rise, you can punch down the dough, cover it tightly with plastic wrap, and refrigerate it for up to 24 hours. Let it sit at room temperature for about 30 minutes before shaping.
    What if I don’t have pretzel salt?
    While pretzel salt is ideal for its coarse texture and adherence, you can use other coarse salts like sea salt or kosher salt. They won’t stick quite as well but will still provide a delicious salty crunch.
    How do I prevent my pretzels from getting tough?
    Avoid over-kneading the dough, as this can develop too much gluten and result in a tough texture. Also, be mindful of the boiling time; precisely 30 seconds per side is key to a perfect balance of chewiness and tenderness.
    Can I double this recipe?
    Yes, this recipe can be doubled. You might need a larger bowl for mixing and rising, and potentially two baking sheets to accommodate all the pretzels during baking.
    How should I store leftover pretzels and the dip?
    Leftover baked pretzels are best stored in an airtight container at room temperature for 1-2 days. The mustard dip should be kept refrigerated in an airtight container and is best consumed within 3-5 days.

    [redirect_script url=”aHR0cHM6Ly93d3cuY29va2luZ3dpdGhsb3JhLmNvbS9hdXRoZW50aWMtYmF2YXJpYW4tcHJldHplbC1yZWNpcGUtd2l0aC1tdXN0YXJkLWRpcC8/dXRtX3NvdXJjZT1waW50ZXJlc3QuY29tJnV0bV9tZWRpdW09cmVmZXJyYWw=”]

  • Classic Korean Japchae: Savory Glass Noodle Stir Fry with Beef

    Classic Korean Japchae: Savory Glass Noodle Stir Fry with Beef

    Master the art of authentic Korean Japchae with this vibrant and flavorful glass noodle stir-fry recipe. Featuring chewy sweet potato noodles, tender marinated beef, and an array of colorful sautéed vegetables, all tossed in a savory-sweet sesame soy sauce, it’s a delightful dish perfect for any meal.

    Ingredients

    • 100g glass noodles (dangmyeon), dried sweet potato starch noodles
    • 200g beef sirloin or flank steak, thinly sliced against the grain
    • 150g fresh spinach, tough stems removed
    • 1 medium carrot, julienned or thinly sliced
    • ½ medium yellow onion, thinly sliced
    • 1 small red bell pepper, thinly sliced
    • 4-5 dried shiitake mushrooms, rehydrated and thinly sliced (stems discarded)
    • 2 tbsp soy sauce (or tamari for gluten-free)
    • 1 tbsp toasted sesame oil, plus more for tossing
    • 1 tbsp granulated sugar
    • 2 cloves garlic, minced
    • ¼ tsp black pepper, freshly ground
    • 1 tbsp neutral oil, for cooking (e.g., vegetable, canola)
    • 1 tsp toasted sesame seeds, for garnish

    Instructions

    1. Prepare the Glass Noodles: Bring a large pot of water to a rolling boil. Add the dried glass noodles and cook according to package directions, typically 6-8 minutes, until they are tender yet retain a pleasant chew (al dente). Immediately drain the noodles into a colander, then rinse thoroughly under cold running water to stop the cooking process and prevent sticking. Once drained, toss them with about 1 teaspoon of toasted sesame oil to keep them separate and pliable.
    2. Prep & Marinate Components: While noodles cook, meticulously slice all vegetables (carrot, onion, bell pepper, rehydrated shiitake mushrooms) into thin, uniform strips for even cooking and a beautiful presentation. For the beef, whisk together 1 tablespoon of soy sauce, ½ teaspoon of minced garlic, and a pinch of black pepper in a small bowl. Add the thinly sliced beef to this marinade and toss to coat; let it sit for 10-15 minutes to absorb the flavors.
    3. Sauté Each Ingredient Individually: Heat 1 tablespoon of neutral oil in a large wok or a spacious non-stick skillet over medium-high heat. Working in batches if necessary to avoid overcrowding, sauté each vegetable component (carrots, then onions, then bell peppers, then shiitake) for 2-3 minutes until just tender-crisp and vibrant, seasoning lightly with a pinch of salt if desired. Quickly wilt the fresh spinach for about 1 minute until tender. Remove all cooked vegetables to a large bowl. Next, cook the marinated beef in the same pan, stirring frequently, for 2-4 minutes until it’s browned and cooked through. Add the beef to the bowl with the vegetables.
    4. Craft the Signature Sauce & Combine: In a small bowl, whisk together the remaining 1 tablespoon of soy sauce, 1 tablespoon of toasted sesame oil, 1 tablespoon of granulated sugar, the remaining 1½ cloves of minced garlic, and ¼ teaspoon of black pepper until the sugar is fully dissolved. In the large wok or skillet (no need to clean), return the cooked noodles, all the sautéed vegetables, and the cooked beef. Pour the prepared sauce evenly over everything.
    5. Final Stir-Fry & Serve: Using tongs or a large spatula, gently but thoroughly toss and stir-fry all ingredients together for 2-3 minutes over medium heat. Ensure the sauce evenly coats every strand of noodle and all the vegetables are well-integrated and heated through. Taste and adjust seasoning if needed (more soy sauce or sugar). Transfer the Japchae to a serving platter, sprinkle generously with toasted sesame seeds, and, for an extra nutty aroma, drizzle with a touch more sesame oil just before serving warm.

    Chef’s Insight

    The secret to exceptional Japchae lies in preparing each component separately. This technique ensures every vegetable maintains its distinct texture and vibrant color, preventing a mushy or dull-looking dish. The sweet potato glass noodles, or dangmyeon, are naturally springy and absorb flavor beautifully, making them the perfect canvas for the savory-sweet sauce.

    Cook’s Notes

    • Noodle Care: Do not overcook the glass noodles; they should be chewy, not soft. Rinsing immediately with cold water is crucial to prevent sticking.
    • Uniform Slicing: Thin, consistent slices for vegetables and beef ensure even cooking and an elegant presentation.
    • Don’t Overcrowd: Sautéing in batches prevents steaming and ensures a proper sear or crispness on your ingredients. A large wok or spacious skillet is ideal.
    • Taste and Adjust: The sauce balance can be customized. Feel free to add a little more soy sauce for savoriness or sugar for sweetness to suit your palate after the final toss.

    How To Serve

    Japchae is incredibly versatile. It can be enjoyed as a hearty vegetarian or beef-filled main course, a substantial side dish alongside Korean BBQ, or as a colorful addition to a potluck spread. It’s often served warm, but leftovers are delicious cold or at room temperature. A light sprinkle of extra toasted sesame seeds and perhaps some finely chopped scallions add a final flourish.

    Prep time: 22 minutes Cook time: 17 minutes Total time: 39 minutes Yield: 4 servings

    FAQs

    Can I make Japchae ahead of time?
    Yes, Japchae is an excellent make-ahead dish! It tastes fantastic served warm, at room temperature, or even cold. If making more than a few hours ahead, keep the sauce separate until just before serving and toss everything together to maintain optimal texture and flavor.
    What other vegetables can I use in Japchae?
    Feel free to customize with your favorite vegetables. Common additions include bell peppers of different colors, zucchini, bok choy, or even wood ear mushrooms. Just ensure they are thinly sliced and cooked until tender-crisp.
    Can I substitute the beef with another protein?
    Absolutely! Thinly sliced chicken, pork, shrimp, or firm tofu are all excellent substitutions. Adjust cooking times as needed to ensure the protein is cooked through.
    Why are my glass noodles sticking together?
    The key to non-sticky noodles is to rinse them thoroughly under cold water immediately after boiling and then toss them with a little sesame oil. This removes excess starch and coats them, preventing clumping.
    How do I store leftover Japchae?
    Store leftover Japchae in an airtight container in the refrigerator for up to 3-4 days. For best results, reheat gently in a microwave or on the stovetop over low heat, adding a splash of water or a tiny bit of sesame oil if it seems dry.
    Is Japchae gluten-free?
    Traditional glass noodles (dangmyeon) are made from sweet potato starch and are naturally gluten-free. To make the entire dish gluten-free, ensure you use tamari instead of regular soy sauce and check all other ingredients for hidden gluten.
    Can I freeze Japchae?
    While technically possible, freezing Japchae is not recommended. The noodles can become somewhat mushy or brittle upon thawing, and the vegetables may lose their texture. It’s best enjoyed fresh or refrigerated.

    [redirect_script url=”aHR0cHM6Ly9lYXN5ZGFzaHJlY2lwZXMuY29tL2phcGNoYWUtcmVjaXBlLWtvcmVhbi1nbGFzcy1ub29kbGUtc3Rpci1mcnkvP3V0bV9zb3VyY2U9cGludGVyZXN0LmNvbSZ1dG1fbWVkaXVtPXJlZmVycmFs”]

  • Irresistible Peach Cobbler Nachos with Sweet Whipped Cream Topping

    Irresistible Peach Cobbler Nachos with Sweet Whipped Cream Topping

    Experience the ultimate dessert fusion with these easy-to-make Peach Cobbler Nachos. This delightful treat transforms classic peach cobbler flavors into a fun, shareable format, layering warm, spiced peaches over crispy cinnamon chips, all crowned with a cloud of fluffy whipped cream. It’s perfect for a quick indulgence or a crowd-pleasing party snack.

    Ingredients

    • 6-8 oz (170-227g) sturdy tortilla chips or pre-made cinnamon sugar pita chips
    • 2 cups (approx. 300g) ripe sliced peaches, fresh or well-drained canned
    • ½ teaspoon ground cinnamon, plus a pinch of nutmeg or pre-made apple pie spice blend for extra warmth
    • 2 tablespoons light brown sugar, firmly packed
    • 1 cup (240ml) fresh whipped cream, store-bought or homemade

    Instructions

    1. Preheat your oven to a moderate 350°F (175°C). Arrange 6-8 ounces (170-227g) of sturdy tortilla chips or cinnamon sugar pita chips in a single, even layer on a large baking sheet, ensuring minimal overlap for even crisping. If using plain tortilla chips, consider a light dusting of cinnamon sugar first.
    2. In a medium-sized mixing bowl, gently combine the 2 cups (approx. 300g) of sliced peaches – whether fresh or thoroughly drained canned – with the 2 tablespoons of packed brown sugar and ½ teaspoon of ground cinnamon. Toss carefully to coat the peaches without mashing them, ensuring each slice glistens with the sweet spice mixture.
    3. Evenly distribute the prepared peach mixture over the arranged chips on the baking sheet, aiming for an approximate 8-10 minute bake time. Observe closely: the peaches should become beautifully warm and slightly bubbly around the edges, while the chips achieve a light golden toast and release their inviting fragrance.
    4. With oven mitts, carefully transfer the baking sheet from the hot oven. Allow the peach nachos to rest for just 1-2 minutes on a wire rack; this brief cooling period helps the warm peach topping to settle and adhere slightly to the chips, preventing it from sliding off too easily.
    5. Lavishly dollop or pipe 1 cup (240ml) of your chosen whipped cream over the warm peach nachos. For an elevated presentation and flavor, consider a drizzle of rich caramel sauce or a delicate sprinkle of finely toasted pecans or walnuts. Serve these delightful nachos immediately while the chips are at their crispiest and the peaches are perfectly warm.

    Recipe At-A-Glance

    These Peach Cobbler Nachos are an incredibly quick and delightful dessert. With minimal prep and a short bake time, you can have a warm, fruity, and crispy treat on the table in under 20 minutes. It’s a fantastic way to enjoy seasonal peaches or transform pantry staples into something special, offering a delightful twist on two beloved classics.

    Baker’s Notes

    • For extra flavor, lightly toast plain tortilla chips in the oven for 2-3 minutes before adding peaches.
    • If using fresh peaches, ensure they are ripe for the best sweetness and texture. A firm-ripe peach that gives slightly when pressed is ideal.
    • Don’t overcrowd your baking sheet; giving the chips space allows them to crisp properly and prevents sogginess.
    • For truly exceptional whipped cream, make your own with heavy cream, a touch of powdered sugar, and a splash of vanilla extract.

    Try These Variations

    • Berry Bliss: Swap out half the peaches for sliced strawberries, raspberries, or blueberries for a mixed fruit experience.
    • Nutty Crunch: Sprinkle chopped pecans, walnuts, or almonds over the peaches before baking for added texture.
    • Caramel Drizzle: A generous drizzle of caramel sauce or butterscotch over the whipped cream enhances the cobbler experience.
    • Ice Cream Sundae: Serve warm nachos with a scoop of vanilla bean ice cream instead of or in addition to whipped cream.
    • Spice It Up: Add a pinch of ground ginger or cardamom to the peach mixture for a more complex spice profile.

    Make Ahead / Freeze

    • These nachos are best served immediately to ensure the chips remain crispy.
    • You can prep the peaches (slice and toss with sugar/cinnamon) up to 1-2 hours in advance and store them covered in the refrigerator.
    • Whipped cream can be made ahead and stored in an airtight container in the fridge for up to 24 hours.
    • Freezing is not recommended for assembled nachos, as the chips will become soggy upon thawing.

    Prep time: 10 minutes | Cook time: 10 minutes | Total time: 20 minutes | Yield: 4 to 6 servings

    FAQs

    Can I use frozen peaches for this recipe?
    Yes, you can use frozen sliced peaches. Thaw them completely and drain any excess liquid before tossing with brown sugar and cinnamon to prevent the nachos from becoming watery.
    How do I prevent the chips from getting soggy?
    To minimize sogginess, use sturdy tortilla or pita chips and avoid overcrowding the baking sheet. Also, ensure your canned peaches are very well-drained, and serve the nachos immediately after adding the whipped cream.
    What kind of chips work best for peach cobbler nachos?
    Sturdy cinnamon sugar pita chips are ideal. If using plain tortilla chips, choose a thick, restaurant-style chip and consider a light dusting of cinnamon sugar before baking for extra flavor.
    Can I prepare parts of this recipe in advance?
    You can slice and toss the peaches with sugar and cinnamon up to an hour or two ahead of time and keep them refrigerated. Homemade whipped cream can also be prepared and stored in the fridge for up to 24 hours.
    What are some other great toppings?
    Beyond whipped cream, consider adding a drizzle of caramel or white chocolate sauce, a sprinkle of toasted nuts like pecans or walnuts, a scoop of vanilla ice cream, or even a dash of shredded coconut for tropical flair.
    How do I know when the peaches are cooked through?
    The peaches are ready when they look warm and slightly bubbly around the edges. They should be tender but still hold their shape, and the chips underneath will be lightly toasted and fragrant.
    Can I make this in an air fryer instead of an oven?
    While possible, it’s trickier to achieve even heating and crisping for a whole batch. You’d likely need to work in smaller batches and monitor carefully, as cooking times will be much shorter.
    Is there a good substitution for brown sugar?
    You can use granulated sugar with a touch of molasses, or even maple syrup or honey, though these might add more moisture to the peaches. Brown sugar gives a richer, more caramelly flavor that complements the peaches well.

    [redirect_script url=”aHR0cHM6Ly93d3cuY29va2luZ3dpdGhsb3JhLmNvbS9wZWFjaC1jb2JibGVyLW5hY2hvcy1yZWNpcGUtd2l0aC13aGlwcGVkLWNyZWFtP3V0bV9zb3VyY2U9cGludGVyZXN0LmNvbSZ1dG1fbWVkaXVtPXJlZmVycmFs”]