Author: Sarah Johnson

  • Classic Baked Beans with Rich Brown Sugar & Molasses

    Classic Baked Beans with Rich Brown Sugar & Molasses

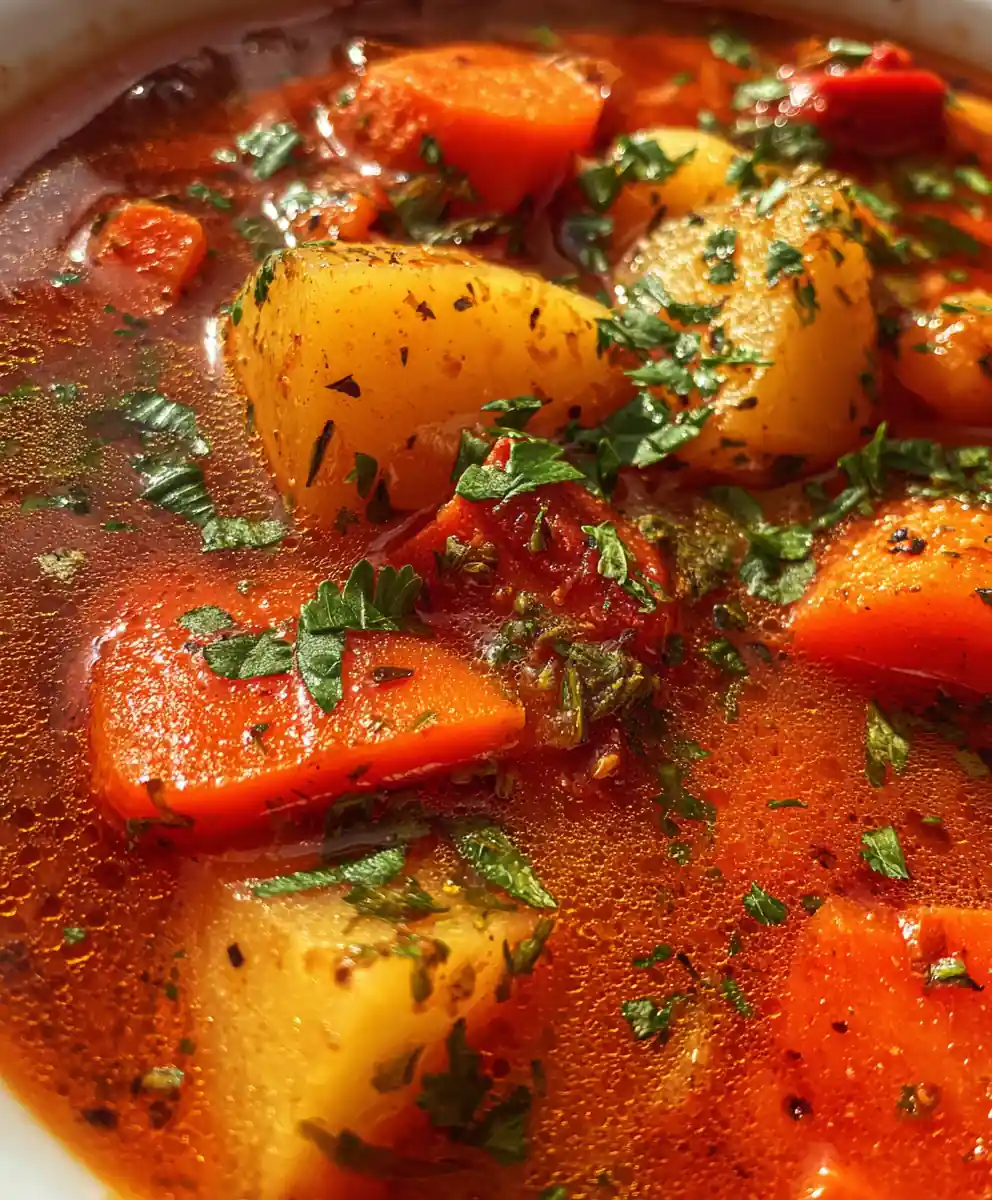
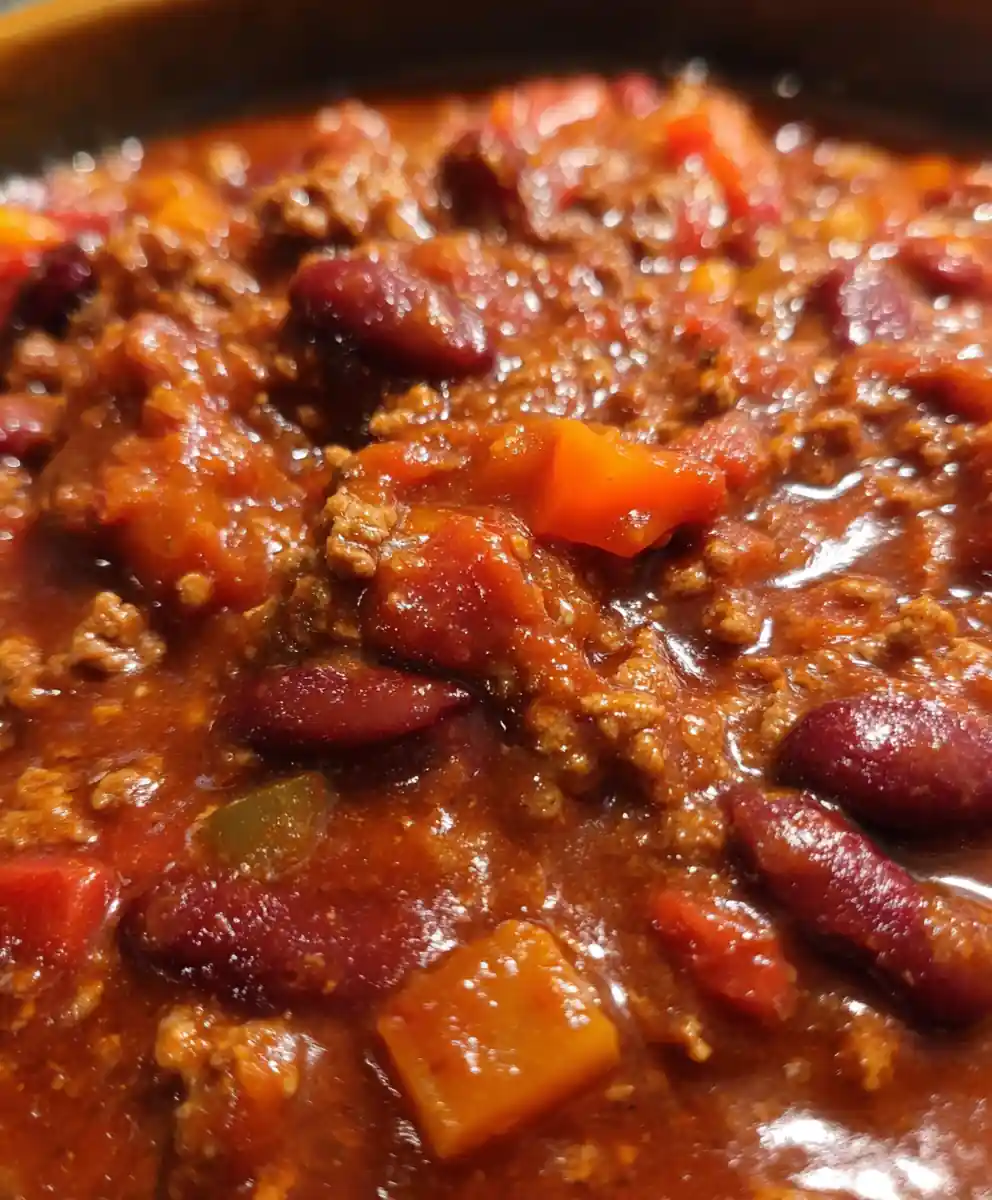
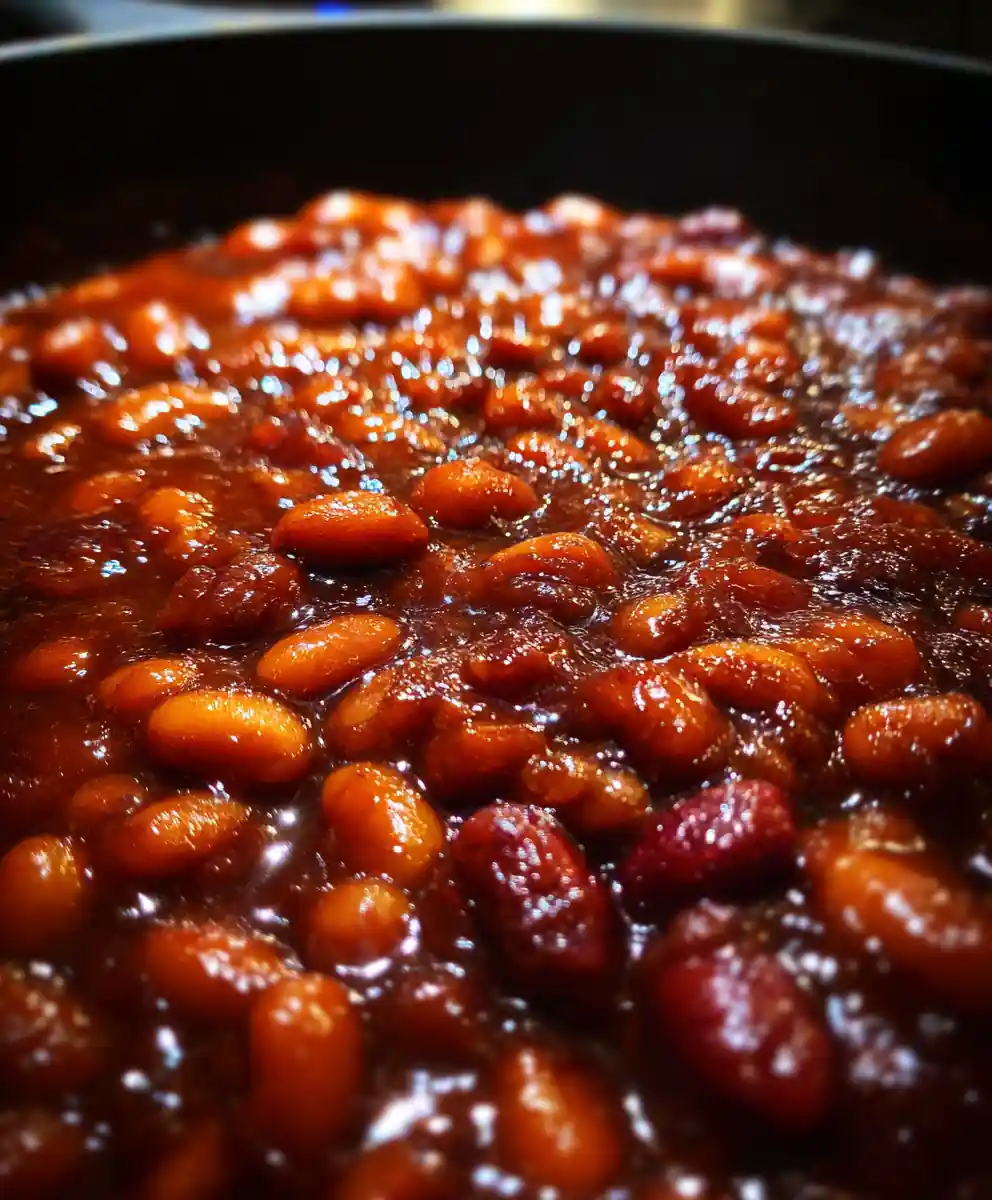
    Experience the ultimate comfort food with this classic baked beans recipe, simmered to perfection with a rich blend of brown sugar and dark molasses. This hearty side dish features tender navy beans in a thick, savory-sweet sauce, making it an indispensable addition to any barbecue, picnic, or family gathering.

    Ingredients

    • 2 (15-ounce / 425g) cans navy beans, drained and thoroughly rinsed
    • ½ cup (100g) light or dark brown sugar, firmly packed
    • ¼ cup (60ml) dark, unsulfured molasses
    • ½ cup (120ml) ketchup, your favorite brand
    • 1 tablespoon (15ml) prepared yellow mustard
    • 1 medium yellow onion, finely diced
    • ½ cup (120ml) vegetable or chicken broth, plus more if needed

    Instructions

    1. Prepare Your Beans: If opting for dried beans, ensure they are soaked overnight (about 8 hours) then cooked until perfectly tender. For canned beans, thoroughly drain and rinse them under cold water to remove excess sodium and starchy liquid, then set aside.
    2. Sauté the Aromatics: In a large, oven-safe pot or Dutch oven (with a lid), warm a touch of oil over medium heat. Add the finely diced yellow onion and sauté for 5-7 minutes, stirring occasionally, until it becomes soft and translucent, but without browning, which builds a sweet, aromatic base.
    3. Combine & Coat: Introduce the prepared navy beans, the softened onion, firmly packed brown sugar, dark molasses, tangy ketchup, prepared yellow mustard, and ½ cup of broth to the pot. Stir all ingredients meticulously with a sturdy spoon until the beans are completely coated in the rich, glossy sauce and everything is well combined.
    4. Bake to Perfection: Cover the pot tightly with its lid or foil. Transfer to a preheated 350°F (175°C) oven and bake for 1 hour 45 minutes. Stir the beans gently every 30 minutes during this period to ensure even cooking and prevent any sticking. For the final 30 minutes, remove the lid to allow the sauce to thicken further and achieve that desirable bubbly, slightly caramelized top. The beans are ready when the sauce is deeply colored, thick, and bursting with flavor.

    Why You’ll Love It

    This recipe transforms simple ingredients into a dish that’s both deeply comforting and incredibly satisfying. The slow baking process allows the flavors of brown sugar and molasses to meld, creating a complex, sweet-and-savory profile that pairs perfectly with a wide range of meals. It’s a crowd-pleaser that’s remarkably easy to prepare for gatherings or weeknight dinners.

    Success Tips

    • Bean Quality Matters: If using dried beans, ensure they are fresh for optimal tenderness and cooking time. For canned, choose low-sodium options to better control the seasoning.
    • Don’t Rush the Sauté: Allowing the onion to soften properly is crucial for developing a sweet, savory foundation for your beans.
    • Stir Consistently: Regular stirring during baking prevents the beans from sticking to the bottom of the pot and ensures even distribution of the delicious sauce as it thickens.
    • Thickening the Sauce: Removing the lid for the last portion of baking is key to achieving a perfectly thick and slightly caramelized sauce. Keep an eye on it to prevent over-reduction.

    How To Serve

    • BBQ & Grilling: A quintessential companion to grilled ribs, pulled pork, hot dogs, and hamburgers. The sweet and savory profile perfectly complements smoky flavors.
    • Potlucks & Picnics: Easy to transport and serves a crowd, making it a perfect dish for any large gathering. Can be served warm or at room temperature.
    • Breakfast & Brunch: Believe it or not, baked beans are a staple in many hearty breakfast spreads, especially alongside eggs, bacon, and toast.
    • Holiday Spreads: A comforting addition to holiday meals, providing a unique texture and flavor alongside richer main courses.

    Prep time: 20 minutes | Cook time: 1 hour 45 minutes | Serves: 6-8

    FAQs

    Can I use a different type of bean?
    While navy beans are traditional for their creamy texture, you can substitute with cannellini or great northern beans. Adjust cooking time slightly if using dried beans, as densities vary.
    How can I make the sauce thicker?
    To ensure a thick sauce, remove the lid for the last 30-45 minutes of baking. If it’s still too thin, you can simmer it gently on the stovetop for a few minutes after baking until it reaches your desired consistency.
    Can I make these baked beans ahead of time?
    Absolutely! Baked beans are excellent for making ahead. Prepare them completely, then store in an airtight container in the refrigerator for up to 3-4 days. Reheat gently on the stovetop or in the oven.
    Are there any substitutions for molasses?
    Molasses provides a unique depth and dark color. If you must substitute, a blend of maple syrup and a small amount of dark brown sugar can work, though the flavor profile will be slightly different.
    How do I store leftovers?
    Store any leftover baked beans in an airtight container in the refrigerator for up to 3-4 days. They also freeze well in a freezer-safe container for up to 3 months; thaw overnight in the fridge before reheating.
    Why are my beans still hard after baking?
    If your beans are still hard, it’s likely they weren’t cooked long enough, especially if using dried beans that weren’t adequately pre-soaked or cooked. You can return them to the oven with a little extra broth or water, covered, until tender.
    What if I don’t have a Dutch oven?
    A large, oven-safe pot with a tight-fitting lid will work just as well. If you only have a deep baking dish, cover it tightly with aluminum foil during the covered baking period.

    [redirect_script url=”aHR0cHM6Ly9lYXN5ZGFzaHJlY2lwZXMuY29tL2Jha2VkLWJlYW5zLXJlY2lwZS13aXRoLWJyb3duLXN1Z2FyLWFuZC1tb2xhc3Nlcy8/dXRtX3NvdXJjZT1waW50ZXJlc3QuY29tJnV0bV9tZWRpdW09cmVmZXJyYWw=”]

  • Effortless Jet-Puffed Marshmallow Fudge: A Rich & Creamy Treat

    Effortless Jet-Puffed Marshmallow Fudge: A Rich & Creamy Treat

    Unlock the secret to irresistibly smooth and delightfully rich chocolate fudge with this streamlined recipe, perfect for home bakers of all skill levels. Featuring the magical touch of Jet-Puffed Marshmallow Creme, this no-fail method guarantees a velvety texture and deep chocolate flavor without the need for a candy thermometer. It’s a fantastic choice for holiday gifting, potlucks, or simply satisfying your sweet tooth with homemade goodness.

    Ingredients

    • 2 ½ cups (425g) good quality semi-sweet chocolate chips
    • Full 7 oz jar (200g) Jet-Puffed Marshmallow Creme
    • ½ cup (113g) unsalted butter, cut into cubes
    • 1 ½ cups (300g) granulated sugar
    • ⅔ cup (160ml) full-fat evaporated milk
    • 1 teaspoon pure vanilla extract
    • ¼ teaspoon fine sea salt (optional, for flavor enhancement)

    Instructions

    1. Begin by preparing your pan; line an 8×8 inch (20×20 cm) or 9×9 inch (23×23 cm) square pan with parchment paper or aluminum foil, ensuring a generous overhang on two opposing sides. This overhang creates handy handles for effortless removal later. Lightly grease the lined surface with butter or cooking spray to guarantee a non-stick release for your finished fudge.
    2. In a substantial, heavy-bottomed saucepan, combine the cubed unsalted butter, granulated sugar, and evaporated milk. Place the saucepan over medium heat, stirring consistently with a wooden spoon or spatula. Continue stirring until the sugar crystals are completely dissolved and the mixture reaches a vigorous, rolling boil—this typically takes 5 to 7 minutes. Once boiling, reduce the heat slightly to maintain a gentle but steady boil and continue stirring for precisely 5 minutes. Constant movement is crucial to prevent the sugar from burning or sticking to the bottom.
    3. Promptly remove the saucepan from the heat source to stop the cooking process. Immediately add the semi-sweet chocolate chips, the entire contents of the Jet-Puffed Marshmallow Creme jar, and the pure vanilla extract. Stir vigorously and continuously with a sturdy spatula or whisk. Keep stirring until all the chocolate is thoroughly melted, the marshmallow creme is fully incorporated, and the mixture is entirely smooth and glossy, with no visible streaks of unmixed ingredients. This rapid, thorough stirring is essential for achieving a luxuriously silky texture.
    4. Working swiftly, pour the warm, perfectly smooth fudge mixture into your prepared lined pan. Use an offset spatula or the back of a spoon to spread the fudge evenly into all corners, aiming for a uniform thickness across the surface.
    5. Transfer the pan to the refrigerator and allow the fudge to chill for a minimum of 2 to 4 hours, or until it is completely firm to the touch. For optimal slicing and the neatest squares, chilling the fudge overnight is highly recommended, as it allows the flavors to meld and the structure to fully set.

    Behind the Dish

    This classic marshmallow fudge recipe is a beloved staple for a reason: it’s incredibly simple, forgiving, and yields consistently delicious results. The Jet-Puffed Marshmallow Creme acts as a stabilizer and emulsifier, preventing the sugar from crystallizing, which is often the downfall of traditional fudge recipes. This means you get that perfect, smooth, and creamy texture every single time, making it an ideal choice for beginners and experienced candy makers alike looking for a reliable and delightful treat.

    Keys To Success

    • Use a Heavy-Bottomed Pan: This helps distribute heat evenly and prevents scorching, especially during the crucial boiling stage.
    • Stir Constantly: Both during the initial melting of sugar and during the 5-minute boil, constant stirring is non-negotiable to ensure the sugar dissolves fully and doesn’t burn.
    • Vigorous Stirring After Heat: Once off the heat, stir in the chocolate, marshmallow creme, and vanilla extract very rapidly and continuously until every lump is gone and the mixture is perfectly smooth. This quick, energetic motion is key to the fudge’s final texture.
    • Don’t Skimp on Chill Time: While 2-4 hours is the minimum, an overnight chill truly yields the best, firmest fudge that slices cleanly and holds its shape beautifully.

    Storage & Make-Ahead

    • Room Temperature: Store your finished fudge in an airtight container at cool room temperature for up to 1 week. Layer parchment paper between pieces to prevent sticking.
    • Refrigerator: For longer storage, keep fudge in an airtight container in the refrigerator for up to 2-3 weeks. Allow it to come to room temperature briefly before serving for the best texture.
    • Freezing: Fudge freezes beautifully! Wrap individual pieces tightly in plastic wrap, then place them in a freezer-safe bag or container. It can be frozen for up to 3 months. Thaw in the refrigerator overnight, then bring to room temperature before enjoying.

    Prep Time: 12 minutes | Cook Time: 14 minutes | Chill Time: 2 hours | Yield: About 36 pieces

    FAQs

    Can I use other types of chocolate for this fudge?
    Yes, you can experiment! While semi-sweet is classic, milk chocolate will result in a sweeter, milder fudge. If using darker chocolate, you might consider slightly increasing the sugar to balance the bitterness, but follow the recipe as written for your first try.
    Why is my fudge grainy or crumbly?
    Grainy fudge often occurs if the sugar didn’t fully dissolve before boiling or if it wasn’t stirred enough during the boiling phase, allowing crystals to form. Ensure you stir constantly until the sugar completely dissolves and for the full 5 minutes once boiling.
    Can I add nuts or other mix-ins to the fudge?
    Absolutely! After you’ve stirred in the chocolate and marshmallow creme, fold in your favorite additions like chopped pecans, walnuts, mini marshmallows, or even crushed peppermints. Do this quickly before pouring into the pan.
    My fudge didn’t set properly, what went wrong?
    The most common reasons for fudge not setting are not boiling the mixture long enough or using incorrect measurements. Ensure your measurements are precise and the mixture boils for the exact 5 minutes, maintaining a steady boil. Insufficient chilling time can also be a factor.
    What’s the best way to store this marshmallow fudge?
    Store the fudge in an airtight container at room temperature for up to a week, or in the refrigerator for up to 2-3 weeks. If stacking, place parchment paper between layers to prevent sticking.
    Can I prepare this fudge ahead of time?
    This fudge is an excellent make-ahead dessert! It keeps well in an airtight container for several days at room temperature or even longer in the refrigerator. In fact, making it a day in advance allows the flavors to deepen and the fudge to set perfectly.
    Do I need a candy thermometer for this recipe?
    No, that’s the beauty of this Jet-Puffed Marshmallow Creme fudge recipe! The marshmallow creme acts as a fail-safe ingredient, preventing crystallization and ensuring a smooth set without needing to monitor specific temperatures with a candy thermometer.

    [redirect_script url=”aHR0cHM6Ly93d3cuY29va2luZ3dpdGhsb3JhLmNvbS9jbGFzc2ljLWpldC1wdWZmZWQtbWFyc2htYWxsb3ctY3JlbWUtZnVkZ2UtcmVjaXBlLz91dG1fc291cmNlPXBpbnRlcmVzdC5jb20mdXRtX21lZGl1bT1yZWZlcnJhbA==”]

  • Irresistibly Crunchy Homemade Caramel Corn Puffs for Any Occasion

    Irresistibly Crunchy Homemade Caramel Corn Puffs for Any Occasion

    Whip up a batch of these irresistibly crunchy homemade caramel corn puffs, a timeless treat perfect for movie nights, parties, or simply satisfying a sweet craving. This recipe guides you through creating a luscious, golden caramel that perfectly coats every fluffy kernel, baked to crispy perfection for a delightful texture in every bite.

    Ingredients

    • 1/2 cup (100g) popcorn kernels, unpopped (yielding about 12-16 cups popped)
    • 1/2 cup (113g) unsalted butter, cubed
    • 1 cup (200g) light brown sugar, firmly packed
    • 1/4 cup (60ml) light corn syrup
    • 1/2 teaspoon (2.5g) baking soda
    • 1 teaspoon (5ml) pure vanilla extract

    Instructions

    1. Pop Your Corn: Get ready with about 12 to 16 cups of fluffy popcorn. Ensure all unpopped kernels are sifted out, as they can be unpleasant to bite into.
    2. Craft the Caramel: In a sturdy, heavy-bottomed saucepan, combine the unsalted butter, firmly packed light brown sugar, and light corn syrup. Place over medium heat, stirring occasionally with a heatproof spatula until the butter has melted and the sugar has dissolved. Bring the mixture to a full boil, then let it gently bubble for 4 to 5 minutes. Watch for it to thicken and achieve a rich, amber hue, indicating it’s ready.
    3. Introduce Foaming Agents: Promptly remove the saucepan from the heat. Stir in the baking soda and pure vanilla extract. The mixture will vigorously foam up and expand due to the baking soda; continue stirring until it subsides slightly and the caramel becomes smooth, lighter in color, and creamy.
    4. Coat Evenly: Transfer your freshly popped popcorn into a very large, heatproof mixing bowl. Carefully pour the hot, prepared caramel sauce over the popcorn. Using two sturdy spatulas or a large spoon, gently but thoroughly toss and fold the popcorn, ensuring every single piece is beautifully coated with the luscious caramel. Work quickly before the caramel cools too much.
    5. Achieve Crispness: Evenly spread the caramel-coated popcorn in a single, thin layer across a large rimmed baking sheet that’s been lined with parchment paper. Bake in a preheated oven at 250°F (120°C) for 45-60 minutes, pausing every 15 minutes to gently stir and redistribute the popcorn. This step is crucial for achieving that signature crisp, non-sticky texture.
    6. Cool and Serve: Once baked to perfection, remove the baking sheet from the oven and allow the caramel corn to cool completely and undisturbed on the parchment paper. As it cools, it will firm up and become wonderfully crunchy. Once entirely cool and hard, break the large clusters into individual, bite-sized pieces for easy enjoyment.

    Pro Tips

    • Pre-Measure Everything: Caramel making moves quickly. Have all your ingredients measured and ready to go before you start melting anything.
    • Use a Heavy-Bottomed Pan: This prevents scorching the caramel, especially during the boiling phase.
    • Don’t Rush the Bake: The oven time is essential for drying out the caramel and achieving that perfect crunch. Stirring regularly helps prevent clumping.
    • Cool Completely: Resist the urge to snack too soon! The caramel corn hardens and becomes truly crunchy only after it’s fully cooled.

    Serving Suggestions

    • This caramel corn is fantastic on its own as a delightful snack.
    • Package it in decorative bags or jars for homemade gifts during holidays or special occasions.
    • Serve alongside a bowl of ice cream for a delightful textural contrast.
    • Crush lightly and sprinkle over brownies or cupcakes for an extra caramel crunch.

    Variations & Add-Ins

    • Nutty Crunch: Stir in 1-2 cups of roasted, salted peanuts, pecans, or almonds with the popcorn before coating with caramel.
    • Chocolate Drizzle: Once the caramel corn is completely cool and broken apart, drizzle with melted dark, milk, or white chocolate for an extra layer of indulgence.
    • Spiced Caramel: Add 1/2 teaspoon of cinnamon or a pinch of nutmeg to the caramel sauce during the boiling stage for a warming spice note.
    • Sea Salt Finish: Sprinkle a tiny pinch of flaky sea salt over the caramel corn right after it comes out of the oven for a gourmet sweet and salty touch.

    Yields: About 14-16 cupsPrep time: 22 minutesCook time: 55 minutes

    FAQs

    How do I prevent my caramel corn from becoming sticky?
    The baking step is crucial! Baking at a low temperature for an extended period dries out the caramel, ensuring a truly crunchy, non-sticky result. Make sure to cool it completely and store it in an airtight container.
    Can I use microwave popcorn for this recipe?
    Yes, you can, but ensure it’s plain, unsalted, and unbuttered microwave popcorn. Any added butter or salt can affect the caramel’s texture and flavor. It’s often better to pop kernels yourself for optimal control.
    What’s the best way to store caramel corn?
    Once completely cool, store your crunchy caramel corn in an airtight container at room temperature. This will keep it fresh and crisp for up to a week. Avoid refrigeration, as it can make the caramel sticky.
    Why did my caramel separate or turn grainy?
    Caramel can separate if it’s stirred too vigorously during the boiling phase, causing sugar crystals to form. Using corn syrup helps prevent this. Ensure your ingredients are at room temperature and avoid scraping the sides of the pan during cooking.
    Can I double this recipe for a larger batch?
    Yes, you can double the recipe. However, it’s recommended to use two separate large baking sheets to ensure the caramel corn bakes in a single, even layer, which is essential for uniform crunchiness. Do not overcrowd one sheet.
    What if I don’t have light corn syrup?
    Light corn syrup is important as it helps prevent sugar crystallization, resulting in a smooth caramel. While some recipes use substitutes like honey or golden syrup, the texture may vary slightly. For best results, it’s recommended to use corn syrup.
    How do I know when the caramel is ready?
    The caramel mixture should reach a full, rolling boil and thicken slightly, taking on a rich, amber color within 4-5 minutes. If you have a candy thermometer, it should reach around 240-250°F (115-121°C) for the ‘soft ball’ stage, though visual cues work well here.

    [redirect_script url=”aHR0cHM6Ly93d3cuY29va2luZ3dpdGhsb3JhLmNvbS9jcnVuY2h5LWNhcmFtZWwtY29ybi1wdWZmcy1yZWNpcGUtZm9yLXBhcnRpZXMvP3V0bV9zb3VyY2U9cGludGVyZXN0LmNvbSZ1dG1fbWVkaXVtPXJlZmVycmFs”]

  • Hearty Fall Root Vegetable Soup: A Cozy & Nourishing Meal

    Hearty Fall Root Vegetable Soup: A Cozy & Nourishing Meal

    Embrace the comforting flavors of autumn with this Hearty Fall Root Vegetable Soup, a wholesome and incredibly satisfying one-pot dish. Brimming with tender carrots, potatoes, sweet potatoes, and parsnips, all simmered in a savory broth with aromatic herbs, this soup is perfect for chilly evenings. It’s simple to prepare and offers a nourishing meal that warms you from the inside out.

    Ingredients

    • 1 cup (128g) carrots, peeled and uniformly chopped
    • 2 cups (300g) Yukon Gold potatoes, scrubbed and cubed
    • 1 large (200g) sweet potato, peeled and cubed
    • 2 medium (150g) parsnips, peeled and chopped
    • 1 large (150g) yellow onion, finely chopped
    • 4 cloves garlic, freshly minced
    • 1 tablespoon olive oil
    • 6 cups (1.4L) low-sodium vegetable or chicken broth
    • 1 can (14.5 oz / 411g) diced tomatoes, undrained
    • 2 sprigs fresh thyme or 1 sprig fresh rosemary, whole
    • Salt and freshly ground black pepper, to taste

    Instructions

    1. Prepare the Produce: Gather all your vegetables and give them a thorough wash. Carefully peel and uniformly chop the carrots, potatoes, sweet potatoes, and parsnips into bite-sized pieces. Finely chop the large yellow onion and mince the garlic cloves. Consistent sizing is key here to ensure all vegetables cook evenly and become perfectly tender at the same time, avoiding any undercooked or mushy bits.
    2. Sauté the Aromatics: In a spacious, heavy-bottomed pot or a sturdy Dutch oven, warm 1 tablespoon of olive oil over medium heat until it shimmers. Add the finely chopped onion and gently sauté for about 4-6 minutes, stirring occasionally, until the pieces become softened and beautifully translucent, releasing their sweet aroma. Next, stir in the minced garlic and cook for just 60 seconds more, until it becomes wonderfully fragrant but doesn’t brown.
    3. Combine & Bring to Boil: Introduce the uniformly chopped root vegetables (carrots, potatoes, sweet potatoes, parsnips) to the pot. Pour in the 6 cups of vegetable or chicken broth, add the undrained diced tomatoes, and nestle in your fresh thyme or rosemary sprigs. Season the mixture generously with a good pinch of salt and freshly ground black pepper. Increase the heat to high and bring the entire mixture to a vigorous, rolling boil, ensuring all ingredients are well-submerged.
    4. Simmer Until Tender: Once a strong boil is achieved, promptly reduce the heat to low. Cover the pot with a tight-fitting lid and allow your hearty soup to simmer gently. Continue cooking for 50-65 minutes, or until all the vegetables are undeniably fork-tender. During this time, the flavors will have ample opportunity to meld and deepen, creating a rich and comforting broth. Taste and adjust seasonings as needed before serving.

    What Makes This Work

    This soup shines thanks to its balanced blend of sweet and savory root vegetables, which develop incredible depth of flavor as they slowly simmer. The inclusion of diced tomatoes adds a touch of acidity that brightens the whole dish, while fresh herbs infuse a delightful aroma. It’s a testament to simple ingredients coming together to create something truly extraordinary and nourishing.

    What To Serve With It

    • Crusty bread or garlic knots for dipping and soaking up the delicious broth.
    • A simple green salad with a light vinaigrette to complement the richness of the soup.
    • A sprinkle of fresh parsley or a dollop of sour cream or Greek yogurt just before serving for added creaminess and freshness.
    • Grilled cheese sandwiches make a classic and comforting pairing.

    Flavor Twists

    • Spice It Up: Add a pinch of red pepper flakes or a diced jalapeño along with the onions for a little kick.
    • Creamy Indulgence: Stir in ½ cup of heavy cream or coconut milk during the last 10 minutes of simmering for a richer, creamier texture.
    • Add Protein: Incorporate cooked shredded chicken, cannellini beans, or lentils during the simmering stage to make it an even heartier meal.
    • Herb Variations: Experiment with other herbs like bay leaf, sage, or a touch of marjoram for different aromatic profiles.

    Yields: 6-8 servings | Prep time: 25 minutes | Cook time: 55 minutes

    FAQs

    Can I make this soup vegan?
    Absolutely! This recipe is naturally vegan if you ensure to use vegetable broth. It’s packed with flavor either way!
    How long does this root vegetable soup last in the fridge?
    Properly stored in an airtight container, this soup will stay fresh and delicious in the refrigerator for 3-4 days, making it excellent for meal prep.
    Can I freeze this soup?
    Yes, this soup freezes beautifully. Allow it to cool completely, then transfer to freezer-safe containers or bags and freeze for up to 3 months. Thaw overnight in the fridge and reheat gently.
    What other vegetables can I add to this soup?
    Feel free to customize! Hearty additions like celery, leeks, kale, spinach, or even bell peppers would all work wonderfully and add more nutrients and flavor.
    What if my vegetables aren’t fork-tender after 50-65 minutes?
    Cooking times can vary slightly. Simply continue to simmer the soup, covered, for an additional 10-15 minutes, or until all the vegetables reach your desired level of tenderness. Check your liquid level periodically.
    Can I use dried herbs instead of fresh?
    Yes, you can substitute dried herbs. As a general rule, use about ½ teaspoon of dried herbs for every sprig of fresh herb called for in the recipe.
    How can I make the soup thicker if I prefer a richer consistency?
    For a thicker soup, you can remove about 1-2 cups of the cooked soup, blend it until smooth using an immersion or regular blender, and then stir it back into the pot. This adds body without additional thickeners.
    Is there a way to add a smoky flavor to this soup?
    To infuse a subtle smoky depth, consider adding a smoked paprika alongside the onions and garlic, or a vegetarian liquid smoke, a drop at a time, to taste.

    [redirect_script url=”aHR0cHM6Ly93d3cuY29va2luZ3dpdGhsb3JhLmNvbS9oZWFydHktZmFsbC1zb3VwLXJlY2lwZS13aXRoLXJvb3QtdmVnZXRhYmxlcy8/dXRtX3NvdXJjZT1waW50ZXJlc3QuY29tJnV0bV9tZWRpdW09cmVmZXJyYWw=”]

  • Hearty Hillbilly Chili with Slow-Simmered Beans: A Comforting Classic

    Hearty Hillbilly Chili with Slow-Simmered Beans: A Comforting Classic

    Dive into a bowl of pure comfort with this Hearty Hillbilly Chili, a robust and flavorful recipe designed for those who appreciate a slow-simmered, deeply satisfying meal. Featuring savory ground beef, tender beans, and a carefully balanced blend of spices, this chili is perfect for chilly evenings or gathering with loved ones.

    Ingredients

    • 1 tablespoon olive oil, good quality
    • 1.5 pounds (680g) ground beef, 80/20 blend
    • 1 large onion, finely diced (about 1.5 cups/220g)
    • 1 green bell pepper, diced (about 1 cup/150g)
    • 3-4 cloves garlic, freshly minced (about 1 tablespoon/15g)
    • 2 tablespoons chili powder, robust blend
    • 1 tablespoon ground cumin, aromatic
    • 1 teaspoon smoked paprika, for depth
    • 1 (28 ounce/794g) can crushed tomatoes, quality brand
    • 1 (14.5 ounce/411g) can diced tomatoes, undrained
    • 2 cups (480ml) beef broth or vegetable broth, low sodium
    • 2 (15 ounce/425g) cans pinto or kidney beans, rinsed and drained (or 3 cups/450g home-cooked slow simmered beans)
    • 1 teaspoon salt, fine sea salt, or to taste
    • 1/2 teaspoon black pepper, freshly ground, or to taste

    Instructions

    1. Sear the Beef: In a heavy-bottomed Dutch oven or large pot, heat the olive oil over medium-high heat until shimmering. Add the ground beef, breaking it apart with a sturdy spoon or meat chopper. Cook thoroughly for 8-10 minutes, stirring occasionally, until it’s deeply browned and no pink remains. This browning develops rich flavor. Carefully drain off any accumulated excess fat to prevent a greasy chili.
    2. Soften Aromatics: Return the pot to medium heat. Add the finely diced onion and bell pepper to the beef drippings (if any remained after draining). Sauté, stirring frequently, for 5-7 minutes until the vegetables soften and become translucent, releasing their sweet aromas. Avoid browning them.
    3. Toast Spices: Stir in the freshly minced garlic, robust chili powder, aromatic ground cumin, and smoked paprika. Cook for just 1 minute more, stirring constantly to prevent burning, until the spices become intensely fragrant. This crucial step, known as blooming, maximizes their flavor.
    4. Combine & Season: Pour in the crushed tomatoes and the undrained diced tomatoes, followed by the beef or vegetable broth. Add the rinsed and drained pinto or kidney beans (or your slow-simmered beans). Stir everything together well. Season generously with fine sea salt and freshly ground black pepper, starting with the recommended amounts and adjusting later.
    5. Slow Simmer: Bring the chili mixture to a gentle simmer, just a few bubbles breaking the surface. Reduce the heat to the lowest setting, cover the pot tightly, and let it slowly cook for at least 1 hour 45 minutes, up to 2 hours. Stir occasionally, every 20-30 minutes, to prevent sticking and ensure even cooking. This extended simmer allows the flavors to meld beautifully and the beans to become incredibly tender. Taste and adjust seasonings as needed before serving.

    Chef’s Insight

    This Hillbilly Chili truly shines with a long, slow simmer. The extended cooking time isn’t just about tenderness for the beans; it’s about allowing all the diverse flavors from the beef, vegetables, tomatoes, and spices to fully marry and deepen into a cohesive, rich broth. Don’t rush this step—it’s where the magic happens and transforms good chili into truly great chili.

    Cook’s Notes

    • For an even richer flavor, consider using fire-roasted crushed tomatoes.
    • If you prefer a thicker chili, leave the lid slightly ajar during the last 30 minutes of simmering to allow some moisture to evaporate.
    • Always taste and adjust seasonings at the end of cooking. The flavors will have concentrated, so you might need a final pinch of salt or a dash more pepper.

    How To Serve

    • Serve bowls of hot chili with a variety of toppings like shredded sharp cheddar cheese, a dollop of cool sour cream or plain Greek yogurt, and a sprinkle of chopped fresh cilantro or green onions.
    • Accompany your chili with cornbread, saltine crackers, or tortilla chips for dipping.
    • For a heartier meal, serve over rice, pasta, or even baked potatoes.

    Prep time: 18 minutes. Cook time: 1 hour 45 minutes. Total time: 2 hours 3 minutes. Yields: 8 servings.

    FAQs

    Can I adjust the spice level of this chili?
    Absolutely. For less heat, reduce the chili powder or omit the smoked paprika if sensitive. For more heat, add a pinch of cayenne pepper or a diced jalapeño alongside the bell pepper.
    What’s the best way to store leftover Hillbilly Chili?
    Allow the chili to cool completely, then transfer it to airtight containers. It will keep well in the refrigerator for up to 3-4 days. For best flavor, reheat gently on the stovetop.
    Can I freeze this chili for later?
    Yes, chili freezes exceptionally well. Once cooled, portion it into freezer-safe containers or heavy-duty freezer bags. It can be stored in the freezer for up to 3 months. Thaw overnight in the refrigerator before reheating.
    What if I don’t have pinto or kidney beans?
    You can easily substitute with other hearty beans like black beans, cannellini beans, or even a mix of bean types. Just ensure they are rinsed and drained if using canned.
    How do I know when the chili is done simmering?
    The chili is ready when the flavors have deepened and melded significantly, and the beans are very tender. The sauce should also have thickened slightly. Taste it around the 1.5-hour mark and cook longer if desired.
    Can I make this Hillbilly Chili in a slow cooker?
    Yes, after browning the beef and sautéing the aromatics and spices on the stovetop (Steps 1-3), transfer everything to a slow cooker. Add the remaining ingredients, stir well, and cook on low for 6-8 hours or on high for 3-4 hours.
    What are some good topping suggestions for this chili?
    Classic toppings include shredded cheddar cheese, a dollop of sour cream or Greek yogurt, chopped green onions, fresh cilantro, or crushed corn chips for added crunch.

    [redirect_script url=”aHR0cHM6Ly93d3cuY29va2luZ3dpdGhsb3JhLmNvbS9oaWxsYmlsbHktY2hpbGktcmVjaXBlLXdpdGgtc2xvdy1zaW1tZXJlZC1iZWFucz91dG1fc291cmNlPXBpbnRlcmVzdC5jb20mdXRtX21lZGl1bT1yZWZlcnJhbA==”]

  • Crispy Pierogi Taco Shells: A Savory Fusion Street Food

    Crispy Pierogi Taco Shells: A Savory Fusion Street Food

    Discover an exciting culinary mash-up with these Crispy Pierogi Taco Shells! This recipe transforms humble frozen pierogies into surprisingly sturdy, golden-brown ‘taco shells,’ offering a delightful textural contrast to a classic seasoned ground meat or lentil filling, all crowned with your favorite fresh taco toppings. It’s an innovative, easy-to-make dish that brings together two beloved comfort foods in one satisfying bite.

    Ingredients

    • 12 frozen pierogies, your favorite variety (e.g., potato & cheese, sauerkraut & mushroom)
    • 1 lb (450g) lean ground beef or turkey, or 1 cup (180g) dry red or brown lentils for a vegetarian option
    • 2 tablespoons (30g) taco seasoning blend
    • 1 cup (100g) shredded cheese, such as sharp cheddar, Monterey Jack, or a zesty taco blend
    • 2 tablespoons (30ml) olive oil or unsalted butter, divided
    • ½ cup (120ml) water (for filling)
    • Toppings Galore: Fresh salsa, crisp shredded iceberg lettuce, finely diced ripe tomatoes, a dollop of creamy sour cream or plain Greek yogurt, and a sprinkle of fresh cilantro, roughly chopped

    Instructions

    1. Cook the Pierogies to Tender Perfection: Begin by preparing your chosen frozen pierogies. Boil them according to package directions for 5-7 minutes until they are tender and float, pan-fry for 8-10 minutes until golden, or air-fry for an extra crispy exterior. The key is to ensure they are fully cooked through but still pliable for the next step.
    2. Forge the Crispy ‘Taco Shell’: If you opted to boil your pierogies, gently pat them very dry with a paper towel. Heat 1 tablespoon of olive oil or butter in a large, sturdy non-stick skillet over medium-high heat until shimmering. Carefully place the cooked pierogies in the hot pan, ensuring a little space surrounds each one. Using a firm, wide spatula, gently but decisively press down on each pierogi to flatten it slightly into a wider, more stable base, aiming for about ⅓ to ½ inch thickness. Cook for 2-3 minutes per side, watching closely until they develop a beautifully golden-brown, crispy crust. This forms your unique pierogi ‘shell.’
    3. Craft the Savory Filling: While your pierogies are crisping up, brown your ground meat in a separate pan over medium heat, breaking it apart with a spoon until no pink remains, about 5-7 minutes. If using lentils, cook them according to package directions until tender, then drain any excess liquid. For ground meat, drain any excess fat. Stir in the taco seasoning and about ¼ cup (60ml) of water, ensuring the seasoning coats everything evenly. Bring to a gentle simmer for 5-7 minutes, stirring occasionally, allowing the flavors to meld and the mixture to thicken slightly.
    4. Assemble Your Unique Pierogi Taco Shells: Once the pierogies are perfectly golden and ready, carefully transfer them from the skillet to a serving platter. Spoon a generous amount of the hot, seasoned filling directly into the center of each flattened, crispy pierogi. Immediately sprinkle with your shredded cheese, letting the residual warmth of the filling begin to melt it into a deliciously gooey layer.
    5. Adorn with Your Favorite Toppings: Now comes the most enjoyable part – customizing your pierogi tacos! Load them up with vibrant, fresh salsa for a burst of flavor, crisp shredded lettuce for texture, juicy diced tomatoes, a cooling dollop of creamy sour cream or healthy Greek yogurt, and a final sprinkle of aromatic fresh cilantro. Serve immediately and enjoy your innovative fusion creation!

    Chef’s Insight

    This recipe is all about embracing creativity and having fun in the kitchen. The magic truly happens when you press those tender pierogies into crispy ‘shells’—it’s a technique that feels a little rebellious but yields incredible results. Don’t be shy with the pressure in the skillet, and aim for a really good sear to get that satisfying crunch!

    Cook’s Notes

    • For maximum crispness, ensure your pierogies are patted very dry after boiling, and don’t overcrowd the pan. Cook in batches if necessary to maintain even heat.
    • When pressing, use a spatula with a wide, flat surface to ensure the pierogi flattens uniformly without tearing.
    • Feel free to experiment with different pierogi fillings! Potato and cheese is a classic, but mushroom or even meat-filled pierogies can add another layer of flavor.
    • If making a vegetarian lentil filling, adding a splash of vegetable broth can deepen the flavor profile.

    How To Serve

    These Pierogi Taco Shells are best served hot and fresh, right off the skillet. Arrange them on a large platter with all the toppings laid out assembly-line style, allowing everyone to customize their own. They make a fantastic, interactive weeknight dinner, a fun party appetizer, or an exciting addition to any casual gathering. Pair with a side of extra salsa or a light, refreshing coleslaw for a complete meal.

    Prep time: 12 minutes Cook time: 28 minutes Yields: 12 Pierogi Tacos

    FAQs

    Can I make these ahead of time?
    While the filling can be prepared a day in advance and reheated, the pierogi shells are best made fresh. They lose their crispness quickly once cooled. You can have all your toppings prepped and ready to go to speed up assembly.
    What kind of pierogies work best?
    Potato and cheese pierogies are a classic choice and work wonderfully, but any variety you enjoy will likely be delicious. Consider sauerkraut and mushroom for a tangier twist, or even a sweet potato filled pierogi for a unique flavor.
    How do I make the pierogies extra crispy?
    For maximum crispness, ensure your pierogies are thoroughly patted dry after boiling. Cook them in a hot skillet with enough oil or butter, pressing firmly to flatten. Air-frying cooked pierogies for a few minutes before flattening can also boost crispness.
    Can I use other fillings?
    Absolutely! Get creative. Shredded chicken, pulled pork, or even a spicy black bean and corn salsa would all make excellent fillings. Adjust the seasonings to complement your chosen protein.
    What are good vegetarian/vegan alternatives for the filling?
    Beyond lentils, consider seasoned crumbled tofu, a hearty mushroom and black bean mixture, or even a spiced sweet potato and corn hash. For vegan, ensure pierogies are dairy-free and use a plant-based cheese and sour cream.
    How do I store and reheat leftovers?
    Leftover filling can be stored in an airtight container in the refrigerator for 3-4 days. Leftover pierogi shells will soften; it’s best to store them separately and crisp them up in a dry skillet or air fryer before adding reheated filling.
    Why are my pierogi shells not holding their shape?
    This usually happens if the pierogies aren’t cooked enough initially (they need to be tender), or if they’re not flattened firmly and cooked long enough to develop a sturdy, crispy crust. Ensure you’re using a large, sturdy spatula and applying good, even pressure.

    [redirect_script url=”aHR0cHM6Ly9lYXN5ZGFzaHJlY2lwZXMuY29tL3BpZXJvZ2ktdGFjby1zaGVsbC1yZWNpcGUtZnVzaW9uLXN0cmVldC1mb29kLz91dG1fc291cmNlPXBpbnRlcmVzdC5jb20mdXRtX21lZGl1bT1yZWZlcnJhbA==”]

  • Classic Buttery Pecan Sandies: Perfect Crunch and Melt-in-Your-Mouth Cookies

    Classic Buttery Pecan Sandies: Perfect Crunch and Melt-in-Your-Mouth Cookies

    Enjoy the timeless charm of homemade Pecan Sandies, a delightful shortbread-style cookie celebrated for its rich, buttery flavor and delicate, melt-in-your-mouth texture. This straightforward recipe guides you to perfect, crumbly treats, generously coated in a sweet cloud of confectioners’ sugar, making them ideal for any occasion.

    Ingredients

    • 1 cup (226g) unsalted butter, softened to room temperature
    • 1 cup (100g) pecans, finely chopped and lightly toasted
    • 2 cups (240g) all-purpose flour, spooned and leveled
    • ½ cup (60g) confectioners’ sugar, plus more for generous dusting
    • 1 teaspoon (5ml) pure vanilla extract
    • ½ teaspoon (2.5g) fine sea salt

    Instructions

    1. Begin by creaming the butter and sugar: In a large mixing bowl, using an electric mixer, beat the 1 cup of softened unsalted butter with the ½ cup of confectioners’ sugar on medium speed. Continue mixing for 2 to 3 minutes, or until the mixture becomes visibly light, pale, and fluffy, ensuring it’s well aerated.
    2. Infuse with flavor: Add the 1 teaspoon of pure vanilla extract to the creamed mixture. Beat again on low speed just until fully incorporated, taking care not to overmix, which can toughen the dough.
    3. Combine dry ingredients gradually: In a separate bowl, whisk together the 2 cups of all-purpose flour and ½ teaspoon of fine sea salt. Gradually add this dry mixture to the wet ingredients, mixing on low speed until the flour is just incorporated and a soft, cohesive dough forms. Stop mixing as soon as no dry streaks remain to prevent gluten development.
    4. Gently fold in pecans: Using a rubber spatula, carefully fold in the 1 cup of finely chopped, lightly toasted pecans. Distribute them evenly throughout the dough without overworking it.
    5. Chill the dough for ease: Gather the dough and gently form it into a log or a flat disk. Wrap it tightly in plastic wrap and refrigerate for at least 30 minutes. Chilling firms the butter, making the dough much easier to handle and preventing excessive spreading during baking. You can chill it for up to 2 hours.
    6. Preheat oven and shape cookies: While the dough chills, preheat your oven to 350°F (175°C). Line two baking sheets with parchment paper. Remove the chilled dough and roll it into uniform 1-inch balls. Arrange the dough balls about 1 inch apart on the prepared baking sheets, allowing for slight spread.
    7. Bake until subtly golden: Place the baking sheets in the preheated oven and bake for 10 to 12 minutes. The cookies are ready when their edges appear very lightly golden brown, and the bottoms are just set. The centers should still look quite pale, indicating a tender, buttery crumb.
    8. Cool and dust for the classic finish: Allow the baked cookies to cool on the baking sheets for about 5 minutes; they will be delicate when hot. Then, carefully transfer them to a wire rack to cool completely. While still warm (but not hot), dust them generously with additional confectioners’ sugar using a fine-mesh sieve for that iconic, snowy finish.

    Chef’s Insight

    The secret to truly tender Pecan Sandies lies in not overworking the dough after adding the flour. Overmixing develops gluten, which can lead to a tougher cookie rather than the desired crumbly, melt-in-your-mouth texture. Also, ensuring your butter is properly softened—not melted—allows for optimal creaming, trapping air for a lighter cookie.

    Cook’s Notes

    • Toasting Pecans: For enhanced flavor, spread pecans on a baking sheet and toast in a 300°F (150°C) oven for 5-7 minutes until fragrant before chopping.
    • Butter Temperature: Room temperature butter should be soft enough to indent easily with a finger but still hold its shape, typically 65-68°F (18-20°C).
    • Dusting Technique: For the best snowy appearance, dust the cookies twice: once while warm, and again lightly just before serving.

    How To Serve

    Pecan Sandies are delightful on their own, but they also pair wonderfully with a warm cup of coffee or tea. Their rich, buttery flavor makes them an excellent addition to a holiday cookie platter, a perfect accompaniment to a dessert cheese board, or simply a sweet treat for an afternoon pick-me-up.

    Prep time: 40 minutes | Cook time: 10 minutes | Total time: 50 minutes | Yield: Approximately 3 dozen cookies

    FAQs

    Can I use margarine instead of butter?
    While you can, butter is essential for the signature rich flavor and tender texture of Pecan Sandies. Margarine will produce a different, less desirable result.
    Do I have to chill the dough?
    Yes, chilling is crucial. It solidifies the butter, making the dough easier to handle, preventing the cookies from spreading too much, and improving their final texture.
    My cookies spread too much. What went wrong?
    This usually happens if the butter was too soft or melted, or the dough wasn’t chilled long enough. Ensure your butter is softened, not melted, and chill the dough for at least 30 minutes.
    How do I finely chop pecans without turning them into paste?
    Pulse them in a food processor in short bursts, watching carefully to stop as soon as they reach a fine, crumbly texture. Alternatively, hand-chop them with a sharp knife.
    Can I make these ahead of time?
    Yes, the dough can be made up to 2-3 days in advance and stored tightly wrapped in the refrigerator. You can also freeze the raw dough balls for up to 3 months.
    How should I store baked Pecan Sandies?
    Store cooled cookies in an airtight container at room temperature for up to 1 week. For longer storage, freeze them for up to 3 months.
    Can I add other flavors or nuts?
    Absolutely! You could swap out pecans for walnuts, or add a hint of almond extract alongside the vanilla for a different flavor profile. Citrus zest also works well.

    [redirect_script url=”aHR0cHM6Ly93d3cuY29va2luZ3dpdGhsb3JhLmNvbS9iZXN0LXBlY2FuLXNhbmRpZXMtcmVjaXBlLXdpdGgtYnV0dGVyeS1jcnVuY2g/dXRtX3NvdXJjZT1waW50ZXJlc3QuY29tJnV0bV9tZWRpdW09cmVmZXJyYWw=”]

  • Irresistible Cinnamon Pecan Bundt Cake with Smooth Vanilla Glaze

    Irresistible Cinnamon Pecan Bundt Cake with Smooth Vanilla Glaze

    Delight in the comforting aromas and rich flavors of a classic Cinnamon Pecan Bundt Cake, generously crowned with a silky vanilla glaze. This beloved dessert is surprisingly simple to master, perfect for family gatherings or a cozy evening treat. Each slice offers a tender crumb, hints of warm spice, and delightful nutty crunch, making it an instant favorite.

    Ingredients

    • 2 ½ cups (300g) All-purpose flour
    • 1 ½ cups (300g) Granulated sugar
    • ½ cup (100g) Light brown sugar, packed
    • 3 Large eggs, room temperature
    • ½ cup (113g) Unsalted butter, softened
    • 1 cup (240g) Sour cream, full-fat (or plain Greek yogurt)
    • 2 teaspoons Pure vanilla extract (for the cake)
    • 1 teaspoon Pure vanilla extract (for the glaze)
    • 1 ½ teaspoons Ground cinnamon
    • 1 cup (115g) Chopped pecans
    • 2 teaspoons Baking powder
    • ½ teaspoon Baking soda
    • ½ teaspoon Fine sea salt
    • 2 cups (240g) Powdered sugar, sifted
    • 3-4 tablespoons (45-60ml) Whole milk, or as needed

    Instructions

    1. Prepare your Bundt pan: Ensure your 10-12 cup Bundt pan is meticulously prepared by greasing it thoroughly with baking spray containing flour, or by brushing with softened butter and then dusting evenly with flour. This critical step prevents sticking and ensures a flawless release, so take your time to cover every crevice.
    2. Combine wet ingredients: In a sizable mixing bowl, using an electric mixer, cream together the softened unsalted butter with both granulated sugar and packed brown sugar on medium speed for 3-5 minutes. Continue mixing until the mixture appears noticeably lightened in color and fluffy in texture. Incorporate the room temperature eggs one at a time, beating well after each addition until fully integrated, then stir in the 2 teaspoons of vanilla extract for the cake until just combined.
    3. Whisk dry ingredients: In a separate, medium-sized bowl, whisk together the all-purpose flour, ground cinnamon, baking powder, baking soda, and fine sea salt until uniformly combined. This ensures even distribution of the leavening agents and spices throughout the batter.
    4. Alternate additions: With the mixer on low speed, gradually add the dry ingredient mixture to the wet butter-sugar mixture, alternating with the sour cream. Begin by adding about one-third of the dry ingredients, mixing briefly, then half of the sour cream, mixing until just barely incorporated. Repeat this pattern, finishing with the remaining dry ingredients. Mix only until no visible streaks of flour remain; overmixing develops gluten, leading to a dense, tough cake.
    5. Fold in pecans: Gently fold the chopped pecans into the batter using a spatula. Distribute them evenly without overworking the mixture.
    6. Bake the cake: Carefully pour the prepared batter into your thoroughly prepped Bundt pan, spreading it evenly. Transfer the pan to a preheated oven at 350°F (175°C) and bake for 50-60 minutes. Begin checking for doneness around the 50-minute mark by inserting a wooden skewer or toothpick into the center; it should come out clean or with a few moist crumbs attached, but no wet batter.
    7. Cool and glaze: Allow the baked Bundt cake to cool in its pan on a wire rack for 10-15 minutes. This cooling period helps the cake firm up before inversion. After 10-15 minutes, carefully invert the cake onto the wire rack to cool completely, which can take 1-2 hours. While the cake cools, prepare the glaze: In a small bowl, whisk together the sifted powdered sugar, 1 teaspoon of vanilla extract, and 3-4 tablespoons of milk until completely smooth and pourable. Adjust milk quantity slightly for desired consistency. Once the cake is entirely cool, generously drizzle the vanilla glaze over the top, letting it cascade down the sides.

    Recipe At-A-Glance

    This Cinnamon Pecan Bundt Cake delivers a classic comfort experience with minimal fuss. Expect a beautifully golden exterior and a moist, tender interior packed with warm cinnamon notes and crunchy pecans. The simple vanilla glaze adds a perfect touch of sweetness without overwhelming the cake’s balanced flavors. It’s an ideal centerpiece that always impresses!

    Pairing Ideas

    • Serve a slice warm with a dollop of fresh whipped cream or a scoop of vanilla bean ice cream for an indulgent treat.
    • A freshly brewed cup of coffee, a robust black tea, or even a spiced chai latte complements the cake’s warm flavors perfectly.
    • For a seasonal twist, pair with a simple apple compote or a scoop of homemade pumpkin ice cream in the fall.
    • Consider a light dusting of extra cinnamon or a few candied pecan halves on top for an elevated presentation.

    Try These Variations

    • Caramel Drizzle: Instead of or in addition to the vanilla glaze, drizzle warm salted caramel sauce over the cooled cake.
    • Spice It Up: Add ½ teaspoon of nutmeg or ¼ teaspoon of cloves to the dry ingredients for an even deeper spice profile.
    • Chocolate Chip Delight: Fold in ½ cup of mini chocolate chips along with the pecans for a different texture and flavor.
    • Maple Glaze: Substitute maple extract for vanilla extract in the glaze, or use maple syrup in place of some milk for a distinct fall flavor.

    Make Ahead / Freeze

    This Bundt cake can be baked a day in advance and stored, uncovered, at room temperature. Glaze just before serving. For longer storage, the cooled, unglazed cake can be wrapped tightly in plastic wrap and then foil, then frozen for up to 2-3 months. Thaw overnight in the refrigerator before glazing and serving. Leftovers, once glazed, can be stored in an airtight container at room temperature for up to 3 days or in the refrigerator for up to 5 days.

    Prep time: 17 minutes. Cook time: 58 minutes. Total time: 1 hour 15 minutes. Yield: 1 Bundt cake (12-16 servings).

    FAQs

    Can I substitute sour cream with anything else?
    Yes, full-fat plain Greek yogurt or buttermilk can be used as a 1:1 substitute for sour cream. Both will contribute to a moist crumb.
    My Bundt cake often sticks. What’s the best way to ensure it releases cleanly?
    Thorough pan preparation is key! Use a baking spray with flour, or meticulously grease with softened butter and dust with flour, ensuring every crevice is coated. Chilling the prepared pan before adding batter can also help.
    How do I know when the Bundt cake is perfectly baked?
    The cake is done when a wooden skewer or toothpick inserted into the thickest part comes out clean or with only a few moist crumbs attached. The top should also spring back lightly when gently pressed, and the edges will begin to pull away slightly from the pan.
    Can I make this cake ahead of time?
    Absolutely! The unglazed cake can be baked a day in advance and stored at room temperature, covered loosely. Glaze it just before serving for the best appearance. You can also freeze the unglazed cake for longer storage.
    What if my glaze is too thin or too thick?
    If your glaze is too thin, gradually whisk in a little more sifted powdered sugar until it reaches the desired consistency. If it’s too thick, add milk a tiny bit at a time (¼ teaspoon) until it’s smooth and pourable.
    Why is room temperature butter and eggs important?
    Room temperature ingredients emulsify more effectively, creating a smoother, more uniform batter. This leads to a lighter, more tender cake with better volume and a more even crumb texture.
    Can I use pre-chopped pecans?
    Yes, pre-chopped pecans are fine. However, freshly chopped pecans often have a stronger, fresher flavor. If using pre-chopped, ensure they are fresh and not rancid.

    [redirect_script url=”aHR0cHM6Ly93d3cuY29va2luZ3dpdGhsb3JhLmNvbS9jaW5uYW1vbi1wZWNhbi1idW5kdC1jYWtlLXdpdGgtdmFuaWxsYS1nbGF6ZT91dG1fc291cmNlPXBpbnRlcmVzdC5jb20mdXRtX21lZGl1bT1yZWZlcnJhbA==”]

  • Decadent Chocolate Oat Fudge Bars: A Rich Layered Treat

    Decadent Chocolate Oat Fudge Bars: A Rich Layered Treat

    Indulge in the ultimate dessert experience with these delightful Chocolate Oat Fudge Bars. Featuring a perfectly crumbly, buttery oat base, a rich and velvety chocolate fudge filling, and a golden, textured oat crumble topping, these bars offer a symphony of flavors and textures in every bite. They are surprisingly simple to prepare and make an impressive addition to any dessert spread or a cherished homemade treat.

    Ingredients

    • 1 cup (2 sticks) unsalted butter, softened
    • 1 ½ cups packed light brown sugar
    • 2 cups old-fashioned rolled oats
    • 1 ½ cups all-purpose flour
    • ½ cup unsweetened cocoa powder, Dutch-processed for richness
    • 1 (14-ounce) can sweetened condensed milk
    • 1 teaspoon pure vanilla extract

    Instructions

    1. Preheat oven and prepare pan. Preheat your oven to 350°F (175°C). Lightly grease a 9×13 inch baking pan. In a large mixing bowl, using an electric mixer, cream together the ½ cup unsalted butter, softened, and 1 cup packed light brown sugar on medium speed for about 2-3 minutes until the mixture is light, pale, and fluffy. Gradually add the 2 cups old-fashioned rolled oats and 1 ½ cups all-purpose flour, mixing on low speed until just combined and a crumbly, sandy texture forms. Press approximately two-thirds of this oat crumb mixture firmly and evenly into the bottom of the prepared pan, ensuring it forms a compact base.
    2. Pre-bake the crust. Place the pan with the pressed oat base into the preheated 350°F (175°C) oven and bake for 10 to 12 minutes. The edges should appear lightly golden brown and the crust should be slightly set. Remove from the oven and set aside while you prepare the fudge layer.
    3. Prepare the luscious chocolate fudge layer. In a medium, heavy-bottomed saucepan, melt the remaining ½ cup unsalted butter over medium heat until fully liquid. Add the 1 (14-ounce) can sweetened condensed milk, remaining ½ cup packed light brown sugar, ½ cup unsweetened cocoa powder, and 1 teaspoon pure vanilla extract. Whisk constantly to combine thoroughly. Bring the mixture to a gentle boil, then immediately reduce the heat to low. Simmer, stirring continuously with a rubber spatula or wooden spoon, for exactly 5 minutes. The fudge mixture will thicken noticeably and darken in color, clinging to the spoon.
    4. Layer and crumble. Carefully and evenly pour the warm, thick fudge mixture directly over the partially baked oat base in the pan. Distribute it gently to cover the entire surface. Take the remaining one-third of the reserved oat crumb mixture and evenly crumble it over the top of the fudge layer, creating a rustic, delightful topping.
    5. Complete the bake. Return the pan to the 350°F (175°C) oven and bake for an additional 20 to 25 minutes. The top oat crumble should achieve a beautiful golden-brown color, the edges of the fudge layer should be visibly bubbly, and the center, when gently pressed, should feel set and firm, not liquid.
    6. Cool for perfection. This step is crucial for perfect bars: remove the pan from the oven and transfer it to a wire rack. Allow the bars to cool completely at room temperature for at least 2 to 3 hours, or until fully firm, before attempting to cut them into neat squares. Chilling in the refrigerator for 30 minutes once cooled can make cutting even easier.

    Chef’s Insight

    These Chocolate Oat Fudge Bars are a delightful fusion of crumbly, buttery oat goodness and a rich, decadent chocolate fudge layer. The combination of textures—crisp crumble and smooth, chewy fudge—makes them utterly irresistible. They’re straightforward to prepare, yet offer a satisfyingly gourmet result that’s perfect for potlucks, dessert tables, or a cozy evening treat.

    Cook’s Notes

    • Softened Butter is Key: Ensure your butter for the oat base is truly softened (room temperature) for a light, fluffy creamed mixture. Cold butter will result in a denser, less uniform crumble.
    • Don’t Rush the Simmer: When making the fudge layer, simmer for the full 5 minutes. This allows the mixture to thicken properly, preventing a runny fudge layer in your finished bars.
    • Cool Completely: This cannot be stressed enough! Warm fudge bars will fall apart. Allow them to cool entirely, ideally for several hours, before slicing for clean, perfect squares. Chilling them in the fridge for 30 minutes after cooling can further aid in neat cutting.

    How To Serve

    • These bars are wonderful on their own, perhaps with a glass of milk or a cup of coffee.
    • For a more indulgent dessert, serve a square warmed slightly, topped with a scoop of vanilla bean ice cream and a drizzle of caramel sauce.
    • They also make fantastic additions to a dessert platter for parties or holiday gatherings.

    Prep Time: 14 mins | Cook Time: 32 mins | Cool Time: 2-3 hours | Yield: 24 bars

    FAQs

    Can I use quick oats instead of rolled oats?
    While old-fashioned rolled oats provide the best texture, quick oats can be used in a pinch. However, they may result in a slightly softer, less chewy oat crumble.
    My fudge layer didn’t set, what went wrong?
    The most common reason for a runny fudge layer is not simmering it long enough. Ensure you simmer the mixture over low heat, stirring constantly, for the full 5 minutes until it visibly thickens. High humidity can also affect setting.
    How should I store these bars?
    Store the cooled, cut bars in an airtight container at room temperature for up to 3-4 days, or in the refrigerator for up to a week. If stacking, place parchment paper between layers to prevent sticking.
    Can I freeze Chocolate Oat Fudge Bars?
    Yes! Once completely cooled and cut, arrange the bars in a single layer on a baking sheet and freeze until firm. Then, transfer them to a freezer-safe airtight container or bag, separating layers with parchment paper. They can be frozen for up to 2-3 months.
    Can I add nuts or chocolate chips to this recipe?
    Absolutely! You can fold ½ cup of chopped pecans, walnuts, or chocolate chips into the oat crumble mixture before pressing the base or sprinkling the topping. This adds extra flavor and crunch.
    How do I get clean cuts?
    Allow the bars to cool completely at room temperature, then chill them in the refrigerator for at least 30 minutes before slicing. Use a large, sharp knife, wiping the blade clean with a hot, damp cloth between each cut for the cleanest edges.
    Can I make this recipe dairy-free?
    Making this recipe dairy-free is challenging due to the sweetened condensed milk and butter. While some dairy-free condensed milks exist, results can vary. Dairy-free butter substitutes for the oat layers are more readily available, but the fudge layer requires careful substitution.

    [redirect_script url=”aHR0cHM6Ly9lYXN5ZGFzaHJlY2lwZXMuY29tL29hdC1mdWRnZS1iYXItcmVjaXBlLXdpdGgtY2hvY29sYXRlLWxheWVyLz91dG1fc291cmNlPXBpbnRlcmVzdC5jb20mdXRtX21lZGl1bT1yZWZlcnJhbA==”]

  • Homemade Cowboy Butter: Elevate Steaks, Seafood & More

    Homemade Cowboy Butter: Elevate Steaks, Seafood & More

    Unlock a world of savory flavor with this easy-to-make Cowboy Butter, a vibrant compound butter packed with garlic, fresh herbs, and a touch of smoky spice. Perfect for slathering on grilled meats, seafood, vegetables, or even crusty bread, this versatile condiment transforms any dish into a culinary masterpiece. Prepare to impress with its bold, zesty kick!

    Ingredients

    • 1 cup (2 sticks) unsalted butter, softened to room temperature
    • 4-6 cloves garlic, freshly minced
    • ¼ cup fresh parsley, finely chopped
    • 2 tbsp fresh chives, finely snipped
    • 1 tbsp fresh lemon juice, for brightness
    • 1 tsp smoked paprika, for depth
    • ½ tsp red pepper flakes, optional, for a subtle warmth
    • ½ tsp black pepper, freshly ground
    • ¼ tsp salt, fine sea salt, or to taste

    Instructions

    1. Soften the Butter: Place the unsalted butter on your counter for at least 30-60 minutes, allowing it to naturally reach a pliable, room temperature consistency. It should yield easily to pressure but not be oily or melted; this ensures smooth incorporation of other ingredients.
    2. Prepare the Aromatics: While the butter softens, finely mince the garlic cloves until they are almost a paste, and meticulously chop the fresh parsley and chives. Gather your lemon juice, smoked paprika, red pepper flakes (if using), freshly ground black pepper, and salt. Proper prep ensures even flavor distribution.
    3. Combine Flavor Components: Transfer the well-softened butter into a medium-sized mixing bowl. Add the minced garlic, chopped parsley, snipped chives, lemon juice, smoked paprika, red pepper flakes, black pepper, and salt. Ensure all ingredients are within the bowl, ready for blending.
    4. Thoroughly Mix: Using a sturdy fork or a flexible rubber spatula, vigorously work all the ingredients into the butter. Continue mixing, scraping down the sides of the bowl as needed, until the mixture is uniform in color, texture, and no pockets of unflavored butter remain. Aim for a consistently vibrant, herbaceous blend.
    5. Shape & Chill to Firmness: Spoon the freshly blended Cowboy Butter onto a sheet of parchment paper or plastic wrap. Gently roll and shape it into a log, approximately 1.5 to 2 inches in diameter. Twist the ends of the wrap tightly to seal. Refrigerate for at least 45-70 minutes, or until the butter is completely firm and sliceable.

    Pro Tips

    • For the best flavor, always use fresh garlic and herbs. Dried alternatives won’t offer the same vibrant taste or texture.
    • Ensure your butter is truly at room temperature. If it’s too cold, it won’t blend smoothly; if it’s melted, the ingredients will separate.
    • Adjust the red pepper flakes to your preferred spice level. For a bolder kick, increase the amount; for no heat, omit entirely.
    • Use a sturdy spatula or a fork to really work the ingredients into the butter, ensuring every bite is packed with flavor.

    Serving Suggestions

    • Melt a pat over a perfectly seared steak, grilled chicken, or pan-fried pork chops.
    • Stir into hot pasta, rice, or mashed potatoes for an instant flavor boost.
    • Spread generously on warm crusty bread, cornbread, or dinner rolls.
    • Dollop onto freshly steamed or roasted vegetables like asparagus, green beans, or corn on the cob.
    • Fantastic with seafood—try it melted over grilled salmon, shrimp scampi, or broiled lobster tails.

    Storage & Make-Ahead

    • Once shaped and chilled, Cowboy Butter can be stored wrapped tightly in plastic wrap or parchment paper in the refrigerator for up to 2 weeks.
    • For longer storage, freeze the butter log in an airtight freezer bag or container for up to 3 months. Thaw in the refrigerator before using, or slice directly from frozen for quick use.
    • You can make a double or triple batch ahead of time and keep it on hand for easy meal enhancements throughout the week.

    Prep time: 12 minutes | Chill time: 45–70 minutes | Yields: Approximately 1½ cups

    FAQs

    Can I use salted butter instead of unsalted?
    While you can use salted butter, it’s best to stick with unsalted so you have full control over the salt content. If you do use salted butter, reduce or omit the ¼ tsp of added salt.
    What if my butter isn’t softening quickly enough?
    To speed up softening, you can cut the butter into smaller pieces. Avoid microwaving, as it can melt the butter unevenly, affecting the final texture of your compound butter.
    Can I add other herbs or spices?
    Absolutely! Feel free to experiment with finely chopped rosemary, thyme, or even a pinch of onion powder. Just be mindful not to overcrowd the butter, maintaining a balance of flavors.
    How do I get the garlic really fine?
    For the best garlic distribution, use a microplane zester or a garlic press. This ensures the garlic is very finely minced, preventing large chunks and providing maximum flavor release.
    Can I make this dairy-free?
    Yes, you can substitute the unsalted butter with your favorite plant-based butter alternative. Ensure it is also softened to room temperature for proper mixing and has a neutral flavor profile.
    What’s the best way to slice the chilled butter log?
    Once firm, unwrap the log and use a sharp, thin knife. You can warm the knife blade slightly under hot water (and dry it) to get cleaner slices, especially if the butter is very cold.
    My butter looks separated after mixing. What went wrong?
    This usually happens if the butter was too warm (oily) or too cold (lumpy) during mixing. Ensure it’s perfectly room temperature and mix thoroughly until completely emulsified.

    [redirect_script url=”aHR0cHM6Ly9lYXN5ZGFzaHJlY2lwZXMuY29tL2Nvd2JveS1idXR0ZXItcmVjaXBlLXdpdGgtZ2FybGljLWFuZC1oZXJicy8/dXRtX3NvdXJjZT1waW50ZXJlc3QuY29tJnV0bV9tZWRpdW09cmVmZXJyYWw=”]